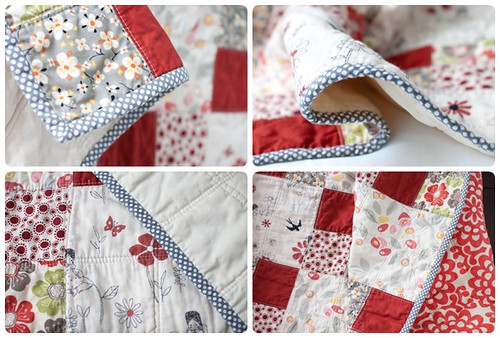
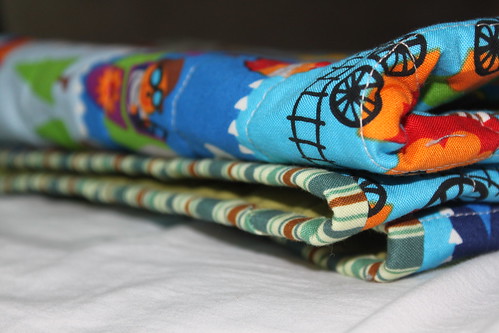
Showing posts with label binding. Show all posts

Thursday, July 14, 2011

How Do You Organize Your Binding/Tape?

I'm always seeking ways to my (tiny) sewing room more efficient and organized. One of the things I'm dealing with is organizing binding. I usually make enough binding tape for my quilts in advance and have about enough for a dozen quilts at any given time.

One of the ways I've been organizing the binding is by rolling it up and pinning it so it doesn't unravel:

IMG_5115

A major plus for this method is the prettiness ;). I love rolling a few up and stacking them on my shelf. They look absolutely beautiful in my opinion. In addition to being a great decor piece, it is quite mobile and easy to keep organized.

IMG_5973

Unfortunately the major flaw is that is takes a while to roll them up. After rolling up a few I usually quit and the rest end up in little stacks like this around the sewing room:

IMG_0623

NOT good! Besides from looking messy and losing binding, it makes the binding wrinkly and unworkable. This results in re-pressing or having to make new binding...again NOT good.

So I have recently found the perfection solution ... at least for now ... at least for me ;)

IMG_0625

Wrap it around an empty bolt board. It's super easy - takes less than a minute to roll up and tape the ends up, keeps all your binding organized and completely visible. I found this method very helpful and started to wrap all my binding up this way - a world of difference. Give it a try :).

Tuesday, March 29, 2011

Binding Tutorial: Part 2 of 2

In the first part of the tutorial I went over 2 different type of binding cuts and how to assemble a folded binding. Now I will go over how to attach the binding, including hand binding.


I take a 2 stage approach to attaching the binding to a quilt - or any project with binding.

Stage 1: Machine Sew the Binding to the Quilt Top

A. Face the quilt with the quilt top facing up and measure about 2/3 of the way down from one edge of the quilt. Line up the raw edge of the quilt from that point with the raw edge of the binding - make sure you leave about 10" of the binding unused. Start sewing using about 1/4" from the raw edge - make sure you leave about 10" of the binding unused.
IMG_5097

(Steps B-E outline to creating miter corners.)
B. At each corner you want to stop about 1/4" from the end. Stitch back and forth a few stitches.
IMG_5098

C. Take the quilt and binding off the sewing machine and fold the binding up at a 45 degree angle.
IMG_5099

D. Fold the binding down on itself so that it lies along the unsewn edge.
IMG_5100

E. Start about 1/4" from the top of the unsewn edge, stitch back and forth a couple of times and then continue stitching the rest of the edge - again with 1/4" allowance.
IMG_5101

F. Once you get to the beginning of the binding, stop about 10" from where you started. Mark where the 2 bindings should join up once the binding is complete.
IMG_5102

G. Open up the binding and face at a 90 degree angle with right sides together. Pin to stay in place and mark where the stitch line should be.
IMG_5103

H. Sew on the stitch line and trim 1/4" from the sew line. Press open the seam, refold the binding and continue attaching the rest of the binding.
IMG_5105

Now that the binding is attached to the quilt top it is now time to decide now you want to attach it the quilt bottom. There are 2 basic approaches to this - either machine bind or hand bind. For (almost :P) all my quilts I have been using hand binding. I find that it makes for a more traditional looking quilt finish and gives the quilt that nice handmade feel...and if done correctly you do not see any threads.

Though you must be warned, hand binding takes WAY longer than machine binding. Today I'm just going to go over the hand binding technique. I'll try to create machine binding soon - probably the next quilt I decide to machine bind :).

IMG_6544

So onto...
Stage 2: Hand Sew Binding to the Quilt Bottom


The key to creating a nice even binding to a quilt is not to pull or tug on binding and to keep each stitch even...also keep it as 'Invisible' as possible :).

A. For hand stitching, use a hand quilting thread to prevent from breaking and knotting.  Choose a color that matches the binding and quilt bottom.  If you are using the technique that only sew on the binding you could choose a thread that matches the binding exactly.  If you choose the method that jumps from the binding to the quilt bottom, try to find a thread that matches both the binding and quilt bottom or an invisible thread. 

I usually use Gutermann 100% cotton for hand quilting:
IMG_5132

B. To start, tie a knot and stitch a few stitches to tie down the thread along the inside of the sew line from the binding top. Start this a few inches from a corner of the quilt.

IMG_5116

C. Fold the binding to cover the sew line, bring the needle out and into the edge of the binding - make sure you catch a few threads on the binding so the sewing thread will be nicely secured. Continue bringing needle through the binding and into the quilt bottom, catch a bit of the batting as well, but make sure you do not get any of the quilt top. Right now you needle should be about 1/8" from where you originally started the stitch, once you get to this distance, push the needle through through the quilt bottom, right along the sew line.  Pull the needle and thread back the position to start the next stitch.  Alternatively if you don't want the thread to be seen between the quilt bottom and binding at all you could push the needle through on the binding instead quilt bottom - in this case use a thread that is the same color as the binding.

IMG_5119


Step D - F goes over the miter corners for the quilt backing:

D. Continue doing step C until you come to a corner.  Stitch all the way to the edge of the binding.

IMG_5120

E. With the binding on the same edge as the sewn binding press down with one hand, and fold down the binding from the next edge over the sewn edge. Stitch into this folded miter corner to secure in place. Stitch a couple of times before continuing sewing on this new binding side.

IMG_5126

F. Continue sewing each edge and corner in this manner until you finish :). Your corners should look something like this:
IMG_5128

Hope this tutorial will help some of you who are not familiar with binding.  I'll keep this tutorial updated as I get feedback and have time to add more details.  Happy quilting :).

Go Back to JAQS Studio Tutorial & Tips

-Q

Tuesday, March 22, 2011

Binding Tutorial: Part 1 of 2

Binding is the perfect end to any quilt.  Besides from creating a sturdy edge to protect a quilt, binding can add playful, beautiful, used to complement a quilt top or even used to create contrast for an element of surprise.


Did I tell you that the binding part of a quilt is my favorite?? :)

In this HOW-TO guide I'll go share my techniques for binding a quilt.  

 First off let's go over the 2 basic types of binding I usually use to make binding:

(A) Straight-of-Grain binding: Cut from selvage to selvage. 

Some characteristics for straight-of-grain binding that I noticed:
  • Easy to cut since fabrics lies in a straight line when cutting.
  • Super simple to figure out how much fabric you need exactly.
  • I don't feel like I'm 'wasting' any fabric since I don't need to cut in an angle like on the bias binding.
  • Great for certain fabric patterns.  Especially stripes - LOVE striped binding!
  • Use it for only straight edged quilts.  Since it is cut straight on the grain, the binding doesn't bend well to contour curved/round edged quilts. 
  • For long term wear and tear, straight-of grain binding may need to be the secondary choice.  Since the same thread runs the whole length of the binding once its folded, it creates a vulnerable spot where the whole binding would be in jeopardy if that thread breaks.
I use it for all my straight edge quilts and projects.  Even though the last bullet point from above is a concern for some quilters, I haven't found it to be any problem at all.  I have had quilts for many years that have gone through A LOT of use and washings and the straight-of-grain binding has held up quite nicely. Once in a while I do use bias binding on straight-edged quilts but only for design/pattern purposes.


(B) Bias Binding: Cut  at 45% angle to the selvage edges of the fabric.

Some characteristics for Bias binding that I noticed:
  • Creates a very stretchy binding that is great for rounded edges.  This is the only way to attacked quilts that are not straight-edged all around.
  • More traditional approach to binding that is recognized to create the sturdiest binding.  
  • To create long strips to make continuous binding without a lot of seams, you do waste some fabric - the triangle leftover after the first and last cut.  
Once cut, the bias and straight-on-grain binding strips are assembled and applied the same way to the quilt top.  So the steps below applies to BOTH binding cutting techniques.  But do keep in mind that if you are binding for a curved edged quilt, do use the bias binding method so your binding can be stretched along with the curve.  For straight-edge quilts, you decide which cutting method you want :).


OK - on to the actual making of the binding :).  Here's step by step instructions on how to create and attach binding to a quilt:


How much binding do you need?

For now this tutorial will only be straight on grain binding.  I'll update on a later date on the details of bias binding - probably when I create a new quilt with curved edges so I would need the bias binding :).  Other sites details bias binding if you need the info right now like here, here and here.

For straight binding use the following calculations for total length and number of strips needed:


Assembling the strips

1. Lay 2 ends perpendicular of each other, with right sides facing each other. With a marking pen, mark where you need to sew - see picture below:
IMG_5107

2. Sew along the marked line and trim along seam with 1/4" allowance:
IMG_5111

3. Press seam open and trim off extra fabric:
IMG_5112

4. Once all the strips are sewn together and pressed, fold in half with right side facing outward and press. Now your binding is ready to use:
IMG_5115


Continue to Binding Tutorial: Part 2 of 2 for instructions on how to attach the binding and hand binding tips...coming soon!


As usual I share all my completed projects with these lovely linking parties :).

-Q

Sunday, December 19, 2010

Binding and Some Rearranging ...

Rainy days means a lot of indoor activity.  This weekend is spent doing a little bit of quilting and a whole lot of rearranging and reorganizing.

On the quilting front - Red Poppy is finally getting some binding ... and you know that means? :)  It's almost  complete.

IMG_0862

My sewing room is turned into a storage area as we get ready for Christmas. My extra work table is now a toy shelf ... thankfully all the gifts should be wrapped and -more importantly - OUT of the sewing room by Sunday night - maybe then I could finish up some projects :P.

IMG_0863

Our boys are now sharing a room! We in the process of redoing the closet so it'll be friendly for sharing. As you can see from the picture below, the closet is pretty big, but with just one poll and a giant dresser in the middle, it wasn't really good for sharing. I'll have the AFTER photos later on once we have a chance to put everything back in place :).

IMG_1027
The big empty closet after taking out all of Asher's closes.  Here's Asher looking at this empty closet and wondering what we have planned for his 'new' room.

So what is next?  Well now we have an empty room - what used to be Silas' nursery.  We have plans on turning it into an shared office (between my husband and me) and an area for the kids to read.

It feels like our house in always changing :)

Sunday, August 8, 2010

Borders & Stripes: Binding

Borders and Stripes has finally entered the Binding stage of quilt making. To help ensure that the binding goes on smoothly and evenly I always do a machine stitch around the trimmed quilt.


Tip: Notice the light brown stitch along the edge of the quilt. This is an extra step I use to make sure all the edges are flattened and everything is nicely squared up. This makes attaching the binding super easy.

For the binding I'm using a Moda dark brown solid. It's the same brown as the solids on the quilt top and quilt back. I cut 2.5" strips and iron them in half. This creates a very strong binding for the quilt. Then the prepared binding is attached to the quilt top - raw edges matching up:


Stitch all around the quilt top about 1/4" away from the edge using mitered corners for each of the corners.

The top front of the quilt top after the binding is attached should look like this. Notice the nice clean edge.


When the binding is folded over to hand bind to the back, the front should look like this:


The quilt top where the binding is attached should be free of pinches, you shouldn't be able to see any of the threads, and it should be in a nice straight line. The picture above is also a nice closeup of the hand quilt work around the flowers. Notice how the hand quilting goes right up to the edge of the quilt.

Now this quilt is ready for some hand binding and off the washing and drying machine for a nice rinsing. It's my first time using the marking chalk so hopefully it comes out nice and easy in the wash :). I'll post with the final quilt results very soon.

Friday, June 11, 2010

Experimenting with Machine Binding - All The Way


So for all the projects I've done so far I've done the machine sew on the binding to the from of the quilt and hand bind to the back.  But with the recent Floormats I decided to try out machine binding ALL THE WAY - front and back.  I've heard mixed things about machine binding but I wanted to try it for myself and see if it's something worth doing.

It actually started out pretty well.  I machine sewed the binding to the front of the quilt.  Then I pinned down the back of the quilt because I read from other quilters so it'll be easier if you pin it until you get used to it.  So pinning it is:

IMG_4820
Okay okay so far so good.  Not much different from hand binding ... except I don't usually pin down the back like this.

Like I said it was a pretty good start.  After about half one into the first edge of the floormat I was in cloud nine and thinking "Geez this is EASY!"

IMG_4827
Nice start huh?  Nice and even in the back.  Only wish I used another thread, but oh well, it's a floormat so you'll never see the back while it's in use anyways.  And besides I did the quilting with that thread already so something matches it in the back.


Even the front of the mat was looking very good.

IMG_4825
The binding stitch is that smaller spaced out stitch in the ditch of the binding.  In person you could hardly see any of the binding thread.  Nice right?

BUT then this happened...

IMG_4822

Missed the binding altogether in the front!  Arg where's my seam ripper!


THEN this...

IMG_4828
I blame the pins!  Just kidding it's me...well me having problems with the pins.  Maybe I wasn't using the pins correctly, but every time I had to remove a pin I would tend to loose the grip on the mat and the sewing gets shifted.  The results - very messy, very crooked lines. 

AND even a little bit of this...
IMG_4824
Hey you're not suppose to sew on the binding on the TOP of the quilt!  ARG!!!!

COFFEE BREAK!  With a little more coffee and a little more patience and NIXING the whole pinning business I was back to this at last :)....
IMG_4826

My final method of (almost) NO pins but just taking it slowly and making sure the stitching is straight - I used a few pins when I really needed the extra support in those 'problem' areas.  So the method: Sew an inch or two, check alignment, peak at the back of the quilt to make sure the binding is being sewn of the stitch, sew a couple of more inches, then back again to the checking.  I sew from the front of the quilt top so I could make sure that I am consistently sewing in the ditch - of course making sure that I caught the back of the binding also with the same stitch


IMG_4821
Use pins sparingly.  It become a hindrance most of the time, but sometimes you just need it there to hold some difficult spots together - ie: seams of the binding.

I am sure this technique of ALL machine binding will be faster with practice.  I don't think I'll use it for most of my projects because the result do show the thread in the back and even a little in the front since the thread in the front did not match with ALL the fabrics used for the front.  I will keep trying this technique.  Maybe more floormats??  Or if I'm in a pinch while trying to finish up a quilt?  Or maybe just for something to change things up a little?  Or better yet, when my hands are tired from hand binding? :)  Practice makes perfect right?

Saturday, May 22, 2010

Good Old Binding & Now I'm Family Clown???

Last step in the Modded Brown Quilt - binding.
IMG_4483
Hopefully I could get the handbinding down by... hmmm...eventually???

And apparently I am now the family clown.  Well I don't wear the silly nose or put on the clown costume but I am getting quite familiar with the balloon arts...
IMG_4413
This is the latest creation - Flowers with very long stems.  I sometimes also fold up the stems to make leaves.  The kids love watching me make it, loves to play with them, and they're relatively cheap.  Once it goes a little flat it gets tossed.

Here's also enjoying the latest additions to our living room:
IMG_4417
Each flower machine takes 2 long balloons.  I pump up the stem first, make a little nub for flower center.  Then with the other balloon, fold it into 5 petals and connect it to the stem. 


Took a little trial and error to get the petals to be even ... and for the balloons to stop popping.  Did I mention I have this fear for balloons popping?  Well I got over that one by this point :P.


IMG_4418


So what have I made so far in the world of balloon art?  Not that much - hearts, different flowers, Mickey Mouse ears, chains, palm tree (that one is a bust), and the ever popular sword.  Haha just something to keep the kids entertained.

Monday, April 5, 2010

The Stash - Adding Stripes - Binding and More

Got a bunch of stripes today - pictured below from www.fabric.com.
IMG_3393
An assortment of colorful stripes from the mail today.

I LOVE stripe fabrics - even before I started quilting. Haha I never really found that many uses for stripes before quilting. There's the occasional pillow top or fringe for a clothing item. But QUILTING has been my lots of reasons for getting stripes - more stripes.  I really like the look of stripes (and polka dots) for the binding of quilts.  It could help create a fun and unexpected finish to any quilt.  Sometimes the stripes serve to tie all the fabrics together on a quilt - having stripes that are similar and goes with each of the fabrics on a quilt.  Sometimes the stripes serve to completely contrast the piece - like an unexpected design to keep the quilt interesting.  Or sometimes it's just a nice fabric that goes with the overall design of the quilt.

Here's a quilt that I used a from polka dotted fabric for the binding.  I didn't want the binding to be the same color as the quilt - but I wanted it to go with the earthy feel of the quilt.  I opted for a olive colored fabric with small white polka dots.
IMG_3324
The small white polka dots on olive fabric added a nice contrast from the floral designs of the fabrics on the quilt top.  However at the same time, the color went very well with the earth tones of the quilt top.

For the Boxed In quilt that I'm making for my sister (still in progress :P), I went with a fabric that matches the quilt top - it's  dark red that is almost the same shade as the reds on the quilt top.  The fabric is striped with a very subtle gold/brown design.  I like the look of the slight stripes with this quilt because it gives it a fun finish without distracting from the overall quilt.  It is still subtle enough to maintain the more 'adult' look of the quilt.
IMG_3377
It's not pictured too well here, but you could see that the red of the binding matches the red on the quilt top.  The binding also has a stripe design on it.

Can't wait till I get a chance to cut up these new stripes fabrics - probably more binding? BUT maybe I'll use some for the quilt top??? We'll see...

LinkWithin

Related Posts Plugin for WordPress, Blogger...