Showing posts with label kids. Show all posts

Friday, November 21, 2014

Happy Birthday Aya

Our little girl is now 2.  We celebrated her second birthday a couple of weeks back with a Frozen inspired theme - a little snowflake here and there.  Olaf "Summer" inspired food :).  Here's some pics of the preparation and party festivities.


A cake stand and some pretty cupcakes makes for pretty center piece and birthday cake.  I love the way the lace wrappers for the baked cupcakes turned out and the little raspberry on top is the perfect touch.


I had a little extra batter left over so I made mini cupcakes as well.   Perfect amount for a little mini-cupcake snowflake dish :).  


The frosting dispenser I got from Amazon was perfect - super easy to use and frosted up all 30 cupcakes super fast - and pretty.


As part of the food table, I made little fruit skewers.  Clean and easy for the little kids to eat - and fun too!


I love the way the little banner turned out for the utensils.  A few little scraps of paper, twine and staples.


We also adorned the light fixture with these cute little paper lanterns and snowflakes.


I wish I took more pictures of the cookie decorating table, but with all the kids at the party I didn't have time :).  But here's a little glimpse of all the spindles that were used for the sugar cookies.  The kids at a great time decorating their little snowflake, Olaf and other sugar cookies.

Great party and now we'll be gearing up for the holidays.  Have a safe week everyone!

Monday, January 13, 2014

WIP & A little Visitor

I've been busy trying to finish up some new quilts - this has been going on for....months??  It's a log cabin version of all jewel tones.  Totally need a break from some of the softer tones I've been using lately.  A nice welcome with some of these keep pretty tones.


I'm making several of these quilts - all in different sizes. So, about 20 blocks done and 100 more to go??? ;)


Good thing quilting is such a relaxing activity :).  I love how the colors are all working together even though they are all from different manufacturers and collections - a lot of colors I don't usually work with like purples and mustards.

On a side note, here a little visitor I found in the shop the other day:


Love my little princess :)

Have a great weekend everyone!

Thursday, September 5, 2013

Wear It Again Baby Clothes

Aya is almost 10 months now and growing like a weed. Like most of you know, baby clothes at this age is pricey and babies outgrow them usually after a few washes (if you're lucky!).  Looking for Aya's pile of 'no longer fit' clothes I was really bummed that she barely wore some of the really cute clothes she had.  So I decided to transform them like I see a lot of moms do.

So out with the scissors and ended up with 2 cute new tops.  


I made a couple of more after this but forgot to photo them :(.

Here's a glimpse of how I transform the onesie - pretty simple and tons of great tutorials out there.
Pretty much snip, measure and sew.  Takes less than 10 minutes once you get the hang out it.  

Love simple and money savings projects like these.

Happy sewing!

Saturday, December 29, 2012

Holiday Festivities With the Boys

I hope everyone is having a lovely holiday break.  I am loving this downtime with the family - especially my little boys.  They are at such a fun age right now (almost 6 and almost 4). 

Here they are ready for some cookie cutting fun.  Don't you love how everything they do turns into a magical event?  Something as simple as cookie cutters become something...fun :)


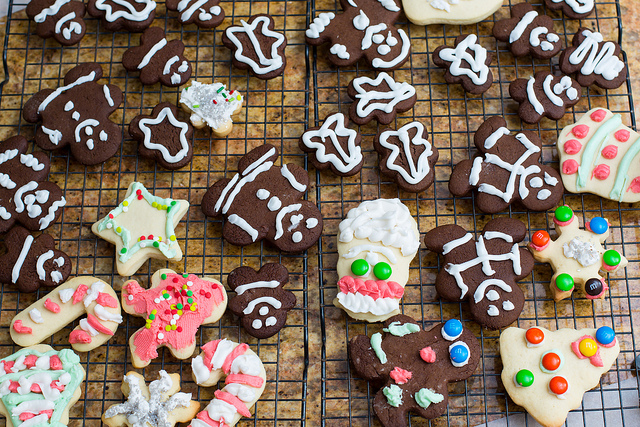
And the results of our labor :).  The boys cut and decorating almost all of the sugar cookies.  They did a marvelous job, don't you think?


Just love this time of year!  And yes the kids do grow up WAY to fast.  I don't know how many years of this we have with them like this, but I will cherish each one.  Have a great New Years everyone!

Thursday, September 20, 2012

A Bit of Housekeeping

Now that I'm a little over 7 months pregnant, my sewing room is becoming smaller ;). Ok not really. I'm the one that's getting bigger and maneuvering in a small (jammed) space is becoming a bit difficult (to say the least!).  However I was able to get some housekeeping out of the way.  Like...

Organize and cut up fabrics for my uneven stripe quilt:

 It's going to be a collection of earthy tones with some blues.  Can't wait to get sewing on this.  And sorry for the poor picture gallery.  I was bit tired by this point ;)

Bundle up some more yummy bundles for the shop.

A little plug for my little fabric shop ... :)  I'm having a storewide sale to celebrate Autumn - 10% off everything with coupon code "fall2012"

7 more weeks of pregnancy left and sooo much more to do.  Still on my list: bundle up more fabrics, finish quilting 3 more quilts, binding for 2 quilts, sew a bunch of napkins, Halloween costume for the kids (Superman and Batman...take TWO), decide if we want to remodel or MOVE and oh-yes organize the nursery (aka byebye office space).  I'm sure there's about a dozen more things that my pregnant brain can't recall right now :).

Monday, June 13, 2011

Mini Bean Bags

I love working on little projects for the kids. With all the outdoor activities going on, I thought it would be nice to introduce them to a game of hopscotch. As a quilter and fabric enthusiast ;) I can't resist making my own little bean bags for their new outdoor game:

IMG_9006

Simple instructions:

-cut 2 pieces of fabric: 4.5" x 4.5"
-place fabrics right side together and sew together 3 of the 4 edges - 1/4" seam allowances
-flip right side out and fill about half way with beans (I used black eyed, but anything will do)
-fold down 1/4" inward along the un-sewn edge and sew shut -about 1/8" away from edge
-press along the other 3 sewn edges and sew about 1/8" away from edge for those as well

When complete it should look like a little pillow with matching edges :). Told you it was simple. I made a dozen for my boys in no time.

IMG_9002

Since I made them a few days ago, my boys have used them as attended - hopscotch. And some unattended purposes as well: throwing bags, stacked up as 'building' blocks, we have invented a few outdoor throwing games with it and now they are sitting in their play area as mini pillows for their action figures.

Try some :). They are super easy and fun to make. I'll be making a few extras as blanket weights. Take them along for a picnic so your blanket doesn't fly away :).

IMG_8999

I'll be sharing at these lovely linky parties.

-Q

Tuesday, February 22, 2011

Child's Play - Hot Air Balloon

This one is for my little guy Asher: Child's Play - Hot Air Balloon -

IMG_4258

I featured the fabrics a little while back since they were picked by my 4 year old son. He insisted on having these wonderful hot air balloons in a quilt:

IMG_4310
Kokka Japan Air Travel

Can you see why?  Aren't they adorable??  Doesn't hurt that he is completely fascinated by anything that flies and color things :).

To show off the fabrics I used the same pattern I used for Child's Play Kohana that I made not that long ago.  Same quilting pattern + different fabrics = Total different quilts:

childsPlay_vs
One for a little girl and the other one for my little boy. Which one do you like more?? I can't decide. :)

For the back of the Hot Air Balloon Quilt I used solids - one from the quilt top and one that mimics the baby blue sky that the hot air balloon remind me of:

IMG_4279

The binding are fabrics is Pimatex Basics Stripe-Pistachio by Robert Kaufman:

childsPlay2_binding
The stripes offsets the circles real well, while the colors matches it perfectly. I'm glad I found this fabric for this quilt.

This quilt is now owned by my son and he is loving it.

IMG_4261


Quilt Information:
Child's Play: Hot Hair Balloon
Front: 100% Cotton Prints and Solids.  Showcase fabric: Kokka Japan Air Travel
Batting: Warm & Natural 100% cotton
Backing: 100% Cotton Solid (Amy Butler & Kona Solids)
Completed Dimension: 52" x 63"
Quilting Method: Double Straight line quilting along each seam
Binding: Machine Sew to Front and Hand Sew to Back (Pimatex Basics Stripe-Pistachio by Robert Kaufman)

IMG_4295

I will be sharing this quilt at these wonderful Linking Parties.


-Q

Tuesday, January 25, 2011

Celebrate Seuss! Pillows x 2

These 2 pillow are for my 2 boys. The older one (Asher) is a big fan of Dr. Seuss and really excited when I got the fabrics for these. It was his idea to make pillows out of the fabrics. I think he did an excellent job making that decision and I had blast making his vision come true :).

IMG_2825

These 2 pillows are designed the same, but they vary by the fabric cut.  I made sure that each pillow gets a good number of characters on them.

seuss_pillow2

The pillow tops are pieced together and then quilted to create an extra comfy feel. It also created a sturdier pillows that hold its shape very well. As you can see I love to quilt and I tend to quilt all my pillow tops as well :).

IMG_2820

For the back of the pillow I repeated the colors from the pillow top but cut it larger. One of the pillow I used off white and green solids and the other orange and blue solids.

seuss_pillow1

Both the pillows turned out beautifully and they add a very fun touch to the boys' room.

IMG_2828

I'm sharing these fun pillows at these marvelous Linking Parties.

Monday, January 10, 2011

New Projects and THAT Guy

I'm working on a few new projects - here's a quick preview:

1 of 2 quilts from a previous fabric preview post:
IMG_1846
Cut, sewn, pressed, sewn, pressed and repeat...

Getting the binding ready as well:
IMG_1847

I'm also making some pillows using a couple of Celebrate Seuss fabrics. These are for my older son. He loves Seuss.
IMG_2374

And in the middle of all this work? A find this little guy:
IMG_2376

:) Darling isn't he? P That's my younger son having fun inside one of the new containers I got for projects.  He's going to turn 2 next month and he is HILARIOUS!

Cheers and happy sewing.

Sunday, September 12, 2010

Superman Beginnings

My older son, Asher, has been a Superman fanatic since watching the original movie.  So guess what he wants to be this Halloween?  Superman OF COURSE :).  It's still a bit early to be making the whole costume, but I can't resist making him a cape in the meanwhile.

IMG_6910

Here's a quick rundown of how I made the cape - sized for a 3.5 year old.

Materials:
  • red fabric 19"x30".  I used a light weight fabric with a little shimmer that flows well.
  • yellow felt - 7"x5"
  • black embroidery floss
  • red sewing thread - match the red fabric
  • yellow sewing thread - match the yellow felt
  • iron on fusing web 
  • printed out Superman symbol - about 6" across.  I used my son's old Superman t-shirt with the logo on it.  They sell them at places like Target and Old Navy.
  • parchment paper - or another thin paper that you could see the logo through
  • Craft pen or thin sharpie
  • Scissor
  • Snap Button

  1. Double fold and sew each edge of the red fabric with the red thread.  
  2. Measure the diameter of your child's neck, add 2-3" for comfort.
  3. Fold down - 'dog-ear' the 2 top corners of the cape.  This will keep the cape from always draping over the front - optional step.
  4. Attach snap button to where you measured for the neck.  Double check to see if this is a comfortable width for your child.
    IMG_6904
  5. Trace the Superman logo onto the parchment paper.
  6. Cut out the logo around the logo and cut out the 'S'. This will be used as the stencil.
  7. Put the stencil on top of the yellow felt, make sure the whole symbol fits on top.  
  8. Use a craft pen or thin sharpie to trace around the outside of the logo and the 'S' shape right onto the yellow felt. Don't worry about the lines showing - I cut slightly inside the line around the logo and the 'S' line will be invisible once it's embroidered.IMG_6706

    Always enlist the help of the little ones :).

  9. Cut out the logo ONLY around the edges - Make sure to cut just inside the line so that the marker will be cut off.  DO NOT cut the 'S' shape.
  10. Using the stenciled on 'S' outline, embroider with the black embroidery floss using a chain stitch along the 'S'. Here's a closeup of the 'S' embroidered on.  See no more marker showing :).
    IMG_6907
  11. Using the fuse web, fuse the logo onto the red fabric about 8" down the center of the cape.  It should hit just below the middle of the back once the cape is on.
  12. Blanket stitch along the logo with the yellow thread once it's fused onto the cape.  This will ensure that the edges don't come loose and give it that extra nice look.  I use the fuse web just to make sure that the middle is on tightly. 
    A view of the front:

    IMG_6908

    A view of the back:

    IMG_6906

  13. Now your little one is ready to enjoy this cape :).
  14.  

    What's the next step?  The rest of the Superman outfit.  In the meanwhile Asher enjoys wearing his cape EVERYWHERE.  Here's my Superman spotted at the park :).

    superman1

    Sorry I didn't have many pictures of the process.  I actually made logos earlier in the day with a similar process but realized later that I couldn't use it for the cape...could you see why???

    IMG_6720

    Yep Superman's cape has an all yellow logo with black lines for the 'S'.  I guess I'll use that red/yellow logo for shirts or decal for other things - photo album cover?

    I'm sharing this project HERE.

    Tuesday, June 22, 2010

    My Superman

    Asher, my 3 year old attended his first day of preschool the other day.  I was very proud looking at him with his little backpack on with no fear and only full of excitement.  I was instantly reminded of all his "firsts" - first laugh,  first crawl, first steps, first words, first "I Love You"....

    Despite his tantrums, picky eating, and sleepless nights, this little guy has been a true joy in my life.  He makes me smile even on the worse of days.  He brings spirit and life into our lives.  He is a wonderful big brother and I am overjoyed to be his mom.

    I love you THIS MUCH - to infinity!

    The Panel Quilt will now be his Preschool quilt.  I was told to write his name on the blanket.  You know me, I can't just ruin a perfectly fine quilt with a sharpie.  I broke out my needle and thread and did a quick embroidery of his name - Asher :).

    xoxo Mommy
     to my Superman :)
     FYI: Big fan of Superman at first sight.

    Tuesday, June 8, 2010

    Panel Baby Quilt #1 Complete!

    Still need a little wash and tumble in the washer/dryer but this little guy is ready for it's new home - in the comfort of my older son, Asher:

    IMG_4762
    Showing off a little bit of the back and little bit of the front.  He loves the little animations on this quilt.  I think he'll enjoy for many years.


    I went with the Moda fabric - Blush Be Mine by BasicGrey/Blush - for the binding.  The overall look of the quilt is a little girly I think but Asher doesn't seem to mind.  I love how the colorful polka dots play with the whimsical swirls/balloons of the quilting.  I also like how it catches the colors of the quilt top tool.  Here's a closeup of the binding during the hand binding process:

    IMG_4714
    I love hand binding.  It creates a very neat and complete look to the quilt.

    A closeup of the whimsical 'balloon' free style quilting:
    IMG_4765
    Used the quilting foot on my Juki.  This small quilt was super easy to work with unlike those bigger quilts.  


    Here's my (VERY) poor attempts to get pictures of the full front and back of the quilt...I have really got to get a better lens for camera...arg....

    The Front:
    IMG_4760

    1 Panel design - Import Japan fabric.

    The Back:
    IMG_4761
    I went with one solid blue color for the back of the quilt - 1) I was in a time crunch. 2) I didn't think the quilt needed any more action since the front was jam packed with it already.  3) I miss the single color quilt back.


    IMG_4759


    And there you have it - 1 of 2 completed and ready for use :).  I love the feeling of a finished quilt - don't you?

    Stacked and ready for use - probably not till later in the year since we just started our blazing out summer out here :P.
    IMG_4764

    Quilt Info:
    Panel Quilt for Asher
    Front: 100% Cotton Single Panel
    Batting: Warm & Natural 100% cotton
    Backing: Solid single color - blue
    Completed Dimension: ~43"x 36"
    Quilting Method: Free-Motion Machine Quilting ('Balloons')
    Binding: Machine Sew to Front and Hand Sew to Back

    I am very happy about the way this quilt turned out.  It was my first time using a single Panel for a quilt.  About as simple as you get I guess :P.  Happy quilting and on with Quilt #2.

    Added to FINISHED PROJECTS :)

    LinkWithin

    Related Posts Plugin for WordPress, Blogger...