Showing posts with label Holidays. Show all posts

Friday, December 27, 2013

Gingerbread Houses and Bubble Snow Fun

Gingerbread House making madness...

5 adults, 7 children, many many candies later we had our first Gingerbread house decorating get-together.  It was a lot of fun and we will definitely be doing this again next year :)


Nothing like bowls of candy and treats to get the kids (and grownups) hyped it!  Can you believe some of this actually made it onto the houses ;)?


I made my own little gingerbread car and road.  Grownups need their fun too right?!


I found some great recipes for gingerbread and royal icing HERE.  That's a great website.  The house was much easier to put together than I thought.  I made some bigger ones from a big template I found online and smaller ones freestyle.  Both worked out wonderfully.


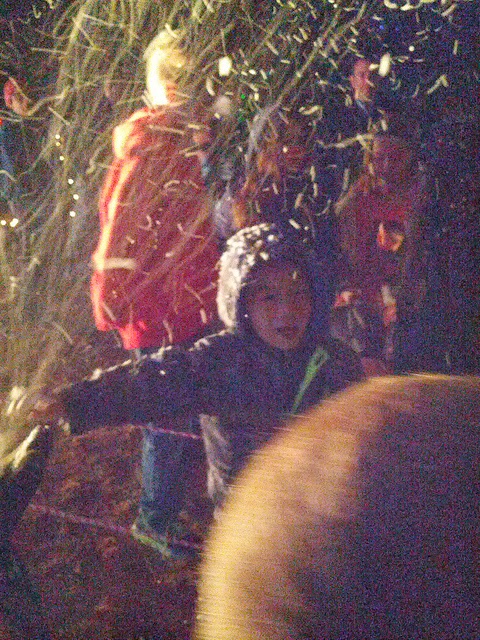
Also amongst all the Christmas fun, one of our neighbors down the way go CRAZY with decorations each year.  This year they had a 'snow machine' - shoots out soap bubbles :).  Of course the kids had a blast.  Here's Silas just showing in 'snow'.


Hope everyone is enjoying some down time and making beautiful memories :).  Take care and have a great Christmas weekend!

Monday, October 28, 2013

Happy Halloween Week - No Linky Party This Week

If you're like my household - there's a lot of focus on Halloween this week.  Let's all enjoy a week off the party this week :).

Just wanted to share this pic - can't resist.  Here's my kiddos enjoying some time at the local Pumpkin Patch.  Baby Aya's first trip to the patch of course.  And as usual the boys had a blast there - petting zoo, train ride and of course pumpkins!


Have a safe and super [spooky] Halloween!

Saturday, December 29, 2012

Holiday Festivities With the Boys

I hope everyone is having a lovely holiday break.  I am loving this downtime with the family - especially my little boys.  They are at such a fun age right now (almost 6 and almost 4). 

Here they are ready for some cookie cutting fun.  Don't you love how everything they do turns into a magical event?  Something as simple as cookie cutters become something...fun :)


And the results of our labor :).  The boys cut and decorating almost all of the sugar cookies.  They did a marvelous job, don't you think?


Just love this time of year!  And yes the kids do grow up WAY to fast.  I don't know how many years of this we have with them like this, but I will cherish each one.  Have a great New Years everyone!

Friday, June 17, 2011

Fabric Love #16 & Fabric GIVEAWAY: Gearing up For Holidays Already?

Holidays are always on my mind and this year is no different.  In the near future I'll be stocking up on Christmas and winter items, but now it is the Halloween fun fabrics :).  Usually I don't think too much about Halloween fabrics but this year a couple of fabrics from Riley Blake caught my eye.


 Super cute little spiders, mummies, cat, bat, witch hat, etc etc.  Need to come up with a project for this pronto!  I LOVE the little vampire too - Is Halloween suppose to be this adorable? ;)


The black on this isn't a deep black - it's more of a ultra dark gray color...and you know how I feel about grays? :)  **hint: check out my blog banner ;)  I will definitely be saving some of these for my personal stash collection.

Boo To You also have a coordinating DOT collection.  This dot fabric is awesome - goes well with both the previous prints, but I think it's neutral enough to use with a lot of other projects that isn't so...Halloween:


So...on to this week's Fabric Giveaway.  Can you guess what it is? :)

Leave a comment for a chance to win all THREE of these fabrics (FAT quarters).  Comment must be posted by 9pm Pacific Time by Monday 6/20/2011.

Thanks!

-Q

Sunday, May 8, 2011

Fabric Love #13 & Fabric Giveaway: For Mothers

Happy Mother's Day to all the Moms out there.  I am a Mom to 2 great little boys - Asher (4) and Silas (2).  Today is one of those days where I am especially thankful for the little things (Mom's edition :P):
  • the little unexpected hugs and "I Love You"
  • raising kids - the ultimate from 'scratch' project ;)
  • finding their little toys hidden in all the drawers and even the freezer - brings a smile to my face everytime
  • their cute little toes, hands, smiles, burps, laughter, and even the whining is sometimes adorable too
  • a test of my patience.  Since being a Mom I have learned (learning) to be more patient - don't let the little things get to me.
  • treasure even the littlest of things
  • seeing the world in their eyes
  • a constant reminder of what life is really about
Happy Mothers Day :).

So on to this week's Fabric Love and Fabric Giveaway.  In the sentiment of Mother's day today I am featuring 2 great fabrics from Alexander Henry:

This fabric always reminds me of feminine beauty.  I always imagine that these ladies - probably wonderful moms - meditating, exchanging stories and taking time away from their busy lives for themselves. 

Chic, stylish, powerful woman :).  What every mom is!


Fabric Giveaway
In celebration of Mother's Day I am giving away 1 full yard of fabric - your choice of either the La Strada or Tea House or 1/2 yard of each.  Just be a follower and leave a quick comment of what you are thankful for on this Mother's day by Tuesday 9PM-PST. A random winner will be picked Tuesday night.

Thanks and have a great Mother's Day!

-Q

Sunday, February 13, 2011

Simple Valentine

So this Thursday while I was dropping my little ones off at preschool, the teacher brought up how the kids were exchanging Valentines THE NEXT DAY!  EEEK!  After a full day at work, cooking dinner, and getting the kids all setup after preschool - I get to making a Simple Valentine.  (yes yes I could have just picked some up at a store, but you know me - I like homemade :)).

Here's my version of a Simple Little Valentine:

IMG_3685


Step 1:
Gather up some construction paper and cut circles (as many as you need Valentines) and a ton of hearts.
IMG_3688


Step 2:
Recruit a 4 year old to help 'design' each Valentine arrangement. The circle being the 'card' and the hearts as the decor.
simple_valentine_asher

Step 3:
Glue the hearts on.
IMG_3683

Step 4:
Attach yarn.
IMG_3690

ALL DONE :). They all turned out great. My son was smiling and having fun throughout the whole process and that's what it is all about right? :)

Have a sweet Valentines day.

As usual, I love to share my project @ these linking parties.

-Q

Monday, December 27, 2010

Survived Another Christmas :)

Love the holidays.  Love Christmas, but boy am I glad it is OVER!

To finish up the year, I decided to bake cookies.  A LOT of cookies.  My estimate is about 400 - give or take a few dozen :P.

Here's the line up:

Mini Gingerbread Men and Women Cookies:

IMG_1364

These turned out fabulously. It was my first time making gingerbread cookies. I am definitely making these again next season...or maybe even before then ;).  I didn't realize that fresh baked gingerbread could be this yummy.  Decorating them was A LOT of work but it was super fun and the results makes me smile each time I look at the pictures.

IMG_1372

How could you resist these little faces :).

IMG_1380

White Chocolate Chip, Cranberry, Macadamia Nut Cookies

Yep - I think the name of these cookies give away half the ingredient list :P. These are a favorite in our household and red cranberries look awesome this time of year.

IMG_1365

Mexican Wedding Cakes

These little snowball looking treats are super easy to make but makes a big impact. My husbands NEW favorite!

IMG_1352


Toffee!

An extra special treat - Toffee :). Love the extra crunch and cookie break from these toffees.

IMG_1356

Not pictured are Sugar Cookies decorated with Christmas Sprinkles - guess I was about ready to pass out by the time I got around to making Sugar Cookies :P.

I started baking around 8:30am and didn't stop until 3pm. It was a constant cycle of mixing, scooping, cookie cutting, oven, cooking rack and finding a container big enough to hold the cookies until they were ready to be packaged.

When it did come time to package up the tins I got a little nervous - did I have enough cookies? Will they taste good? Did I have enough tins? Well 25 tins and hundreds of cookies later I was finally DONE. Everything turned out beautifully and my kitchen was not COMPLETELY destroyed :P.

IMG_1385

Happy Be-Lated Christmas everyone!

IMG_1379

Monday, November 8, 2010

Green Grocer Bag Challenge - For the Holidays

Every year I try to put together a package of things that I really enjoyed during the year for family and friends. It's nothing big or expensive (haha I'm not Oprah ;)), but usually something small and fun to share. So last year I put together a Green Grocer Goodies bag.

IMG_2521

Why am I reliving this project?  I'm sharing this project at this years'
Green Grocery Bag Challenge

@Sew, Mama, Sew!

I think Green Grocery bags are a great way to save resources and reduce the amount of waste in landfills.  But reusable bags are not just for groceries, they could be used for ... anything you would need a bag for :) - including gift giving.

I got these from the local Whole Foods Market. It's their Sheryl Crow bag in the smaller size. They cost only 79 cents but it held a good amount of goodies. I stuffed it with my favorite teas, coffees, cookies and other treats.  The bags are sewn at the seams and super durable - and quite stylish :).

Why Green Bags for the Holidays are TOTALLY Awesome:
  • The bags were tied closed with scraps of fabrics I have left over from sewing projects
  • For the 'gift tag' I just used the tags that came with the bags.  It was a nice green tag printed with the why green bags are awesome :)
  • For added festivities, I got some holiday ornaments to tie on the outside of the bags.  Makes the bags scream out Happy Holidays and the ornaments are totally reusable to hang on a Christmas tree later on. 
  • Added bonus to the green theme was seeing these bags being used after the holidays.  I saw family members and friends use it for everything from grocery shopping to lunch bags to kid's toy/book bags.  It's great to see them make good use of the bag instead of throwing it out like every other regular gift bag.
So go ahead and raid your local grocery store for these bags - or any bag that you absolutely find to be totally awesome.  Here's my stash from last year:

    IMG_2523

    I put together over 40 bags.  I wonder how many of these are still being used :).

    Happy (Early) Holidays. 

    Wednesday, October 6, 2010

    Halloween Costumes Continues: Trick or Treat Bags

    To accompany the boys' Halloween costumes as Superman and Batman I decided to put together these:

    IMG_0128_1

    Their very own Superman and Batman Trick-or-Treat bags of course :).

    The idea started when I was at Target over the weekend and ran into these cute little trick or treat bags:
    IMG_0070
    Unfortunately I didn't get good shots pre-modification. One is a spider modif and the other a cat.

    Cute but doesn't match the boys' costumes ... but for $1 a piece and knowing that I'll have to make them SOME sort of bag I decided to get them anyways.  That's what extra felt and some creativity is for right? :P


    So remember these extra Superman and Batman felt patches from the cape?
    IMG_0068

    They will be put into good use after all. A quick little picture tutorial of what I did to make the patches (I mixed pictures from the Batman and Superman patches to show each patch in progress):
    1. Use parchment paper and trace logo from a t-shirt or other source.
    2. Pin along - but NOT directly - on the traced lines onto the felt
      IMG_6713
    3. Cut along lines
      IMG_6719
    4. Do this for both the colors for each patch accordingly
      IMG_6720
    5. Then pin the top colors (red for Superman, yellow for Batman), on top of the bottom colors (yellow for Superman, black for Batman)
      IMG_6716
    6. Blanket stitch along all edges where the top edge covers the bottom piece
      IMG_0131

    As for the bags, I just took scissors and some good ol' fashioned muscles then off comes the little spider and cat - leaving plain black bags. There was some remnants I couldn't remove but the patches covered it right up.

    Once the bags were ready, I stitched the patches straight on each one and voila! Easy-peasy Trick or Treat bags for my Superman and Batman:
    IMG_0142

    Perfect size openings on top for both my little guys - haha Oh I do wish they get healthy treats like these when the day comes :P -
    IMG_0139

    Happy TRICK or TREATING!

    I am sharing this project with these fun linking parties :).

    Monday, September 27, 2010

    12 Weeks of Christmas: Join In!

    Hi - This year @ JAQS I'm counting down the 12 WEEKS of Christmas. 


    Each week leading up to the big day will be a new project inspired by the holiday season.  We're starting the 12 WEEKS of Christmas with the week one starting October 4.  So come join in the festivities with your own creation for each holiday inspired project or come get inspired.  Either way there will be lots to see and lots to do.  Linkies will be available starting the first day of each week to show off YOUR on that week's project.  All Linkies will stay open until the big CHRISTMAS Day.

    Here's a breakdown of the weeks and what project I will be working on.

               Holiday Napkins & Napkins Rings
    Holiday napkins are an easy way to bring the holidays to any holiday table.  I like to keep mine simple so that it could be used year round if I wanted to.  I put extra flair on it during Christmas with a holiday napkin ring.

              'Twas the Season Pillows
    Something small but adds a lot of holiday cheer to any room.  This is a great way to show off your sewing skills without spending a lot of time on a big project.

    • 3rd Week of Christmas: Oct 18 - Oct 24
                   Magnet Christmas Card Holder

    If you're like me you are always looking for a way to display Christmas cards.   These Christmas magnets will do the trick.

    • 4th Week of Christmas: Oct 25- Oct 31
              Go-Green Gift Tags

    A greener way to go this holiday season.  Why not reuse old Christmas cards as gift tags?  This little project speaks to my green holiday spirit :).

    • 5th Week of Christmas: Nov 1 - Nov 7
                  The Scrappy Christmas Tree 
    Left with a bunch of fabrics from all those quilting projects?  Have no fear - make a Scrappy Christmas Tree this year.

    • 6th Week of Christmas: Nov 8 - Nov 14
              Snowflake w/ Ribbon
    Something I do every year to give our California home a feel of a 'White Christmas'.  This year I get to share this special tradition with my 2 boys...and we're going to pretty it up with ribbons.

    • 7th Week of Christmas: Nov 15 - Nov 21
              Christmas Cupcakes
    Cupcakes...yummm...must I say more?

    • 8th Week of Christmas: Nov 22 - Nov 28
              Christmas Wreath
    A way to use materials that you probably already have around the house already.  Decorate and reuse at the same time!

    • 9th Week of Christmas: Nov 29 - Dec 5
              Customized Tree Ornaments
    Another tradition at our household is to great ornaments each year to commemorate the events of the past year.  Well this year we will attempt to make our own.  Something new :). 

    • 10th Week of Christmas: Dec 6 - Dec 12
              Garland (Fabric) Decor
    An easy but very festive way to decorate your Christmas tree, a wall, or anything.  The best part?  It's made of fabrics from your scrap pile! :)    


    • 11th Week of Christmas: Dec 13 - Dec 19
              Scrappy Gift Wrapping
    It's a gift wrap, no it's a present, no it's BOTH!  Know a quilter/sewer?  You could wrap their present with something they could use.  Ahh...another green Christmas idea.  Love it.

    • 12th Week of Christmas: Dec 20 - CHRISTMAS DAY
              Funny Man Gingerbread Cookies
    Nothing says Christmas like the smell of fresh baked cookies.  Why not give it an extra special touch?  Make them fun with the kids!  Get their little hands dirty for Funny Man gingerbread cookie decoration time.


    So what's your take on these holiday projects?  Have something you want to share?  Strut your stuff here :).

    Sunday, September 19, 2010

    BOO!

    BOO!  It's that time of year to get in the HALLOWEEN spirit.  Not a huge fan of the holiday but doesn't mean I can't take this opportunity to do something that I am a big fan of: decorating of course :).

    My front gate is now ready to great Treat-Or-Treaters:
    IMG_7119

    Here's a quick rundown of how I made this sign.

    1.  Cut out the necessary fabrics:
      IMG_6895
      • For the spider - using black fabric of choice, cut down the body (2 pieces - oval approx. 8"x12"), 8 legs (1.25" x 25") and a head (2 pieces - gumball shape about 5" base)
      • Sign fabric - rectangle (2 pieces -22"x16")
      • Yellow felt - rectangle (2 pieces - 10"x8")
    2. Assemble the spider
      • Start with the head - sew seams except for gumdrop base and fill with stuffing
    IMG_6991
      • Sew legs over itself with a craft pipe or other flexible/bendable material in the center


        IMG_6998
      • Sew the body of the body together, starting with the head.  When sewing the seams of each of the limbs (head, each leg) place that limb inside the seam and then sew the seam shut
      • Embroider some eyes onto the spider
    3. Embroider the yellow felt:
      •  Embroidery - or write with permanent paper - a cool little Halloween image/saying.  I went with the basic BOO! :)
    4. Quilt the signage and bind it:
      • Treat the signage fabric like a single sheet quilt top and quilt back.  Layer it with batting and quilt.  I went with a basic straight diagonal crossing lines.
      • IMG_7103
      • Bind with a dark brown fabric.  I machine bind to the BACK then machine bind to the front of the quilt top.
    5. Attach the hanging 'rod':
      IMG_7092
      • I used 2 bamboo skewers - you could use whatever would be long enough for the whole width of the signage.  It just need to be rigid enough to keep the edges of the sign from folding down.
      • Use some of the leftover binding strip to create a pocket to put the rod in.  Sew the ends shut.

        IMG_7097

      • With more of the leftover binding strip, sew 2 'ropes' or strings and attached to the newly formed rod pocket
      • IMG_7102
    6. Attach the yellow felt to the signage:
      • Find a placement on the right side of the sign that you like - leave enough space on the left side for the spider, then stitch along the edge of the sign onto the sign

        IMG_7117
    7. Attach the spider
      • Use a black thread and sewing the spider securely onto the signage.

        IMG_7114
    8. Trim all the loose string, find a place for the sign, and attach :) VOILA!  A BOO! Halloween sign.
      • Make sure that you wrap the spider legs outward.  I wrapped all the legs around a pole on the gate.

        IMG_7110

     
    There's even a nice view from the back :):
    IMG_7108

    Now I could get into the Halloween spirit a little bit more.  Love looking at this sign every time I come in and out of the gate :).  
    IMG_7119

        Sharing at these MARVELOUS places.

        LinkWithin

        Related Posts Plugin for WordPress, Blogger...