Tuesday, March 29, 2011

Binding Tutorial: Part 2 of 2

In the first part of the tutorial I went over 2 different type of binding cuts and how to assemble a folded binding. Now I will go over how to attach the binding, including hand binding.


I take a 2 stage approach to attaching the binding to a quilt - or any project with binding.

Stage 1: Machine Sew the Binding to the Quilt Top

A. Face the quilt with the quilt top facing up and measure about 2/3 of the way down from one edge of the quilt. Line up the raw edge of the quilt from that point with the raw edge of the binding - make sure you leave about 10" of the binding unused. Start sewing using about 1/4" from the raw edge - make sure you leave about 10" of the binding unused.
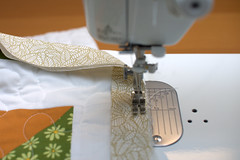
IMG_5097

(Steps B-E outline to creating miter corners.)
B. At each corner you want to stop about 1/4" from the end. Stitch back and forth a few stitches.
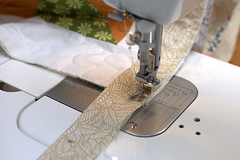
IMG_5098

C. Take the quilt and binding off the sewing machine and fold the binding up at a 45 degree angle.
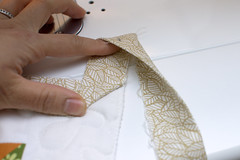
IMG_5099

D. Fold the binding down on itself so that it lies along the unsewn edge.
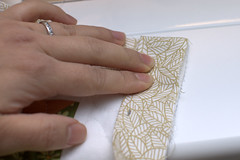
IMG_5100

E. Start about 1/4" from the top of the unsewn edge, stitch back and forth a couple of times and then continue stitching the rest of the edge - again with 1/4" allowance.
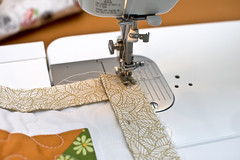
IMG_5101

F. Once you get to the beginning of the binding, stop about 10" from where you started. Mark where the 2 bindings should join up once the binding is complete.
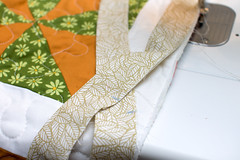
IMG_5102

G. Open up the binding and face at a 90 degree angle with right sides together. Pin to stay in place and mark where the stitch line should be.
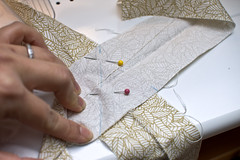
IMG_5103

H. Sew on the stitch line and trim 1/4" from the sew line. Press open the seam, refold the binding and continue attaching the rest of the binding.
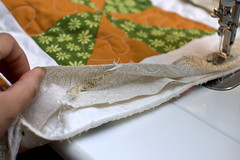
IMG_5105

Now that the binding is attached to the quilt top it is now time to decide now you want to attach it the quilt bottom. There are 2 basic approaches to this - either machine bind or hand bind. For (almost :P) all my quilts I have been using hand binding. I find that it makes for a more traditional looking quilt finish and gives the quilt that nice handmade feel...and if done correctly you do not see any threads.

Though you must be warned, hand binding takes WAY longer than machine binding. Today I'm just going to go over the hand binding technique. I'll try to create machine binding soon - probably the next quilt I decide to machine bind :).
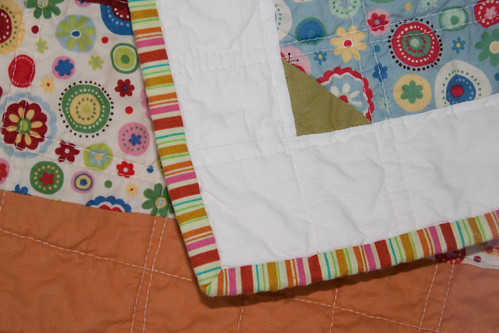
IMG_6544

So onto...
Stage 2: Hand Sew Binding to the Quilt Bottom


The key to creating a nice even binding to a quilt is not to pull or tug on binding and to keep each stitch even...also keep it as 'Invisible' as possible :).

A. For hand stitching, use a hand quilting thread to prevent from breaking and knotting.  Choose a color that matches the binding and quilt bottom.  If you are using the technique that only sew on the binding you could choose a thread that matches the binding exactly.  If you choose the method that jumps from the binding to the quilt bottom, try to find a thread that matches both the binding and quilt bottom or an invisible thread. 

I usually use Gutermann 100% cotton for hand quilting:
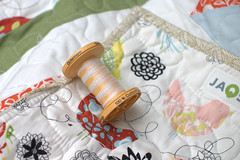
IMG_5132

B. To start, tie a knot and stitch a few stitches to tie down the thread along the inside of the sew line from the binding top. Start this a few inches from a corner of the quilt.
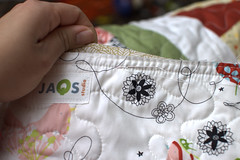
IMG_5116

C. Fold the binding to cover the sew line, bring the needle out and into the edge of the binding - make sure you catch a few threads on the binding so the sewing thread will be nicely secured. Continue bringing needle through the binding and into the quilt bottom, catch a bit of the batting as well, but make sure you do not get any of the quilt top. Right now you needle should be about 1/8" from where you originally started the stitch, once you get to this distance, push the needle through through the quilt bottom, right along the sew line.  Pull the needle and thread back the position to start the next stitch.  Alternatively if you don't want the thread to be seen between the quilt bottom and binding at all you could push the needle through on the binding instead quilt bottom - in this case use a thread that is the same color as the binding.
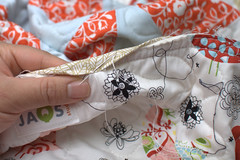
IMG_5119


Step D - F goes over the miter corners for the quilt backing:

D. Continue doing step C until you come to a corner.  Stitch all the way to the edge of the binding.
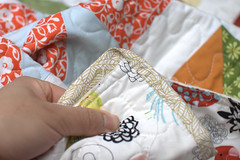
IMG_5120

E. With the binding on the same edge as the sewn binding press down with one hand, and fold down the binding from the next edge over the sewn edge. Stitch into this folded miter corner to secure in place. Stitch a couple of times before continuing sewing on this new binding side.
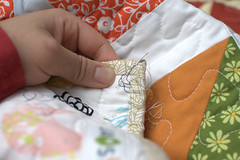
IMG_5126

F. Continue sewing each edge and corner in this manner until you finish :). Your corners should look something like this:
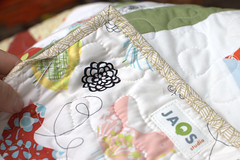
IMG_5128

Hope this tutorial will help some of you who are not familiar with binding.  I'll keep this tutorial updated as I get feedback and have time to add more details.  Happy quilting :).

Go Back to JAQS Studio Tutorial & Tips

-Q

Sunday, March 27, 2011

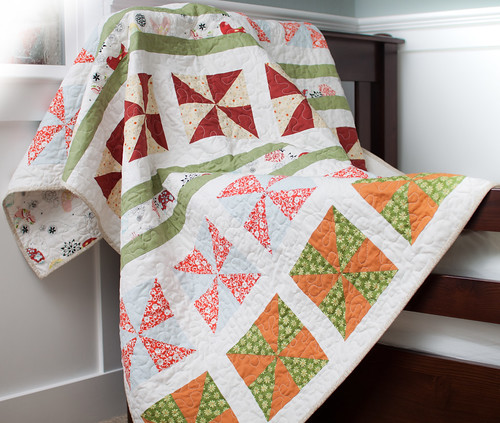
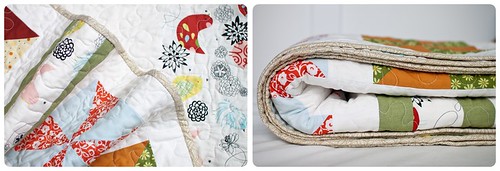
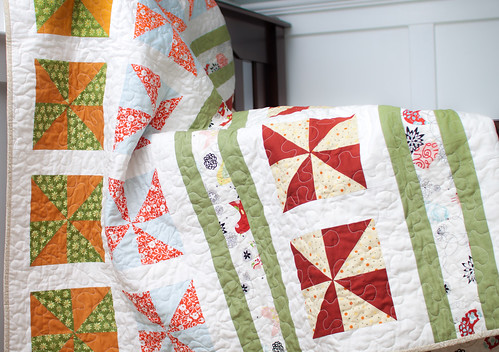
Spring Wheels Quilt Completed!

Welcome Spring Wheels :)

IMG_5490

Reminds me of warm spring days with a slight breeze in the air:

IMG_5480

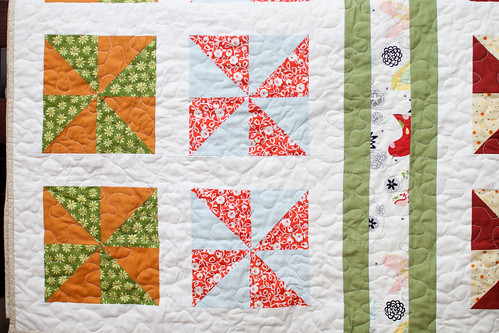
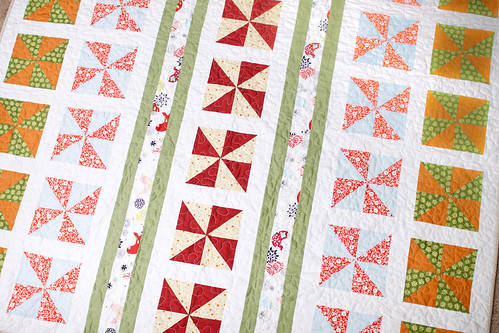
This is the newest addition to the studio. I had a blast making it. I love all the different colors and how they all combined together to create different wheels:

IMG_5508

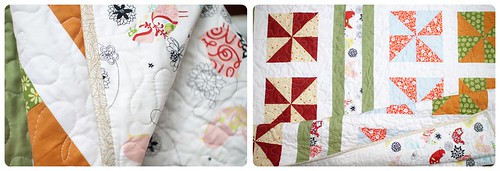
The back repeats the spring wheels:

IMG_5473

Don't you just love that pretty and playful Starling fabric? There's some in the front and the back of this quilt - adding a whimsical touch:

IMG_5494-horz

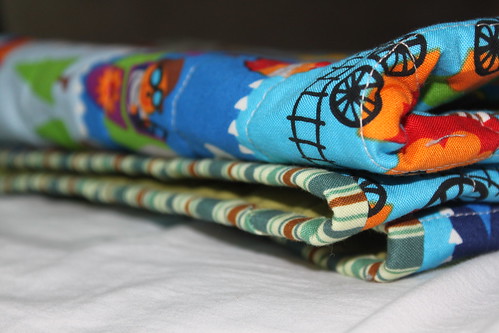
Binding is from the Peaceful Planet line from Studio E:

IMG_5519-horz

This is quilt #1 of 2 Spring Wheels.  For this one I decided to use a free form quilting style.  It adds a whimsical feel to the quilt and make each of the part of the quilt flow into the other.  I love how it adds a consistent texture to the whole quilt.  I'm working on quilt #2 now - it has more of a structured straight-line quilting style.  I can't wait to see how the two differs once it's quilted :).  I'll share #2 as soon as it's done.  For now I am enjoying looking at #1. 


IMG_5485


Quilt Information:
Spring Wheels (#1)
Front: 100% Cotton Prints and Solids.  Showcase fabric: Starling by Alexander Henry
Batting: Warm & Natural 100% cotton
Backing: 100% Cotton Solid (Amy Butler & Kona Solids)
Completed Dimension: ~60" x 66"
Quilting Method: Free Style Meandering
Binding: Machine Sew to Front and Hand Sew to Back (Peaceful Planet by Studio E)

Pattern to come :)

I am sharing this quilt at these great Linking Parties.

Saturday, March 26, 2011

Fabric Love #8

I am loving Alexander Henry fabrics.  I just got in my shipment of their fabrics and I am some very yummy ones to share with you today :).  So to this week's Fabric Love(ing) Alexander Henry!

Little Farm:
Playful and cute, this fabric would be awesome for any fun project:
This is available in both White and Blue backgrounds - how great is that?? 


Griffith Floral
And speaking fun - I love the playful retro feel of this one.  I haven't decided what I'll do with it yet, but I couldn't resist!


Last but not least...
Barclay Snail
Speechless...I don't like snails, but this is sooo cute!  I'm also a sucker for orange fabrics...

As usual all of Fabric Love fabrics are available at JAQS Studio @ Etsy :).


-Q

Tuesday, March 22, 2011

Binding Tutorial: Part 1 of 2

Binding is the perfect end to any quilt.  Besides from creating a sturdy edge to protect a quilt, binding can add playful, beautiful, used to complement a quilt top or even used to create contrast for an element of surprise.


Did I tell you that the binding part of a quilt is my favorite?? :)

In this HOW-TO guide I'll go share my techniques for binding a quilt.  

 First off let's go over the 2 basic types of binding I usually use to make binding:

(A) Straight-of-Grain binding: Cut from selvage to selvage. 

Some characteristics for straight-of-grain binding that I noticed:
  • Easy to cut since fabrics lies in a straight line when cutting.
  • Super simple to figure out how much fabric you need exactly.
  • I don't feel like I'm 'wasting' any fabric since I don't need to cut in an angle like on the bias binding.
  • Great for certain fabric patterns.  Especially stripes - LOVE striped binding!
  • Use it for only straight edged quilts.  Since it is cut straight on the grain, the binding doesn't bend well to contour curved/round edged quilts. 
  • For long term wear and tear, straight-of grain binding may need to be the secondary choice.  Since the same thread runs the whole length of the binding once its folded, it creates a vulnerable spot where the whole binding would be in jeopardy if that thread breaks.
I use it for all my straight edge quilts and projects.  Even though the last bullet point from above is a concern for some quilters, I haven't found it to be any problem at all.  I have had quilts for many years that have gone through A LOT of use and washings and the straight-of-grain binding has held up quite nicely. Once in a while I do use bias binding on straight-edged quilts but only for design/pattern purposes.


(B) Bias Binding: Cut  at 45% angle to the selvage edges of the fabric.

Some characteristics for Bias binding that I noticed:
  • Creates a very stretchy binding that is great for rounded edges.  This is the only way to attacked quilts that are not straight-edged all around.
  • More traditional approach to binding that is recognized to create the sturdiest binding.  
  • To create long strips to make continuous binding without a lot of seams, you do waste some fabric - the triangle leftover after the first and last cut.  
Once cut, the bias and straight-on-grain binding strips are assembled and applied the same way to the quilt top.  So the steps below applies to BOTH binding cutting techniques.  But do keep in mind that if you are binding for a curved edged quilt, do use the bias binding method so your binding can be stretched along with the curve.  For straight-edge quilts, you decide which cutting method you want :).


OK - on to the actual making of the binding :).  Here's step by step instructions on how to create and attach binding to a quilt:


How much binding do you need?

For now this tutorial will only be straight on grain binding.  I'll update on a later date on the details of bias binding - probably when I create a new quilt with curved edges so I would need the bias binding :).  Other sites details bias binding if you need the info right now like here, here and here.

For straight binding use the following calculations for total length and number of strips needed:


Assembling the strips

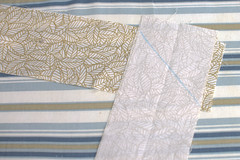
1. Lay 2 ends perpendicular of each other, with right sides facing each other. With a marking pen, mark where you need to sew - see picture below:
IMG_5107

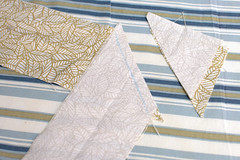
2. Sew along the marked line and trim along seam with 1/4" allowance:
IMG_5111

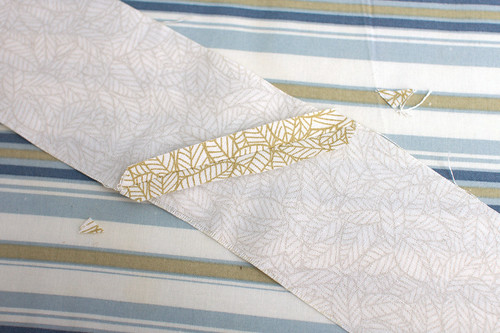
3. Press seam open and trim off extra fabric:
IMG_5112

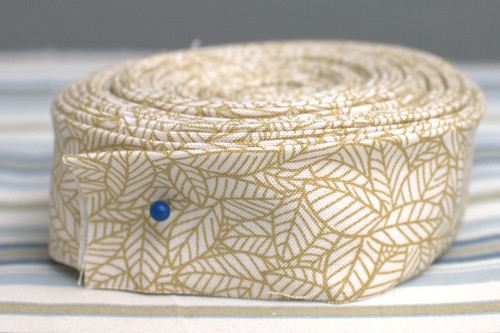
4. Once all the strips are sewn together and pressed, fold in half with right side facing outward and press. Now your binding is ready to use:
IMG_5115


Continue to Binding Tutorial: Part 2 of 2 for instructions on how to attach the binding and hand binding tips...coming soon!


As usual I share all my completed projects with these lovely linking parties :).

-Q

Fabric Love #7 WINNER

Congratulations to Christie from Describe Happy for winning this week's Fabric Love - Giveaway #7! I'll contact you shortly to get your shipping address :).


The fabric giveaway included the following items:

From left to right: 

Thanks to everyone that joined in and I hope to see you all again soon :).

Remember that Fabric Love is here @ JAQS every weekend.

-Q

Sunday, March 20, 2011

Weekend Wrapup

As a Californian pretty much my whole life, I am not used to extreme weather.  So with constant and rapid rain and wind this weekend, I felt a little...lost.  First off, the kids have been stuck inside the whole weekend.  Without any break in the rain, it was hard to keep them entertained.  We went through several of their favorite TV shows, read about every book in the house, the house itself is a MESS, and they were bouncing off the walls ... well not literally...sorta.  Hopefully we get a break soon and they could stretch their legs outside soon.

Luckily I was able to get a little bit of quilting done. 

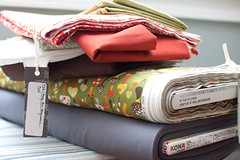
Got some fabric ready for the next quilt:
IMG_5306

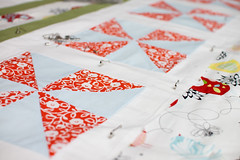
Basted and quilted Spring Wheels #2 :). I am very excited about this quilt. The design and colors are a welcomed break from the gloomy weather and colors outside.
IMG_5315

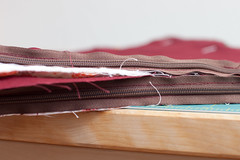
Added zippers to a couple of more Simplicity Pillows:
IMG_5310

So that was my weekend in a nutshell. What did you work on this weekend?

-Q

Saturday, March 19, 2011

Fabric Love #7 and Fabric GIVEAWAY

This week I am loving florals.  After sewing up some more Simplicity Pillows for JAQS Etsy shop I am beginning to go through my stash for more pretty florals.  So for this week's Fabric Giveway, I am giving away 3 fat quarters total of these lovely little florals prints:

From left to right: 


Enter to win a package of 1 fat quarter each of these fabrics by leaving a comment  by Tuesday night (3/22/2011).

These are also this weeks' Fabric Love and fabrics are available here:


-Q

Monday, March 14, 2011

Simplicity Pillow: Bloom Cherry Blossoms

Pillows are great and you can never have enough of them.  Swap them out according to season, room decor or even to match your mood.  There are many reasons why you can never have enough of them around.  Personally, I don't think I have enough pillows - actually barely any.  I usually admire the ones in the stores or in peoples' homes but I realized that my own home is lacking pillows.


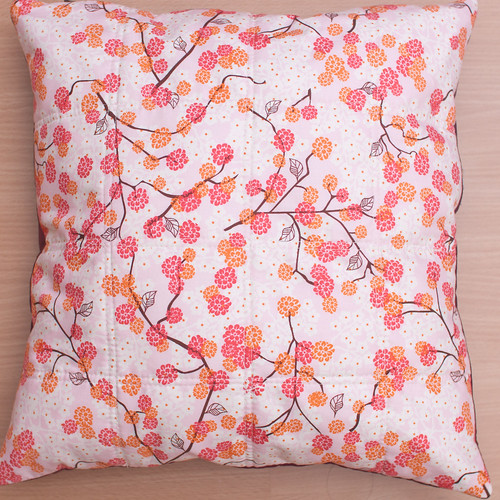
That's why I'm dedicating my next few smaller projects to PILLOWS :).  I have a few ideas in mind - in this post I will share my first:  Simplicity Pillow.  Here's my first one (I made quite a few of these since I love that fabric):

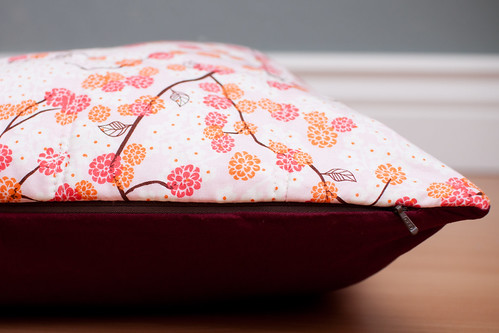
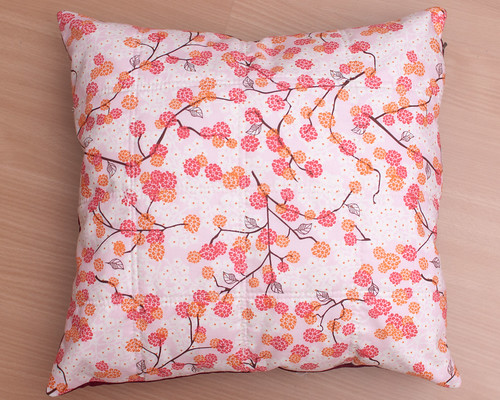
IMG_5179


As the name implies, it is simple.  Well I should say Simple and FABULOUS.  Because besides from being a simple pillow to make, you have to first find yourself a FABULOUS piece of fabric you absolutely adore.  Can't be too hard these days since there are so many great ones out there.  Here's my quick tutorial on how to create the Simplicity Pillow.

Materials:

  • beautiful cotton print fabric - cut 16.5" x 17": Bloom Cherry blossoms by Studio E
  • Solid coordinating fabric - cut 16.5" x 17": Amy Butler Solid Periwinkle
  • Batting - cut 16.5" x 17": Natural Cotton
  • Thread: One to match cotton print, one to match darker solid fabric
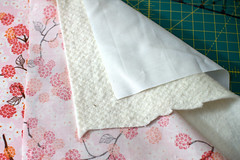
  1. Composing the pillow top quilt: Layer the  cotton print, batting and solid together in that order.  Make sure the cotton print is right side up.
  2. IMG_5134
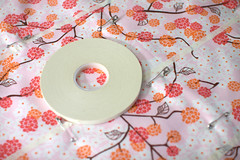
  3. Going in one direction, mark quilt lines about 4 inches apart - leaving the extra fabric (since the length is either 6.5" or 7") on the outer strip.  For small projects I just 1/4" quilting tape.
  4. IMG_5138
  5. Quilt on either side of the marked lines - about 1/4" apart.  If you are using the tape, make sure you don't quilt on the tape, it's a pain to remove.
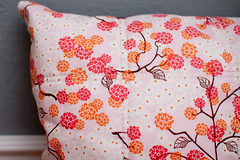
  6. Going the other direction, mark quilt top 4" apart - 90 degrees from the previously quilted lines and quilt the same in the same fashion.
  7. IMG_5174
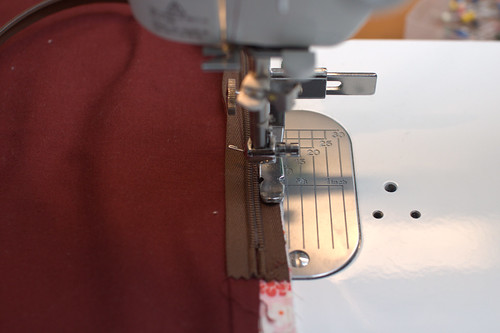
  8. Attaching a zipper:  For this pillow top I used an 'invisible' zipper.  Tutorial for attaching zippers are found HERE.  Attach the zipper along the shorter length of the pillow top and bottom.
  9. IMG_5157
  10. After zipper is attachment to one side of the pillow, face right sides of the fabrics together and double sew 1/4" along the 3 other sides.
  11. Carefully turn out all four corners and then the whole pillow right side out.
  12. IMG_5169
Enjoy :).  I'm going to make this pillow pattern with a few more fabrics that I think will go very nice with this simple design. 

IMG_5175

I am sharing this pillow at these lovely linking parties. 


IMG_5189
-Q

    LinkWithin

    Related Posts Plugin for WordPress, Blogger...