Monday, August 30, 2010

Squared: Putting It All Together

So what do you do when you have 288 little squares? Put them together and enjoy the view of course :).

IMG_6319

The Squared Quilt is finally in full speed. After a little while of arranging and rearranging, this quilt top is ready for the final piecing. Good to see progress :).

IMG_6317

Friday, August 27, 2010

Scrappy Project: Gift Wrap

As a quilter - I'm always left with odds and ends. Fabrics that are too small to be useful in projects but throwing it out seems like such a waste. So I have another Scrappy Project I like to share - Wrapping Presents: The Scrappy Way :).

IMG_6191

This single fabric technique is good for small packages. For this example I'm using a 3"x3" box.
  1. Cut fabric 15"x10" for a box 3"x3". Dimensions for other box sizes needs to be about 5x for the width and 3x for the height. You could play around with the dimensions as needed. I like a little extra fabric on all sides so its easier to handle.
  2. IMG_6157
  3. Place the box on top of the fabric - with the fabric print facing down. Make sure that the box is in middle of the fabric, then take one of the longer edges and fold it over to the top of the box. Then tape this edge in place with some tape. Don't worry about the tape showing because it will be covered up. This is the only tape that will remain in place after the completion of the project.
  4. IMG_6159
  5. Take the opposite edge and folder it over twice so that it looks like this:
  6. IMG_6162
  7. Bring the folded edge over to the top of the package and bring it down over the taped edge. Make sure that the folded edge covered the taped edge completely. Then put a piece of tape to hold it in place.
  8. IMG_6163
  9. Now for the other 2 edges. For both of them follow step 5-8. Turn the package on the side that's not being worked on. Fold down the side that does not open and hold it in place.
  10. IMG_6167
  11. Fold the open side slightly in to hide the raw edges.
  12. IMG_6169
  13. Carefully tuck in each of the 2 remaining sides. Make sure that it looks like the picture below with the corners nicely tucked.
  14. IMG_6170
  15. Now fold the edge from step 5 making sure that all raw edges are nicely tucked away. Use as much tape as needed to keep it from shifting.
  16. IMG_6171
  17. Repeat steps 5-8 for the opposite side of the package.
  18. Stitch the folded sides from step 8 in place using a matching thread. A few stitches should do the trick, just make sure you go through all the layers to keep it secure. Once you feel like you have enough stitches in then remove the tape.
  19. IMG_6173
  20. Repeat with the other side of the package.
  21. IMG_6174
  22. Now your package is complete. You could add an additional bow if you want. For this example made a simple bow using 3 strips of fabric.
  23. IMG_6178
  24. Ta-da! A simple way of using up scrap fabric. I want to play around with the type of fabrics-maybe use numerous types sewn together? Play around with the bows since I just used a very simple one for this package.
  25. IMG_6194

Wednesday, August 25, 2010

Sweet Blocks - Quilting Along

This quilt has been sitting sweetly on my sofa - untouched, unloved and me completely lost on how to do the quilting for it. After a lot of going back and forth on quilting ideas and techniques, I decided to keep it simple - machine quilting straight lines.

A preview of the front of the quilt:
IMG_6136
Line about 1/4" along the OUTER seam of every block. Then 2 sets of lines about 1/5" part down and across IN every block. This help to create a very clean and very secure quilt top.

Here's a further view of the top quilting:
IMG_6130
Love the simple pattern that the lines created. Having the pairs of lines about 1/5" apart really made the simple lines pop and created a very nice elegant finish to the top of the quilt.

Do you know the main reason why I couldn't decide on a quilt pattern for such a long time? THE BACK! I didn't want any quilting on the top to distract from pretty fabrics that were repeated on the back of this quilt. I am sooo glad that the final quilting pattern did not 'ruin' the back of the quilt - as a matter of fact it turned out very nicely. See for yourself :):
IMG_6137

Simple quilting pattern showed up very nicely for the back of this quilt.

I am so relieved and happy that the quilting is FINALLY done. Once a pattern was decided, the quilting did not take long at all. Now it's time to choose a binding for this baby. Yep, still haven't decided. I don't usually work this this color schematic so I was waiting until all the pieces were complete to see what kind of binding went with it. More on the binding next time.

Tuesday, August 17, 2010

The Mighty Garden ... In A Box

Since we've moved to the 'new' place a year ago I've been itching to start up a vegetable garden. We had one in our old place. It was great having herbs and fresh vegetables all the time. A garden also provided great education for the kids on where their food comes from, how its grown, and the importance of fresh organic-chemical free foods. Unfortunately I didn't get a chance to start the full garden this year - maybe next, BUT I did manage to get my ultra-cool husband to make me a planter box:

IMG_5833

Bonus: It's on wheels! I move it around our little patio in the front the house. It's also used as a blockade to keep the kids from running into the driveway :).

It's pretty incredible what you could fit into a space that's about 1' x 6'.

Let's see starting from the left side of the box and making my way right:

Basil, cilantro and parsley:
IMG_5837
Basil is plenty for our family who only uses it for the occasional pasta dish, though we did manage to save enough for a huge pesto salad not that long ago - and as you could there's still plenty left on the plant - it grows pretty quickly. Cilantro is awesome to have around. We use it for fish, salsas, marinades, stir fry, etc etc. The cilantro looks a little sparse in the picture on the upper left hand side because I just picked a bunch right beforehand for fish :). The parsley is a little disappointing. It's barely grown since it's been put in. Though it does look nice I guess :P. Next year I'll aim to grow way more cilantro and basil...parsley is on the 'maybe' list.

Onions (brown shells) and Red Chard:
IMG_5840
This is my first time growing onions - they are super fast growing for sure. It's so fast and easy that I actually planted a bunch of them throughout the planter space - wherever these a little bit of space. I'm sure if the onions get big enough it'll be an but for now, it's nice to look at :). BTW - I'm also cutting the onion leaves off to use as green onions - for stuff like stir fry, salsa, salads. I've been my geru-garden mom do it, so I think it should be OK. The red chard is beautiful to look at. I love the red stems and the bright green leaves. I like using a little bit of chard in a salad - did I mention they were beautiful to look at?


A Closer Look at the Red Chard:
IMG_5839
Yep definitely growing these again - if nothing else they are gorgeous to look at.


Romaine Lettuce:
IMG_5842
These are great in salads. It grew like weeds in our old place, but for some reason this batch didn't quite turn out as I hope... But I think I have enough for a salad now :). Think I'll try these again since I had such good luck with them the last time.


Last but not least ... more ONIONS!
IMG_5844
Due to the sparse turnout of the romaine lettuce, I had more room...and more room means for brown onions! Haha I got WAY to many of these little brown onion starters. To my defense #1 I got the smallest bad they had, #2 they were on sale for only $2. So yeah that's my story :). But they do double as green onion so they serve more than one purpose. Actually the kids love pulling me them...Does that count as 3 purposes?

That's it for the mighty planter box. Hopefully the garden will expand in the (near) future and there will be more to show, but for now I am enjoying the low maintenance of a single boxed planter.

BTW - I also have a few tomato plants straight on the ground that's not pictured. They really do grow like weeds out here. I have 3 plants - early variety of medium sized reds, yellow pear and red cherry. All are thriving and producing way more tomatoes than we could eat - good thing we could give it out to our family and friends :).
IMG_5829

Yes the garden will continue expanding :)...even if it kills me....

Tuesday, August 10, 2010

Borders & Stripes: COMPLETED!

I am so happy with the results of this quilt - actually it may be my favorite thus far. It's been months in the making but now, it is mine to use. Borders and Stripes is now complete!

These photos were taken right after the quilt went through a quick wash and dried. It's as puffy and wrinkly as it'll ever get :). Actually I couldn't get good photos due to lack of space and since this quilt was pretty big (75" x 80"). Hopefully I got enough shots to show off this quilt.

Borders and Stripes laying pretty after the wash and dry cycle:


I was trying to get a good casual shot of the quilt while all the wrinkles and crinkles were still fresh. Check out how nice the quilt pockets are after a run in the dryer. Love it. It's only like this for a couple of hours then it flattens slightly into more subtle quilt pockets - still pretty but just not as puffy.

My favorite part of the quilt? The countless hours of hand-quilting around each of the flower, leaf, and stem. It really created a nice old-fashioned look to the already gorgeous flower pattern. The hand quilting made the flowers pop even more in my opinion - it gave it personality :). Here's a closeup of the hand quilting along with each flower - steam - and leaf - and yes I was very relieved when I finished the last flower:


I love the hand quilted look so much for this quilt I decided to hand quilt straight stitch lines on each of the other fabrics to match the hand quilting for the flowers. The result? Nice straight hand quilting lines that complements the quilt:


Not the greatest of pictures but you could see the straight brown lines on the off-white and brown patterned fabrics. For the brown solid fabrics I did the opposite and used off-white thread. This gave the solids more definition and it complements the floral border fabric very nicely.

One of the hardest thing to do with a larger quilt is to photograph it! We have a lot of pine needles outside due to high winds we've been having so else I would've shot this outdoors where there's more room. But unfortunately I had to make do with photographing this indoors. OK, enough complaining - back to the quilt. Here's the best I could do to show off the complete quilt top:


You could see how I alternated the patterned and solid colors. The yellow-brown strip is actually a subtle patterned fabric. This photo really doesn't show off how well the colors go together, but you could get a look at how the overall designed worked out. The only thing I will change is I wish I had some colors with more blue in it to go with the flowers more.

A look at the back of the quilt - consist of 5 strips of off-white and dark brown solids. I couldn't get a good shot of just the back so this is a back and front view actually :):


I really like all the crinkles from the back. You could make out the floral outline very well and the spacing of the straight stitches were just enough to create a very cozy back without being too busy.


So who's the lucky owner of this quilt? ME! I realized that I haven't made a quilt for myself yet and this is definitely one that I would cherish for a very long time.

Quilt Info:
Borders & Stripes
Front: 100% Cotton Prints and Solids
Batting: Warm & Natural 100% cotton
Backing: Solids (Off-White & Dark Brown Moda Fabrics)
Completed Dimension: 75″x 80″
Quilting Method: Machine Quilt long the lines then Hand-Quilt for all decorative stitching (~90%).
Binding: Machine Sew to Front and Hand Sew to Back


I'm sharing this on:


giveaways


Monday, August 9, 2010

Preview of SQUARED

Since I've been busy organizing my sewing room ... and my whole house it seems ... I have found a lot of fabrics I have long forgotten. Most of which I don't even know the name of - just a half yard here or a 1/4 yard there. Nonetheless, I found many treasures in this quest this organize things. So what to do with all these newly found treasures. Celebrate by making a quilt of course :).

Simplicity is the goal and SQUARED is the method.

Here's a quick sketch of the front:


As the names implies it is rows and rows of squares. 16 rows of 18 squares to be exact.

The back will consist of two of these squared rows and the rest will be a solid color that matches:


Simple? CHECK!

I got as far as selecting and cutting the fabrics - all from small pieces I had lying around. Here's a peak at the fabric stack.


A nice mix of solids and patterned cotton prints.

Now it's onto the sewing machine to piece these cuts together. Hopefully I could get some time later this week...

Sunday, August 8, 2010

Borders & Stripes: Binding

Borders and Stripes has finally entered the Binding stage of quilt making. To help ensure that the binding goes on smoothly and evenly I always do a machine stitch around the trimmed quilt.


Tip: Notice the light brown stitch along the edge of the quilt. This is an extra step I use to make sure all the edges are flattened and everything is nicely squared up. This makes attaching the binding super easy.

For the binding I'm using a Moda dark brown solid. It's the same brown as the solids on the quilt top and quilt back. I cut 2.5" strips and iron them in half. This creates a very strong binding for the quilt. Then the prepared binding is attached to the quilt top - raw edges matching up:


Stitch all around the quilt top about 1/4" away from the edge using mitered corners for each of the corners.

The top front of the quilt top after the binding is attached should look like this. Notice the nice clean edge.


When the binding is folded over to hand bind to the back, the front should look like this:


The quilt top where the binding is attached should be free of pinches, you shouldn't be able to see any of the threads, and it should be in a nice straight line. The picture above is also a nice closeup of the hand quilt work around the flowers. Notice how the hand quilting goes right up to the edge of the quilt.

Now this quilt is ready for some hand binding and off the washing and drying machine for a nice rinsing. It's my first time using the marking chalk so hopefully it comes out nice and easy in the wash :). I'll post with the final quilt results very soon.

Wednesday, August 4, 2010

Hand Quilting Complete & Tools Must Haves for Hand Quilting

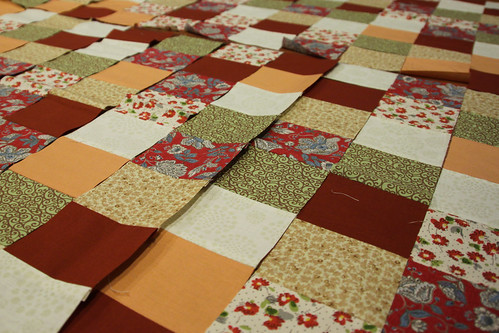
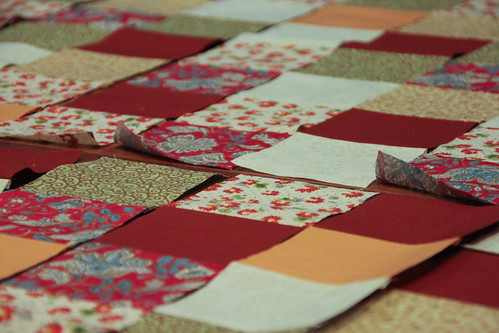
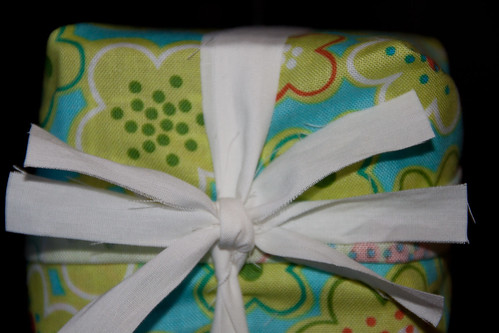
I couldn't believe it myself. It's been MONTHS and countless hours but the hand quilting is finished on 
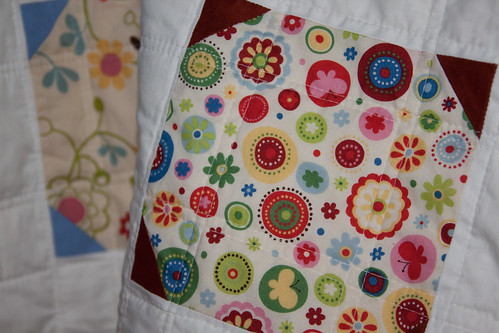
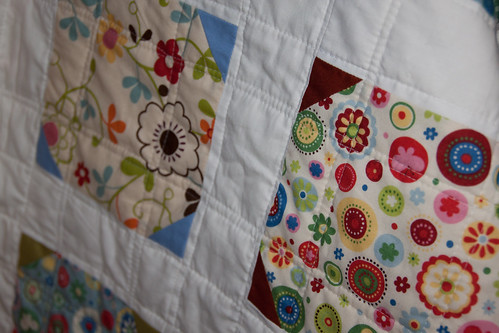
Borders and Stripes. I'll show the whole quilt top once I finish the binding - promise :).

Like most quilts, there's usually a lesson or two learned, a story, or a memory that goes with the quilt. With Borders and Stripes I have learned many 'new to me' gadgets to help make the process much more enjoyable. Last post I wrote about the stick on thimbles- a very good alternative to regular thimbles for folks like me who either loose them or it doesn't fit properly.
Love these little pads. From start to finish this quilt took only 3 of these pads - not bad considering that I kept having to take them off and on all the time because I only had time to quilt for like 1/2 hr straight because the kids needed attention.

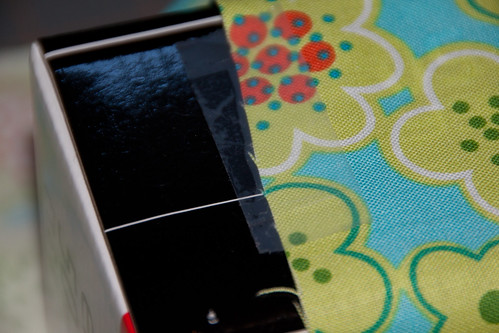
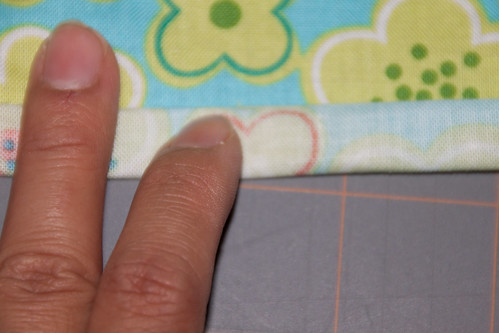
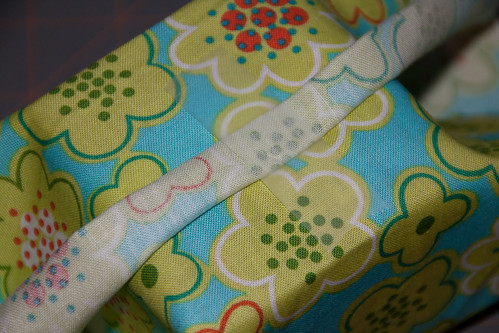
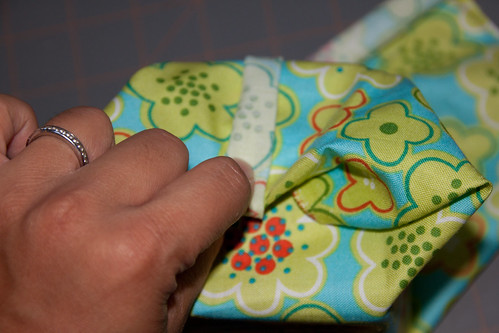
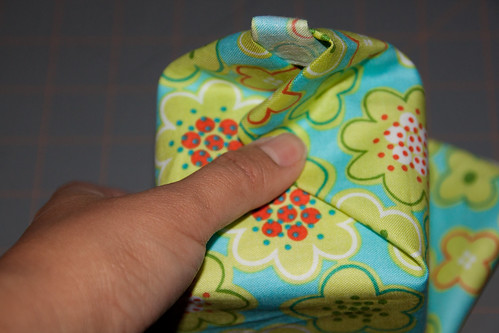
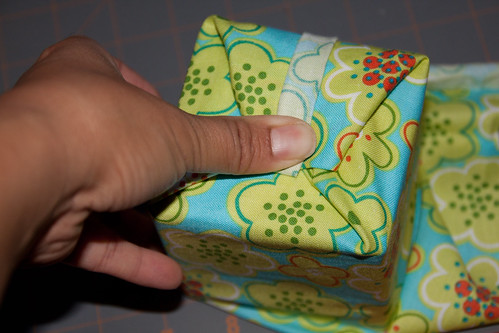
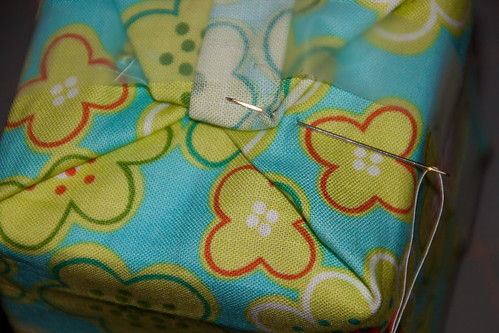
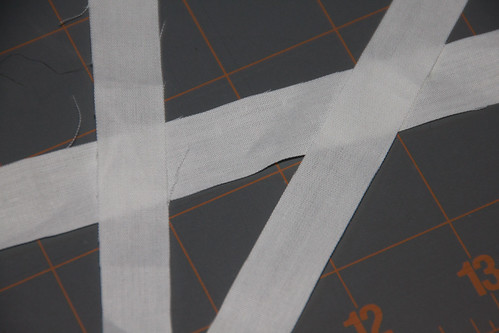
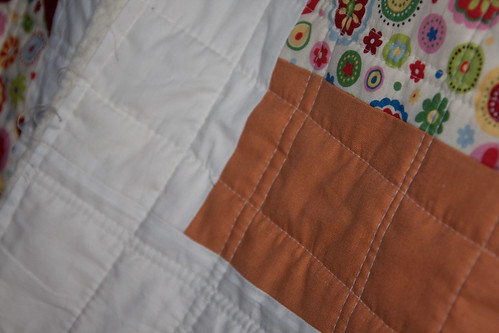
Another great tool to help along the way was 1/4" quilter's masking tape. It was great to use along the parameter was the quilt to guide where the hand-quilting to start and where it should end. Though I did learn along the way that it's too tedious use and not very appropriate for quilting straight lines on the actual quilt top area. But it was great around the parameter of the quilt though since it stayed the whole time and very easy to take off.

The 1/4" quilter's tape essentially a very thin masking tape. It worked very well along the edge of the quilt to mark where I needed to end my hand quilting. I tried it on the quilt top to guide straight lines pictured above - this was very time consuming and wasted a lot of tape. I ended up not using the tape for this purpose and stuck with using it only for the edges.

And last but not least - the marking chalk. I don't remember which brand it was, but I did pick it up at Joannes so it shouldn't be that hard to find. It comes with a chalk holder case and a bunch of colored chalk sticks. They are a much more efficient and cost effective way to mark a quilt top. This will be a great for machine quilting too.

Here's a view of the 'pen' casing that comes with the kit. You just slide the chalk in and use. Pictured underneath the pen is some of the replacement chalk that came with the kit. There's many different colors.

The chalk in action. Pictured is the green chalk marking on the off-white fabric. It creates a temporarily line to help guide the quilting.

I know these are probably like regular tools for experienced quilters, but this is new to me so bear with me through the excitement as I 'discover' these tools :P. They make all these different tools for a reason right? So we could find the tool that fits our own unique needs. So go out there and experiment, find something new or at least new-to-you. Happy quilting everyone.

And yes I'll post soon with the finished results of this quilt. Can't wait to use it! This one is a keeper and will be staying with me in my collection :).

Our 'new' place is turning out to be quite the zoo. Besides from owls, wild turkeys, snakes, cats (neighbors'), we now have whole nest of baby birds. I don't know much about birds, but from what I've been told based on my description of these birds they are Finches: tiny, grayish and makes a lot of chirping noise. A few of weeks ago I noticed a couple of Finches flying about our entry way. Then last week I saw this:


Nestled in this:


That's one of two hanging planters in our entry way patio. I can't believe it took me so long to figure it out since all the clues were so obvious:
  • 3 previous times I tried to water the planter, a bird flies out of it
  • check out the way all the foliage has been rearranged by the birds - hahaha plants do not naturally grow like that :P
  • Excessive bird chirping noises every time we walk pass the planters
DUH!

Well I'm glad I noticed the eggs when I did or else I would've ended up watering these little cuties:


They hatched shortly after the discovery of the eggs - all 4. This picture was taken a couple of days ago so they have a bit more fuzz and they are a lot more alert now. I've still try to water the planter but only enough to keep the plants alive and very carefully.

Aren't they adorable! The kids looks at them everyday when they get home. Feels like we're running a zoo around here :).

LinkWithin

Related Posts Plugin for WordPress, Blogger...