I been through countless thimbles. They usually...suck. They're either too small, too big, too slippery, too hard, too soft, or I just loose them. They're expensive and, for me, they're pretty useless. For my previous projects I suffered through at least 1 new thimble but usually end up just using bandages. Hey they're relatively inexpensive, stay on, and you could adjust it to fit just right :).
But guess what? I found a solution that I LOVE! So to tackle this quilt:
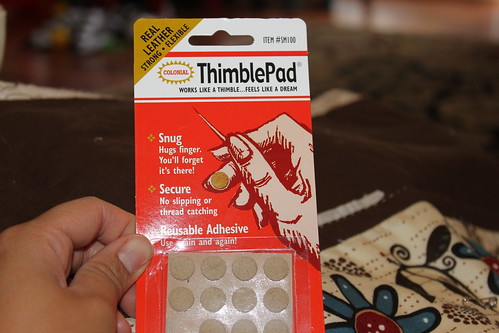
I have discovered this:
They are leather STICK on thimble pads from Colonial...and my hand quilting savior. Sure I was skeptical, very skeptical in the beginning. Will they actually stay on? Would that little piece of leather be enough coverage? Would it hurt to pull it off? How long will it actually last? Would I go through this whole 12 pack before I even finish my quilt??
Yes they stay on very well. Yes there is enough coverage. No, it doesn't hurt to pull it off - well not more than a package. I have been using the same little piece for almost a week now, so I've gone through about 1/4 of a full size quilt and that same little piece is still going strong. And no I will NOT finish the whole 12 pack with this one quilt. At this rate I think I'll probably go through 2 or 3 of them.
Another great thing about these? You could stick it to any hard surface when you're not using them. That means I don't have to worry about them rolling away or my kids playing with them. I just stick it on the scissors I'm using or on the edge of the cup table. Very small and discrete :). I am going to put in another order of these babies.
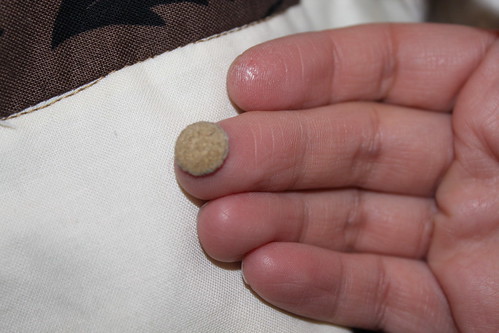
I am definitely not cut out for hand modeling, but I just wanted to show you a picture of the little thimble in action.
The brand I use is Colonial and they're called ThimblePad. Definitely on top of my list of favorite sewing tools.
Thursday, June 24, 2010
Borders and Stripes - Hand Quilting Begins
I don't know how this happened, but it was definitely not the initial plan for this quilt. After scrapping the initial plan to machine quilt it then spending the last few days taking out about a large section of machine quilting this is the final plan:
Yep that's right - I'm hand-quilting! I haven't hand quilted a quilt for a few months now. I guess I miss it. As much as I like the convenience and results of machine quilting, there is nothing like hand quilting. It looks different, it feels different, and it gives a quilt a very nice old fashioned custom look.
Borders and Stripes piecing was very simple - consisting of strips of different fabrics. After doing a little machine on it, I soon realized that it was not the right approach for this quilt. I'm still not 100% sure what kind of quilting pattern I want on the whole quilt but I am confident that hand quilting was the right thing.
So far I have 3 straight lines quilted - and about 50 more to go. I'm going to be doing the straight line on all the solid browns. I used a off-white thread to match the backside of the quilt. My goal is to always use thread that is the same color as the backside.
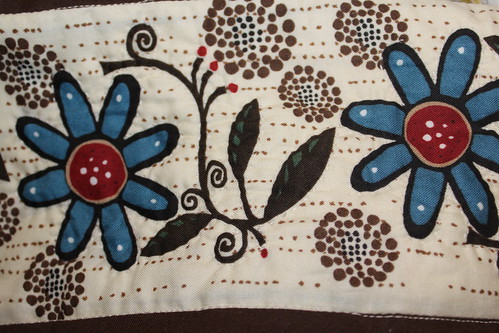
For the Borders fabric I did an outline of the flowers and stems (Bryant Park fabric). There's 3 Borders strips so I'm about 20% done with that part. Here's a closeup of a Border strip:
This has been a lot of work...and a lot more to do. But I do love the results of hand quilting.
Hand quilting Borders and Stripes. For the straight line hand quilting, I marked small sections with masking type to make sure the lines are straight.
Borders and Stripes piecing was very simple - consisting of strips of different fabrics. After doing a little machine on it, I soon realized that it was not the right approach for this quilt. I'm still not 100% sure what kind of quilting pattern I want on the whole quilt but I am confident that hand quilting was the right thing.
So far I have 3 straight lines quilted - and about 50 more to go. I'm going to be doing the straight line on all the solid browns. I used a off-white thread to match the backside of the quilt. My goal is to always use thread that is the same color as the backside.
For the Borders fabric I did an outline of the flowers and stems (Bryant Park fabric). There's 3 Borders strips so I'm about 20% done with that part. Here's a closeup of a Border strip:
Doesn't show up too well in the photo, but it's a pretty discrete hand quilted outline around each flower and stem on the Bryant Park fabric. This is creating a very nice look and feel to the quilt. A lot more work to do but I am liking the results a lot.
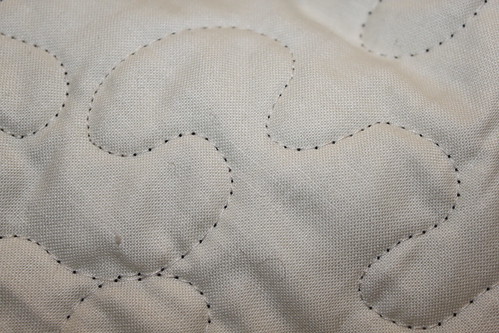
The back side of the floral hand quilting. Loving it.
One of the goals of doing this type of hand quilting is to preserve the look of this pretty fabric. Here's a closeup of the fabric before quilting. I didn't want any quilt lines to take away from the overall look and feel of the design.
A look at the fabric before the quilting.
This has been a lot of work...and a lot more to do. But I do love the results of hand quilting.
Tuesday, June 22, 2010
My Superman
Asher, my 3 year old attended his first day of preschool the other day. I was very proud looking at him with his little backpack on with no fear and only full of excitement. I was instantly reminded of all his "firsts" - first laugh, first crawl, first steps, first words, first "I Love You"....
Despite his tantrums, picky eating, and sleepless nights, this little guy has been a true joy in my life. He makes me smile even on the worse of days. He brings spirit and life into our lives. He is a wonderful big brother and I am overjoyed to be his mom.
I love you THIS MUCH - to infinity!
Despite his tantrums, picky eating, and sleepless nights, this little guy has been a true joy in my life. He makes me smile even on the worse of days. He brings spirit and life into our lives. He is a wonderful big brother and I am overjoyed to be his mom.
I love you THIS MUCH - to infinity!
The Panel Quilt will now be his Preschool quilt. I was told to write his name on the blanket. You know me, I can't just ruin a perfectly fine quilt with a sharpie. I broke out my needle and thread and did a quick embroidery of his name - Asher :).
xoxo Mommy
to my Superman :)
FYI: Big fan of Superman at first sight.
A Change of Plans
It seems like I've been working on the Borders and Stripes quilt FOREVER! Mostly due to lack of desire (I don't really want to work on a big quilt in the heat of the summer) and life (kids, work, etc). So last week I took a stab at the quilting for this quilt.
And? Disaster! I went with a free motion quilt pattern on just the brown part of the quilt top. BTW, my plan was to have different quilting throughout the quilt. So after struggling for hours with the string tension of trying to do a dark bright thread for the top thread and off white for the bobbin (the quilt bottom was off white where the browns where on top - I know I know I should of planned it a little better right?), I gave up. The quilting looked awful!
See for yourself this mess of a quilt job:
So what do I do? Seam ripper becomes my companion...for a while...
And? Disaster! I went with a free motion quilt pattern on just the brown part of the quilt top. BTW, my plan was to have different quilting throughout the quilt. So after struggling for hours with the string tension of trying to do a dark bright thread for the top thread and off white for the bobbin (the quilt bottom was off white where the browns where on top - I know I know I should of planned it a little better right?), I gave up. The quilting looked awful!
See for yourself this mess of a quilt job:
Okay, this picture doesn't show you all the awfulness with the quilting, but in person it is hideous. The dark top thread IS NOT suppose to show on the bottom! And don't even get me started on the top of the quilt. most of it is too ugly to even share.
So what do I do? Seam ripper becomes my companion...for a while...
You could see a little bit of the bad quilting top here. No matter what I tried the tension of the string did not work. It was constantly too tight or too loose and when I finally get it right for a little bit, the bobbin runs out and I have to start all over. ARG! Is my machine broken?
So - yeah a complete redo of the Borders and Stripes quilting. Thank God I only did one brown section of these! The hand quilting will resume after I get all these machine quilting OUT and GONE!
Monday, June 21, 2010
Weekly Goals June 21 - June 28
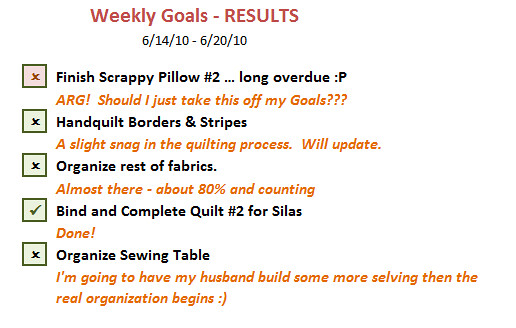
Not so good about last week's goals. See for yourself...
I'm going to put the Scrappy Pillow #2 on the back burner for now. I guess I just don't have to desire to finish the second one...
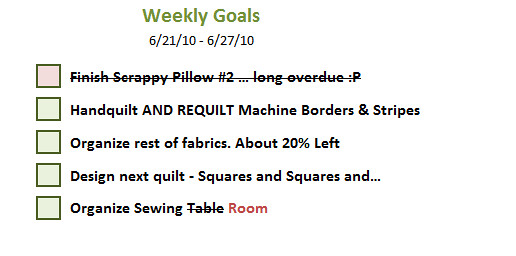
I had a change of plans for the Borders and Stripes quilt so I'm spending the next couple of days taking out the machine quilting - not that much was done - and doing something a little different instead. I'll follow up with a post to show you what I mean.
Instead of organizing just my sewing TABLE, there's been a switch of plans and now my very nice husband has volunteered to build a bunch of shelving in the closet. More room, different organization tactic :).
So here are my goals for this week:
Happy Quilting :).
Thursday, June 17, 2010
Some Rearranging in Process...
As you can see I am in the process of changing up the layout of this site a little. Please bear with me as I work it out :).
Why I'm doing this? Wanted more space to show off projects, easier to use layout, etc.
Hopefully by the end of the day it'll be all up and running the way it's suppose to.
Why I'm doing this? Wanted more space to show off projects, easier to use layout, etc.
Hopefully by the end of the day it'll be all up and running the way it's suppose to.
Anything But Sewing...
So there's a lot going on in the house - well anything but actual sewing. What's going on? Just a lot of enjoying the company of my little ones and the great outdoors I guess.
Here's a little of the action - haha trying to put in some craft related activities.
Playing 'Hide' with the cloth napkins.

Ummm aren't those suppose to be for your face not ON TOP OF YOUR HEAD! I'm glad to see these things are having multiple purposes in our house.
Oh there's Silas!
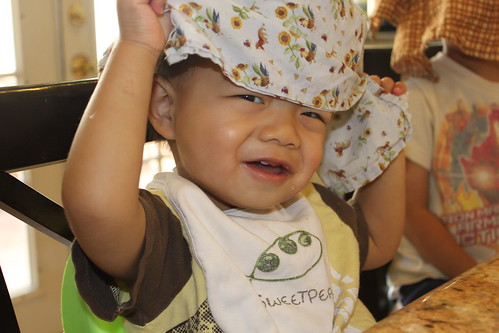
Where's that cute little kid? Oh there he is! Take a close look at that bid he's wearing - 100% organic cotton. Think they sell them at specialty shops - I got it as a sample freebie from work.
Organization of Fabrics CONTINUES!
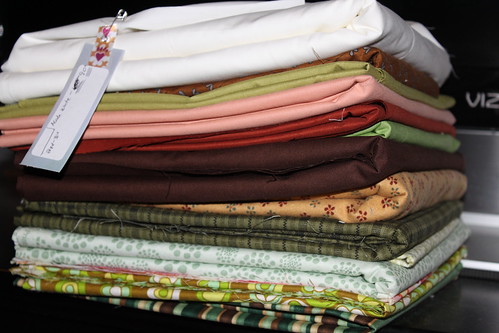
I have 3 of these piles. Project Fabric Organization is well on it's way. I think I have another 3 piles to complete then I could...GET MORE FABRIC! :P
And of course there's always the great outdoors. Here's the kids enjoying some peach picking at a nearby peach orchard. The verdict? Love! They could not get enough of these super sweet, super ripe, delicious peaches right off the tree. We managed to bring home 10 lbs of these without the kids eating them all up.
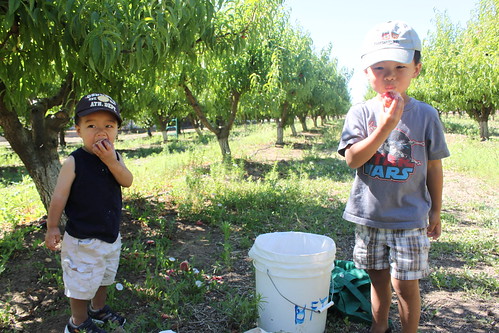
Ummm who's counting? Is that 5 each? 10? Who knows???
Nothing like the fresh smell of summer fruits. Here's to a wonderful summer and happy quilting! I promise I'll actually do some quilting next post :P.
Tuesday, June 15, 2010
Quilt #2 Complete - For the Little One
This 2nd of 2 quilts is for my younger son Silas:
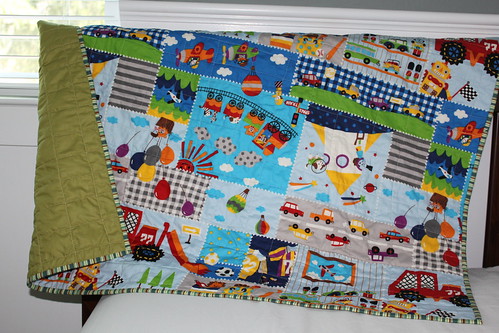
Sitting pretty on the bed.
I really like the way the second quilt came out - maybe more so than the first. I really like how the simple straight line quilting did not distract from the playful quilt top. I machine quilt straight lines about 2.5 inches apart in one direction and 3.5 inches in the other - creating squares throughout the whole quilt.
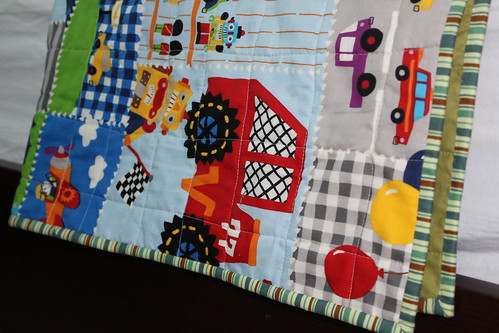
Another view of the top. Shows the squares created by the quilting much more in this photo.
To go with the straight lines of the quilting, I chose a striped fabric for the binding. I love the look of striped binding on a quilt...followed closely by polka dots and solids :).
Here's a closeup of the binding:
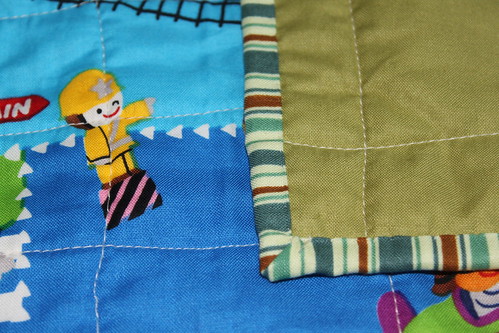
Don't you love stripes :). I don't have a closeup of the back of the quilt, but it's pretty much what you could see in the photo here. It's an all green apple solid cotton fabric. It matches the binding and quilt top perfectly.
So what is happening with these quilts now?
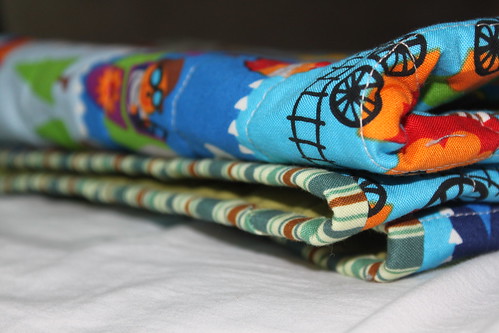
For now they are hanging out in my kids' rooms, looking pretty. It's just turned really hot here in the last couple of weeks, so these little babies will have to wait till colder weather to be used. Can't wait to break these out when the weather turns again.
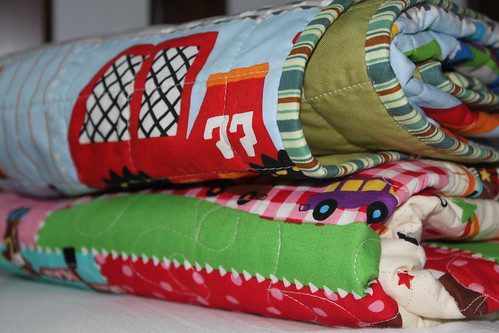
Quilt Info:
Panel Quilt for Silas
Front: 100% Cotton Single Panel
Batting: Warm & Natural 100% cotton
Backing: Solid single color - Green Apple
Completed Dimension: ~43"x 36"
Quilting Method: Straight-Line Machine Quilting - Cris Cross for Rectangles
Binding: Machine Sew to Front and Hand Sew to Back
* * * * * * * * * * * * * * * * * * * * * * * * * * * * * * *
Joining in the fun here:


Monday, June 14, 2010
Weekly Goals June 14 - June 20

Not bad results from last week. All except the Scrappy Pillow #2 was complete. I have no desire at this point to finish it, but I will keep it on the last 'cause I really don't want the 'unfinished' projects pile to development. Slippery slope and all that good stuff.
Here's the list for this week:
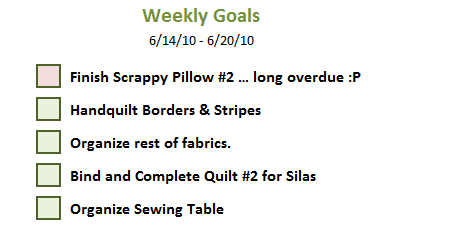
Notice I didn't put Sweet Blocks on the list this week. But I will finish pressing it then I will STAY AWAY from it until next week. I really need to crack down on:
- Organization
- Finishing Projects
- ORGANIZATION!
Sunday, June 13, 2010
Sweet Blocks - A Little Bit of Progress
Been a pretty packed few days but I found a little bit of time to do some piecing and pressing for Sweet Blocks. For the four corners I decided to press to the side of the triangles.
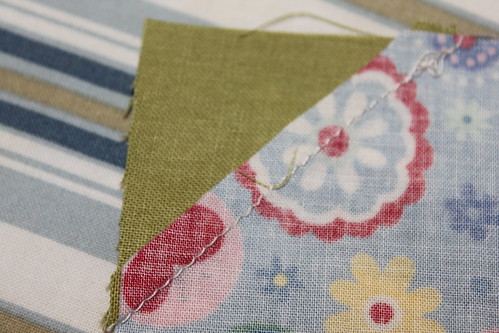
Thought this will give the center of the block some uninterrupted space - no lines, no bulkiness from the seams.
A view from the top:
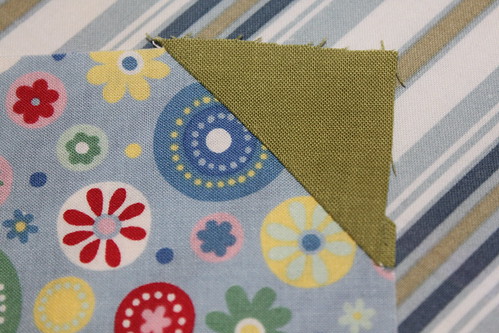
I don't think it shows up so well in the picture, but in person the center of the block is very smooth while the seam is pressed to the side of the triangle. I usually press the seams open for quilt tops but I thought pressing to one side would be better for the block.
Stacked and ready for sashing.
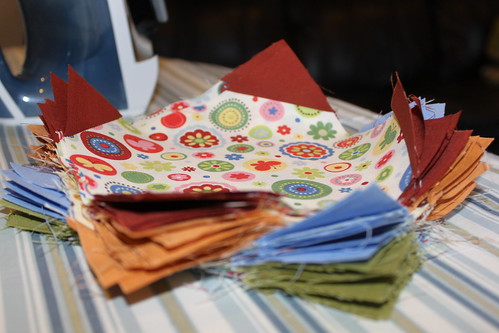
Did I mention how much I love the look of neatly stacked ... anything??
For the sashing I went with Moda solid white. It'll be a nice contrast to the blocks :). Here's another pretty stack with part 1 of the sashing pinned.

Pins :). Beautiful. I enjoy this process.
This is the stage where I left off - pressing part 1 of the sashing. Going to the pressed open seams for pressing all the sashing.
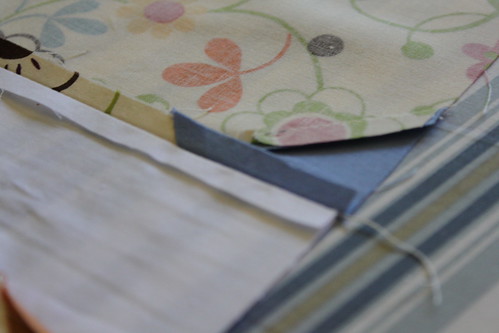
Hoping I could sneak in some time to finish the piecing of the top and bottom of this quilt. Here's the wishing :).
Friday, June 11, 2010
Experimenting with Machine Binding - All The Way
So for all the projects I've done so far I've done the machine sew on the binding to the from of the quilt and hand bind to the back. But with the recent Floormats I decided to try out machine binding ALL THE WAY - front and back. I've heard mixed things about machine binding but I wanted to try it for myself and see if it's something worth doing.
It actually started out pretty well. I machine sewed the binding to the front of the quilt. Then I pinned down the back of the quilt because I read from other quilters so it'll be easier if you pin it until you get used to it. So pinning it is:
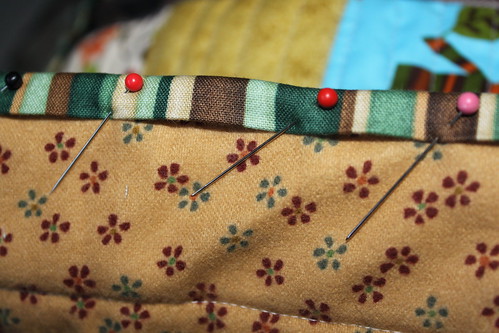
Okay okay so far so good. Not much different from hand binding ... except I don't usually pin down the back like this.
Like I said it was a pretty good start. After about half one into the first edge of the floormat I was in cloud nine and thinking "Geez this is EASY!"

Nice start huh? Nice and even in the back. Only wish I used another thread, but oh well, it's a floormat so you'll never see the back while it's in use anyways. And besides I did the quilting with that thread already so something matches it in the back.
Even the front of the mat was looking very good.

The binding stitch is that smaller spaced out stitch in the ditch of the binding. In person you could hardly see any of the binding thread. Nice right?
BUT then this happened...
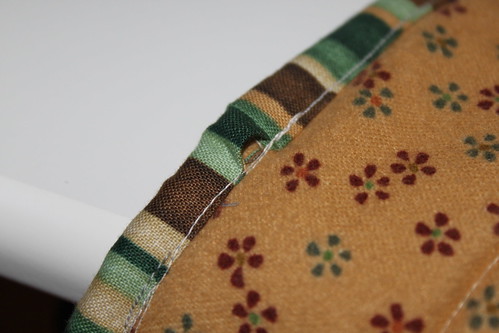
Missed the binding altogether in the front! Arg where's my seam ripper!
THEN this...
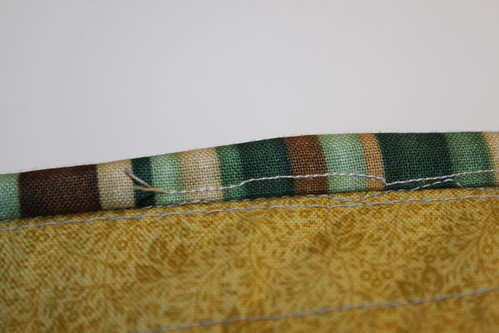
I blame the pins! Just kidding it's me...well me having problems with the pins. Maybe I wasn't using the pins correctly, but every time I had to remove a pin I would tend to loose the grip on the mat and the sewing gets shifted. The results - very messy, very crooked lines.
AND even a little bit of this...
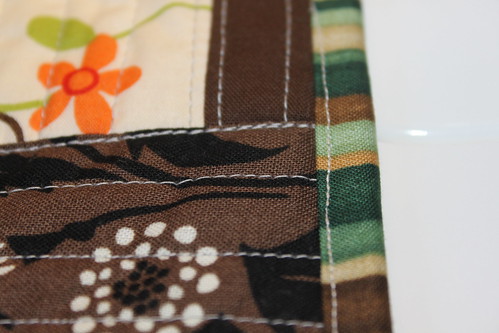
Hey you're not suppose to sew on the binding on the TOP of the quilt! ARG!!!!
COFFEE BREAK! With a little more coffee and a little more patience and NIXING the whole pinning business I was back to this at last :)....
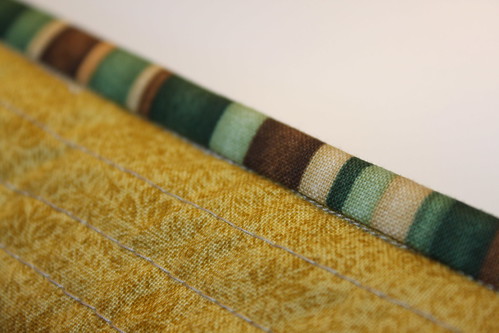
My final method of (almost) NO pins but just taking it slowly and making sure the stitching is straight - I used a few pins when I really needed the extra support in those 'problem' areas. So the method: Sew an inch or two, check alignment, peak at the back of the quilt to make sure the binding is being sewn of the stitch, sew a couple of more inches, then back again to the checking. I sew from the front of the quilt top so I could make sure that I am consistently sewing in the ditch - of course making sure that I caught the back of the binding also with the same stitch
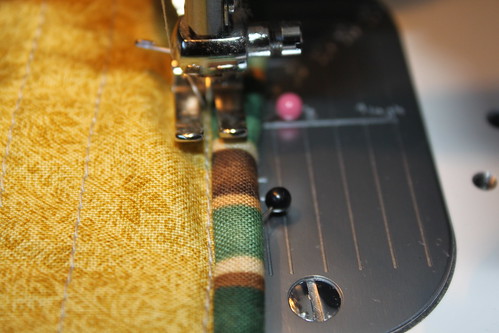
Use pins sparingly. It become a hindrance most of the time, but sometimes you just need it there to hold some difficult spots together - ie: seams of the binding.
I am sure this technique of ALL machine binding will be faster with practice. I don't think I'll use it for most of my projects because the result do show the thread in the back and even a little in the front since the thread in the front did not match with ALL the fabrics used for the front. I will keep trying this technique. Maybe more floormats?? Or if I'm in a pinch while trying to finish up a quilt? Or maybe just for something to change things up a little? Or better yet, when my hands are tired from hand binding? :) Practice makes perfect right?
Thursday, June 10, 2010
It's That Time of Week Again - Sew N Tell!
I'm participating in the Sew N Tell @ Amy's blog this week:
Here's some quick links to my finished projects from this week (it was posted in earlier posts).
Owls Flatmats

Panel Quilt for Asher


Also showing this on:


Playing Around with Way to Feature Finished Projects
On the left hand column of this site I've already had a button labeled "Finished Projects" but it wasn't really mentioned or that noticeable. SO, I include pictures of recently finished projects as well as the button :). It'll be an ongoing thing I'll keep up to track finished projects. I think it's always important to look back and reflect and appreciate past projects.
(on the left hand side of this blog from now on and updated)
Recently Finished
Owls Flatmats
Panel Quilt for Asher
Modded (Brown)
Scrappy Pillow #1
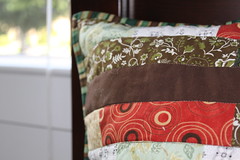
More Finished Projects:

<------This is on the left column all the time on all the pages :)
Tuesday, June 8, 2010
Kitchen Floormat...and Bathroom Floormat
It was mostly out of necessity that I HAD to make some kitchen floormats and I found my inspiration from Red Pepper Quilts. I wanted something a little whimsical too since I have young kids and I always like to put a playful touch to projects that they would use. So I decided to use this owl fabric :):

Amy Schimler's On a Whim Perched Owls Earth. Thank you organized stash :)!
Took some time to cut out pairs and singles of these cuties:
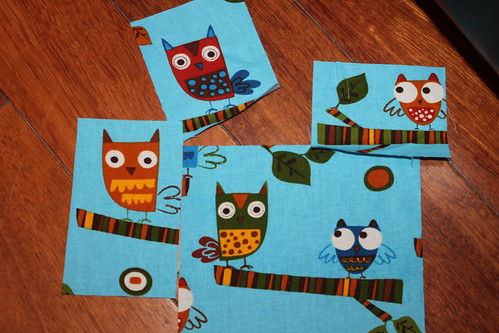
I cut 20 of these out. I tried to make sure I got each of the owls and trying not to be too wasteful with the fabric.
And since the inspiration and design for this quilt was the "Quilt as You Go" I just kind of went for it - with no particular order, color or measurements in mind for the fabric pieces. My parameters for the kitchen floormat was 15"x22" so that was basically my only 'goal' - end up with a floormat around that size :).
Here it goes...
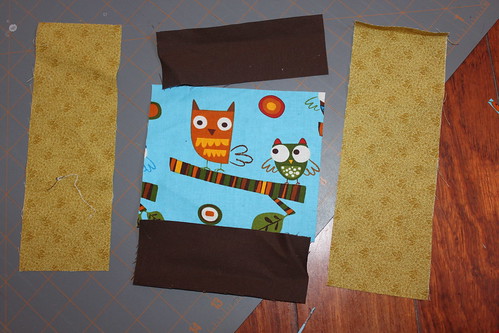
I just started to layout each piece at a time around one of the owl cutouts. Then one that was quilted on, I picked another fabric color and did the same - keep laying it out one strip at it time until I reach the edge of the floormat.
And the results? Here's a look:
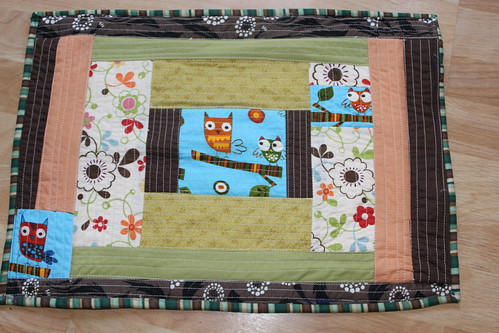
Unfortunately I didn't have a chance to take a picture of this before it got used by the kids - the edges are a little curved and the whole thing got a little wrinkled, but you get a good feel of the results anyways.
I was very happy about the way it turned out - super easy to make and the results are fun and pretty. HOWEVER, it was a bit too small for the kitchen....ARG!
No worries I used it for the kid's bathroom instead :). Win Win. And I get to immediately make a second one :) - this time a little bit bigger to actually use for the kitchen. This time I went with 15"x30" instead of 15"x22".
And voila! A kitchen floormat.
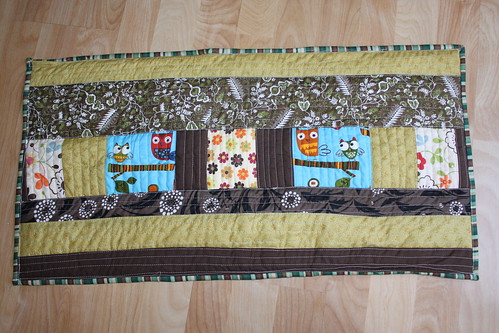
Sitting pretty and ready to use.

In the kitchen and already in use.
A view from the back:
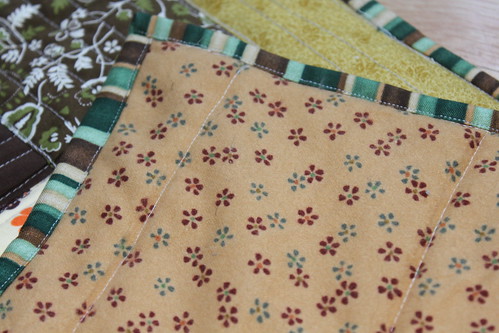
I used a single fabric - a flannel floral design. It's not organized yet so I have no idea what designer.
Not bad for lack of measuring and designing and very quickly put together. I'll definitely use this technique again, but probably with more precision and planning next time :P. Maybe even try to keep the quilting straight next time :).
Here's a closeup of the mat:
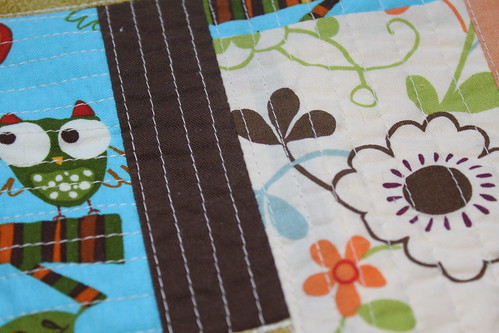
All but the Owl fabric were fabrics from my scrapbox - all fabrics used in previous projects. Could you tell which ones?? :P. I used a cream colored thread and made alternating straight stitches for each strip of additional fabric.
This was also my first time experimenting with machine binding for front and back - I'll do a later post on that experience later. Here's the "GOOD" parts of the trials:

I was very surprised it turned out this well. Though I did have some OOPS moments.
And probably the LAST time you'll see these two floormats together in the same room :).

There you have it, my first floormat, machine binding, Quilt as You Go, cutting for a particular design (the owls) EXPERIENCE. I had a very fun time making these floor mats. I have enough owls cut out for another 2 mats so maybe I'll find some time soon to finish those up. But right now I am loving these 2 I have already.
BTW - I put 2 big owls and 2 little owls on each mat - aka Mom, Dad, and the 2 little rug-rats :).
Quilt Info:
Family of Owls Floormats (Kitchen and Bathroom)
Front: Quilt as You go technique using Owls and Scrap fabrics.
Batting: Warm & Natural 100% cotton
Backing: Single flannel fabric - floral
Completed Dimension: 15"x30" (Kitchen), 15"x22" (Bath)
Quilting Method: Quilt as You Go
Binding: Machine Sew to Front and Back

Amy Schimler's On a Whim Perched Owls Earth. Thank you organized stash :)!
Took some time to cut out pairs and singles of these cuties:

I cut 20 of these out. I tried to make sure I got each of the owls and trying not to be too wasteful with the fabric.
And since the inspiration and design for this quilt was the "Quilt as You Go" I just kind of went for it - with no particular order, color or measurements in mind for the fabric pieces. My parameters for the kitchen floormat was 15"x22" so that was basically my only 'goal' - end up with a floormat around that size :).
Here it goes...

I just started to layout each piece at a time around one of the owl cutouts. Then one that was quilted on, I picked another fabric color and did the same - keep laying it out one strip at it time until I reach the edge of the floormat.
And the results? Here's a look:

Unfortunately I didn't have a chance to take a picture of this before it got used by the kids - the edges are a little curved and the whole thing got a little wrinkled, but you get a good feel of the results anyways.
I was very happy about the way it turned out - super easy to make and the results are fun and pretty. HOWEVER, it was a bit too small for the kitchen....ARG!
No worries I used it for the kid's bathroom instead :). Win Win. And I get to immediately make a second one :) - this time a little bit bigger to actually use for the kitchen. This time I went with 15"x30" instead of 15"x22".
And voila! A kitchen floormat.

Sitting pretty and ready to use.

In the kitchen and already in use.
A view from the back:

I used a single fabric - a flannel floral design. It's not organized yet so I have no idea what designer.
Not bad for lack of measuring and designing and very quickly put together. I'll definitely use this technique again, but probably with more precision and planning next time :P. Maybe even try to keep the quilting straight next time :).
Here's a closeup of the mat:

All but the Owl fabric were fabrics from my scrapbox - all fabrics used in previous projects. Could you tell which ones?? :P. I used a cream colored thread and made alternating straight stitches for each strip of additional fabric.
This was also my first time experimenting with machine binding for front and back - I'll do a later post on that experience later. Here's the "GOOD" parts of the trials:

I was very surprised it turned out this well. Though I did have some OOPS moments.
And probably the LAST time you'll see these two floormats together in the same room :).

There you have it, my first floormat, machine binding, Quilt as You Go, cutting for a particular design (the owls) EXPERIENCE. I had a very fun time making these floor mats. I have enough owls cut out for another 2 mats so maybe I'll find some time soon to finish those up. But right now I am loving these 2 I have already.
BTW - I put 2 big owls and 2 little owls on each mat - aka Mom, Dad, and the 2 little rug-rats :).
Quilt Info:
Family of Owls Floormats (Kitchen and Bathroom)
Front: Quilt as You go technique using Owls and Scrap fabrics.
Batting: Warm & Natural 100% cotton
Backing: Single flannel fabric - floral
Completed Dimension: 15"x30" (Kitchen), 15"x22" (Bath)
Quilting Method: Quilt as You Go
Binding: Machine Sew to Front and Back
Subscribe to:
Posts (Atom)

