Tuesday, January 25, 2011

Celebrate Seuss! Pillows x 2

These 2 pillow are for my 2 boys. The older one (Asher) is a big fan of Dr. Seuss and really excited when I got the fabrics for these. It was his idea to make pillows out of the fabrics. I think he did an excellent job making that decision and I had blast making his vision come true :).

IMG_2825

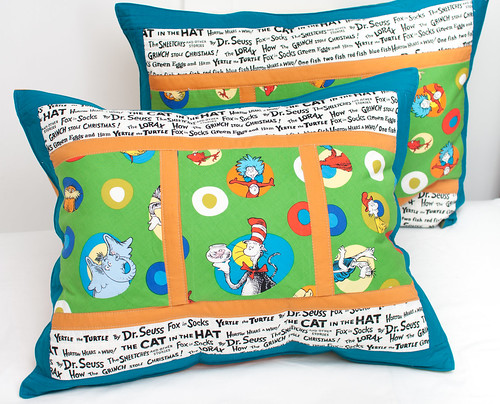
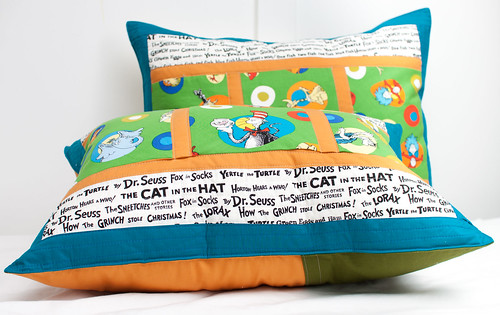
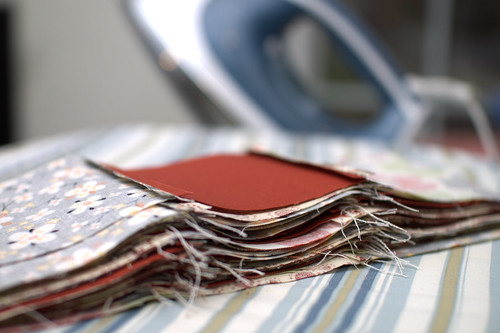
These 2 pillows are designed the same, but they vary by the fabric cut.  I made sure that each pillow gets a good number of characters on them.

seuss_pillow2

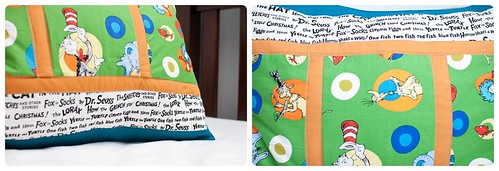
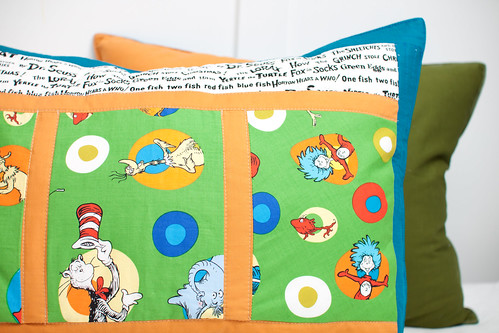
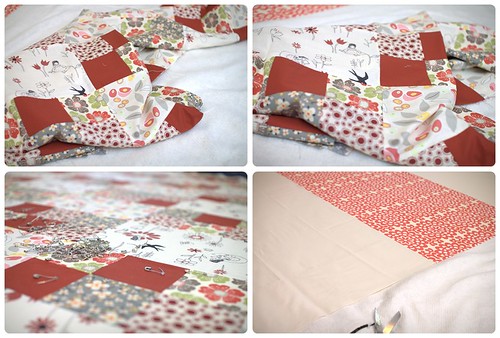
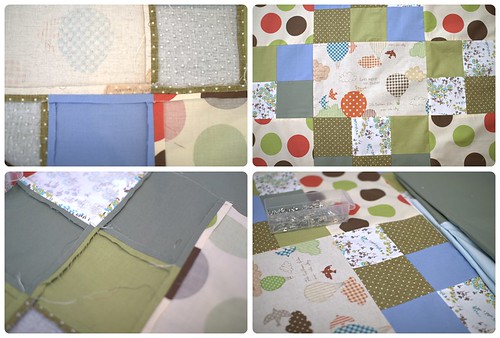
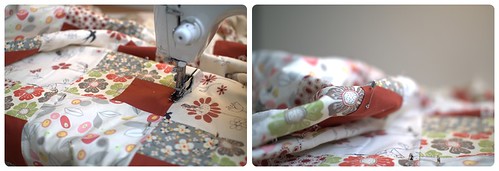
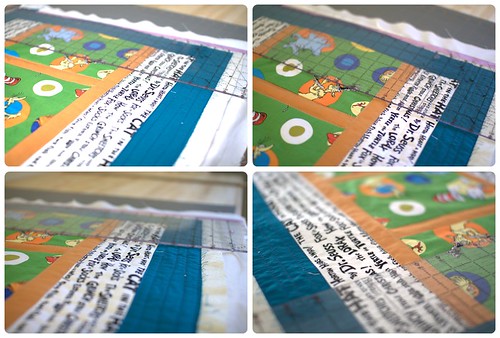
The pillow tops are pieced together and then quilted to create an extra comfy feel. It also created a sturdier pillows that hold its shape very well. As you can see I love to quilt and I tend to quilt all my pillow tops as well :).

IMG_2820

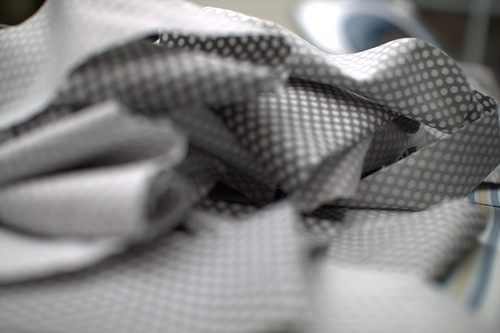
For the back of the pillow I repeated the colors from the pillow top but cut it larger. One of the pillow I used off white and green solids and the other orange and blue solids.

seuss_pillow1

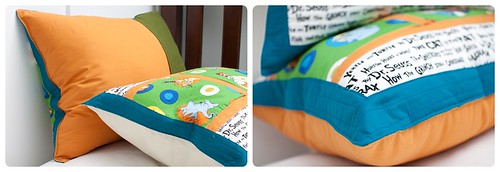
Both the pillows turned out beautifully and they add a very fun touch to the boys' room.

IMG_2828

I'm sharing these fun pillows at these marvelous Linking Parties.

Sunday, January 23, 2011

A Weekend Full of Sewing

This weekend I spent some quality time in my new sewing room and got a lot done.

I got a chance to finish up TWO quilt sandwiches:

Child's Play: For Kohana
childsPlay_sandwich - Copy

Child's Play: Hot Air Balloons
childsPlay2_sandwich

Child's Play: For Kohana even got mostly quilted :).
childsPlay_quilting

The 2 Dr. Seuss Pillows are also coming along. I got the quilt tops completed and now it's just a matter of assembling the back and adding the final touches.

seus_progress_quilting

Feels good to have a productive weekend - especially in a wonderful, clean, organized sewing room.

Tuesday, January 18, 2011

My NEW Sewing Room is Complete!

I am super happy and excited to show off my new sewing room. Many thanks to my wonderful husband and all the hard work he put into making my vision come true.

I'll start off with my favorite new piece of furniture - new cutting table:

IMG_2611

Isn't it beautiful? Plenty of work surface - big enough for bolt fabric cutting and much more. There's also 3 huge drawers and 2 big shelves. Practical, beautiful and it is all mine to use :).  This is also an IKEA piece - it is from their kitchen department - intended for a kitchen island, but I think it makes a wonderful cutting/craft table.

The sewing room is now HARD WOOD! YES!!!! No more dingy carpeting. This laminate 'hardwood' is also from IKEA. Feels fabulous and very easy to clean. Love it!

2595 compare with 2441
Before and after flooring - from old carpeting to beautiful floors.

I also painted one of the walls a gray-blue color - a pop of color - makes me smile just looking at it :)

IMG_2610-2

I couldn't get a picture of the whole sewing table area, but this is a pretty good picture of the organized and clutter free sewing table and shelf:

IMG_2616

Having all those drawers and shelves on the new cutting table REALLY help clear up the sewing area. YEH!!!

Here's a glimpse of the fabric closet. I didn't have time to organize and arrange all my fabrics yet - so I'll update on another post when that is done.

IMG_2614

Here's to many many hours of quilt making and creativity!

Monday, January 17, 2011

Sewing Room - Day 2

Second day and the room is looking great. Got the flooring in - it's a laminate from IKEA. I needed something that would be affordable but still sturdy enough for the wear and tear of a craft room. And my husband chose a very nice baseboard to finish it off:

IMG_2595

Like that wall color - I DO! It's the same color from my son's bedroom. It's called Organic Garden and suppose to be a safer and more environmentally friendly paint than conventional paint. It's sold at most major home improvement stores around here like Home Depot.

IMG_2581

Next up - putting back all the furnishings and organizing the room. I also got a new cutting table for the room - can't wait to get that up!

Saturday, January 15, 2011

A Work in Progress - Day 1

I don't know about your sewing room, but it seems like my sewing room is always a work in progress.  It's been through many, many transitions, but somehow or another it always becomes to room where random stuff always get stored.

Well - enough is enough.  It's time for a complete overhaul of the room and for it to become to 100% sewing room.  That means no more Gift wrap storage area, no more old-electronics-that-is-longer-used area and NO MORE CLUTTER area.


To jump start this 'new' room I have - again - requested to help of my handy man husband, Jeff.  Goals for this 3 day weekend:  take out the old carpet and put in new hardwood floor laminate, redo baseboards, paint ONE wall (the 'accent' wall) and reorganize the fabric stash.  Could this be done?  Who knows :P, but here's the progress 1/2 way into day #1.

 Say bye bye to old carpet:
IMG_2444
Can't really tell from this picture, but the carpet is looking pretty bad. It was inherited from the previous owner and I have been itching to get rid if it since we moved in. This is the last of the 'old' carpet in the house :) YEH!!!


Most tedious part was taking out the tack strip and random nails that were holding down the previous carpet and carpet pad. After those were removed or hammered down the sub-floor was looking good.
IMG_2449 IMG_2524

Next on the agenda for today: remove old base boards, paint the wall and call it a day :P. Hopefully tomorrow we'll be able to lay down the new flooring...

Monday, January 10, 2011

New Projects and THAT Guy

I'm working on a few new projects - here's a quick preview:

1 of 2 quilts from a previous fabric preview post:
IMG_1846
Cut, sewn, pressed, sewn, pressed and repeat...

Getting the binding ready as well:
IMG_1847

I'm also making some pillows using a couple of Celebrate Seuss fabrics. These are for my older son. He loves Seuss.
IMG_2374

And in the middle of all this work? A find this little guy:
IMG_2376

:) Darling isn't he? P That's my younger son having fun inside one of the new containers I got for projects.  He's going to turn 2 next month and he is HILARIOUS!

Cheers and happy sewing.

Monday, January 3, 2011

Red Poppies FINISHED

Welcome Red Poppies :).

IMG_1930

After months of sewing, pressing (repeat repeat repeat), quilting and lots of distractions due to the holidays I finally got a chance to finish Red Poppies.

The poppies, buds, and steams are all raw edged appliques set in a white background.

IMG_1990

Each area of the poppies are framed with matching fabrics.

IMG_1935

The binding is a matching dark red fabric with a slight stripe and circular pattern...and check out my new labels in action :).

IMG_1959

For the back of the quilt I used off white as the main fabric with a giant strip of a beautiful red floral fabric.

IMG_1986

I am very excited about the way the quilt came out. It was my first time doing appliques on a quilt and I think I am a FAN :).

This quilt will be sitting on my quilt closet awaiting a new owner :).

IMG_1968


Quilt Information:
Red Poppies
Front: 100% Cotton Prints and Solids.  Raw edge appliques.
Batting: Warm & Natural 100% cotton
Backing: 100% Cotton Prints and Solids
Completed Dimension: 74" x 90"
Quilting Method: Free Motion Quilting around appliques.  Straight line quilting along the framing straight fabrics.
Binding: Machine Sew to Front and Hand Sew to Back

IMG_1946

I will be sharing the quilt at these very lovely Linking Parties.

LinkWithin

Related Posts Plugin for WordPress, Blogger...