Friday, April 30, 2010

Sewing Up Some More Napkins


I've been making my own cloth napkins for almost a year now.  I have a basket full of cloth napkins ready to use by the kitchen table.  So far it's been very nice to have it around.  I have a 1 year old and a 3 year old so meals and snacks get very messy and sometimes a paper napkins does not cut it.  Even with the cloth napkins, we sometimes go through 2 napkins per kid - it really adds up$.

Basket of napkins and bibs.  When all the napkins are washed and folded this whole basket is more than full.


A quick snapshot of my napkin basket.  It's usually very full of only napkins.

I made about 40 napkins so far - some has gotten pretty used and some as disappeared.  So I'm on a mission to make more. I thought about making some fancier ones with different patterns or patchwork but I'll wait until the kids abuse them a little less.  For now, these simple one-ply cloth napkins will do just fine.  Here's a quick rundown of how I make my napkins.


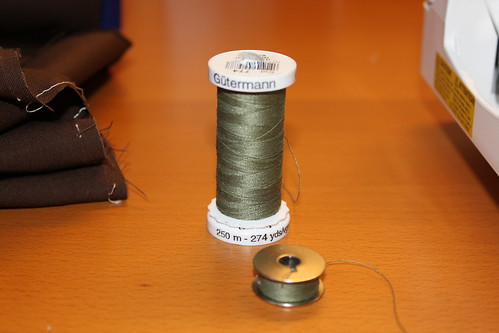
What you need: Scissors Measuring board/tape/ruler Sewing Machine Cloth - prewashed and ironed (I use a 100% cotton cloth normally used for quilting, but any kind of cloth would work depending on preference)

Time Needed:
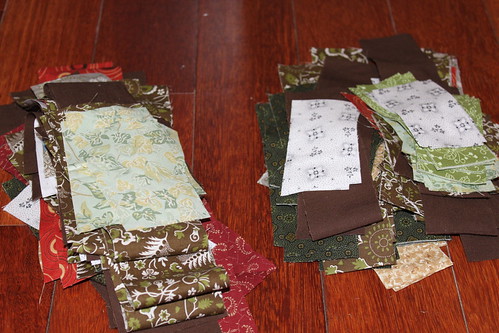
About 3-5 minutes to make one (cutting and sewing). I cutted up 20 squares the other night, and sewing them as I need them.
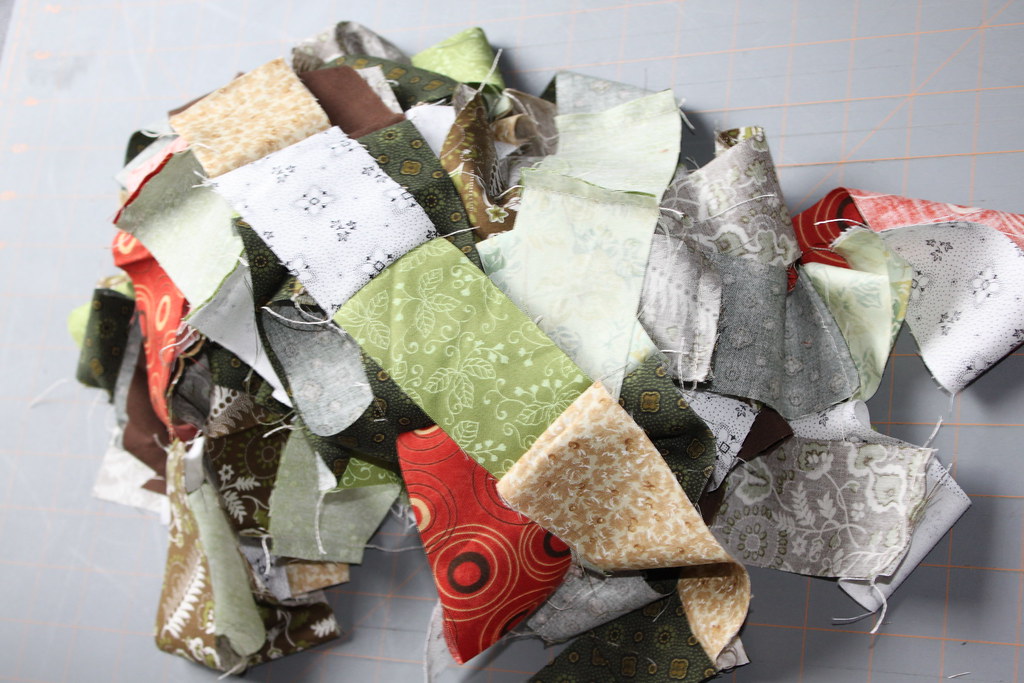
Step 1:
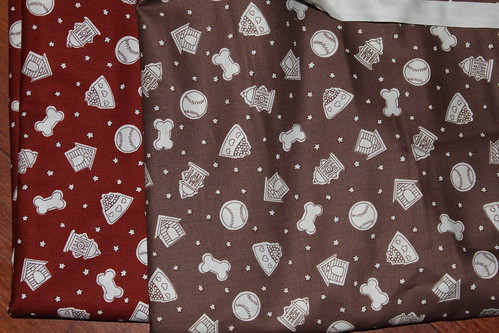
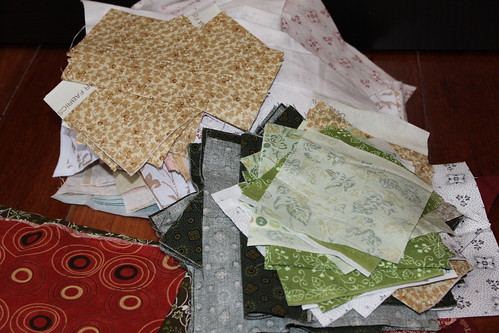
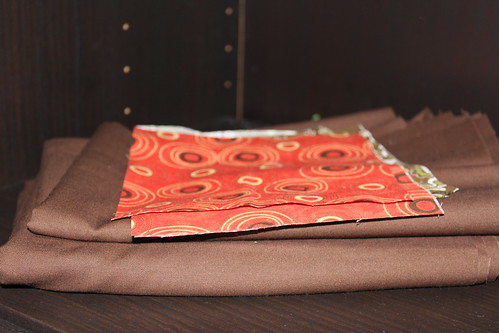
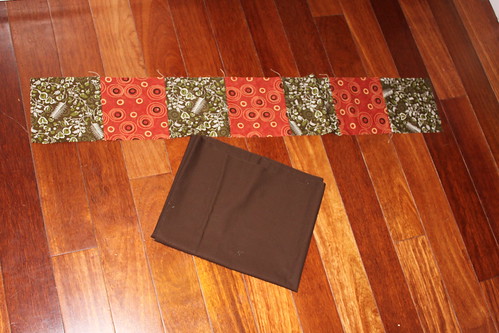
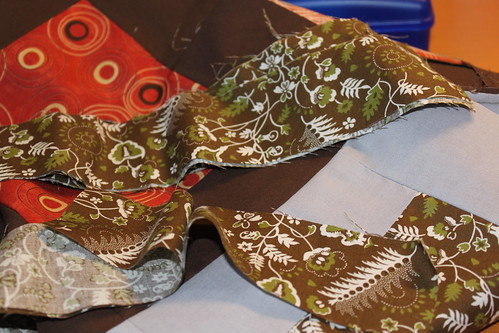
Cut cloth into squares. I cut 18x18 inch squares, but any dimension will work depending on preference.  I usually use whatever fabric is cheap but still durable and looks nice.  My napkins don't watch and I don't really make a point of trying to get the same cloth every time :).  Up to you.  You may want to make a huge batch at one time to always have the same fabric on your napkins.
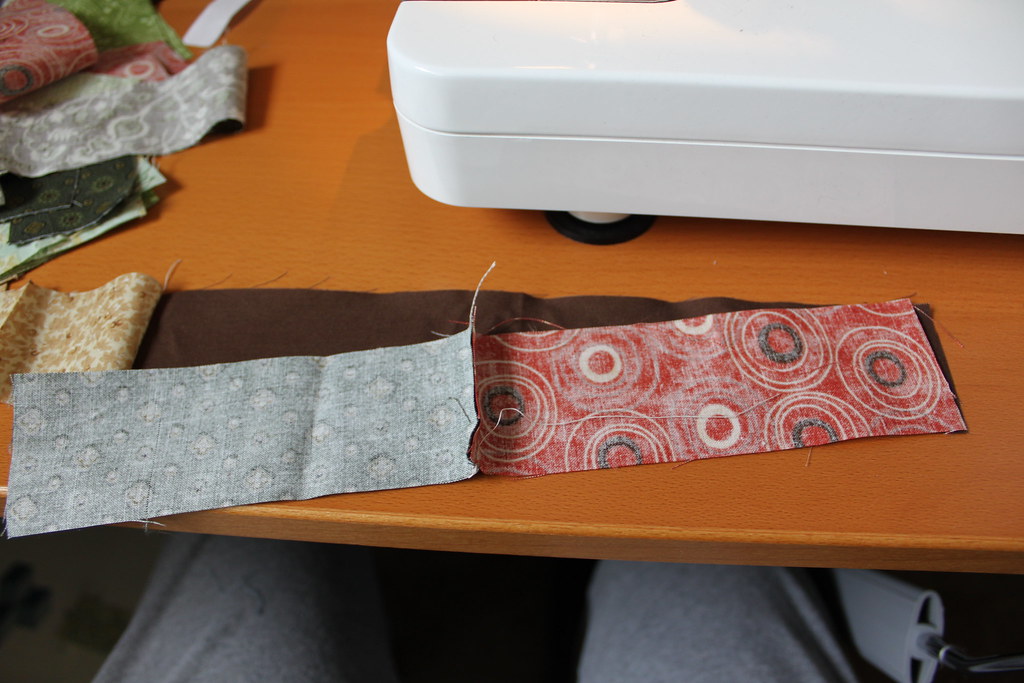
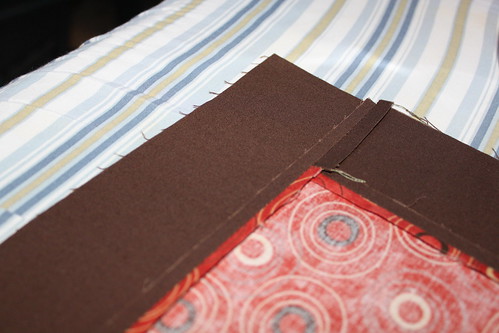

Step 2:
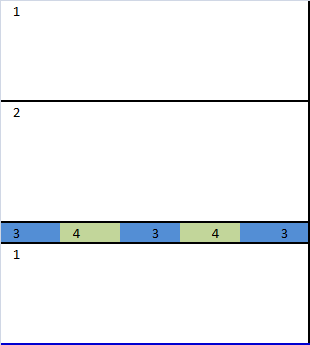
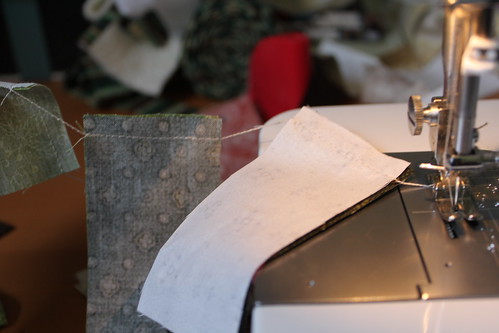
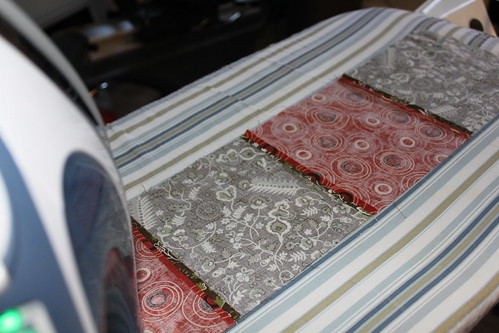
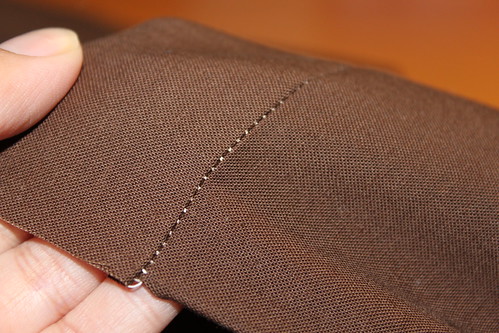
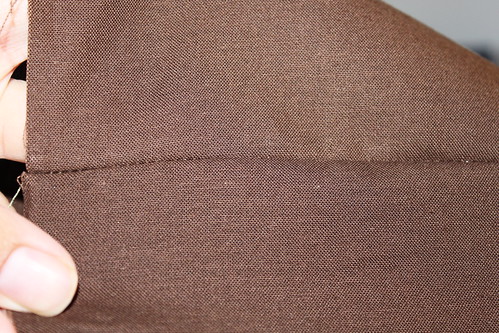
Sew all four edges. I folded over the edges twice and sewed it down. The corners are simple square corners.

Fold over twice and sew.

Sewing the corner.

Step 3:
Fold or just throw into a basket and use when needed :). I fold it up and put it with Silas' bibs right on the dining room table.


How to Clean:
I just throw them in a basket with the kitchen towels and baby bibs (slightly rinse beforehand if there's too much caked on stuff) and wash it in hot water in the washing machine about once a week or whenever the basket gets full.

Reasons why I love having cloth napkins:
  • It's been quite convenient because they are super easy to wash up and reuse.
  • More durable than paper napkins
  • Since I usually wash all my kitchen linens once a week anyways, these napkins just gets thrown in the same wash so no extra wash necessary
  • Saves $$ by not having to by disposables constantly.  Again since these are washed in the same wash as the regular kitchen linens, it doesn't cost any more money to wash the cloth napkins.  Well maybe a little bit of extra money because it takes longer for the dryer to dry since there's more things in it now.
  • Teaches the kids about conserving and reusing.
  • Always a conversation piece when we have guest over.  I thought people wouldn't want to use our re-used (over and over again) cloth napkins, but people absolutely do not mind.  They always think it's a great idea.
 Though cloth napkins are working wonderfully for our household it may not work for yours.  But I do recommend that people at least try it.  Buy or make a couple per person in your household.  If you don't have enough linens to complete a wash, try throwing it with your normal laundry.  Keep track of how many disposable napkins you're saving each day and decide for yourself if you prefer the cloth over paper.

Thursday, April 29, 2010

Extended Checked (White & Blue) is Complete!


The simple design of two different colored rectangles, checkered is quilting, binded, washed and dried and ready for use.  Here's a picture of it on my son's bed.
IMG_4088
Laying peacefully on my younger son's son-to-be bed (he's still in a crib :)).

The whole quilt consisted of 4 different fabrics: 2 for the front, 1 different one for the backing (as well as a little from the fabrics on the front) and binding.  I wanted to keep this quilt simple to show off the blue fabric that I like so much.  Speaking of which, here's a close-up of the blue fabric.

IMG_4076
I really liked the way the white fabric went with the blue fabric - it had just enough design to not be plain, but not too much to distract.  Notice for the binding I used a dark green fabric with geometric floral designs.  It contrasted with the quilt top enough to add as a obvious border, but matched enough to - again - not to distract.

The overall results of the quilt - simple but elegant.


A look at the quilt top:
IMG_4064
It was rainy and dreary so I couldn't go outside or get good lighting inside the home.  So when there was a little spray of sunlight I had my husband hold up the quilt for me to take a few quick snaps with the camera.

A look at the quilt back:
IMG_4065
This picture didn't turn out as well.  Unfortunately, the little spray of sunlight through the room was gone by the time I got around to back of the quilt.  In case you can't make it out, the back was all white except for a strip of a color using the fabrics from the front.  Noticed that I changed the design a little on the back - mainly 'cause I ran out of that beautiful blue fabric.


Another thing that was not planned during the design stage of the quilt was how the quilting was going to look.  I thought about a free motion pattern, but decided against it because I didn't want to make the quilt look too busy - I wanted to maintain that simple look in the quilt.  So, I went with a straight line, straight stitch across the width of the quilt.  Each line is about 1.5" apart.

I stitched in the ditch first on every seam across the width.  However, I didn't really like the straight stitch really much,  so for the stitching that were not 'in the ditch' I decided to give it a slightly 'pulled' look - creating a little texture and definition on the quilt.  The results were quite obvious in this picture with the lighting:

IMG_4082
This lighting totally exaggerated the crinkles from the quilting.  In person the crinkles are not quilt as exaggerated and is pretty subtle.

 I really like the look of this quilt.  It accomplished the feel I was going for - simple but elegant.  I think I'm going to keep this quilt and give it to my younger son because I was - and still am - clueless on the quilt I should make him.  Something that he could grow into.  Actually, I think this will be a great quilt for him.

Another one COMPLETED! :)
IMG_4075
Doesn't it look pretty all folded up? :P


 Quilt Info:
Extended Checkered (1-Blue & White)
Front: 100% Cotton Print Fabrics
Batting: Warm & Natural 100% cotton
Backing: White Broadcloth 100% cotton
Completed Dimension: ~53"x77"
Quilting Method: Machine, Straight Stitch - Straight lines ~1.5" apart
Binding: Machine Sew to Front and Hand Sew to Back

Wednesday, April 28, 2010

Weekly Goals: April 28 - May 9


I couldn't wait till Monday, so this will be a long Weekly Goal :).
(will be out of town May 6-9)

Weekly Goals:
  • Baby Rose design *.pdf completed and posted 
  • Completed log for Extended Checkered
  • Hand bind Scrappy Pillow #1
  • Make pillow fill for Scrappy Pillows #1
  • Assemble pillow bottom & zippers for Scrappy Pillow #1
  • "Borders & Stripes" cutting and piecing (design and post to come)
  • Finish Sandwich and basting for Modded (brown)
  • Update Current Projects & Finished Projects lists
I'm not going to be really hard on myself if I don't finish everything on this list.  However I will continue to put any unfinished items on next week' - and continue having it on the Weekly Goals list until that task is complete.  Hopefully this will be a good method to end unfinished projects...haha at least some of them :P.

Weekly Goals


Since the Spring Goals post I have been thinking a lot about what I want to accomplish for this site and for my craft.  Right now I try to dedicate a couple of nights during weekdays to sewing/design/blogging.  This usually end up being about 4 hours during weekday nights.  I rush home from work with tasks in mind and try to complete at least one of those tasks that night.  This usually is a short stretch of time since I have to juggle that time with preparing dinner and cleaning up the house before my husband gets home after picking up the kids.  On a good weekday night I get about 1-2 solid hour dedicated to my craft - usually 1.

On the weekends I try to squeeze in about 2-4 hours a day for crafts.  It's usually the time when one of the kids are asleep or when my husband is out with the kids (ie: walks, errands, etc).  It's hard to come up with a good solid block of time on the weekends since it's usually spent running errands or hanging out with the family.  I wouldn't want to spend more than 2-4 hours a day on weekends on crafts anyways since this should be family time. 

My long time goal is to spend more time on weekdays for my crafts and less time, or at least only NEEDED time, on the weekends.  How to accomplish that goal?  I'm not quite sure at this point.  Financially, it's not a good time for me to quit my full time job or even go part-time and the days are NOT getting any longer :P.  However, I am hoping the the first choice (quitting or working part-time) would open up in the future.  For now, I am trying to get into work earlier so I could leave early and hence get to my crafts earlier.  I am trying to organize my Weekly Goals at the end of each week in preparation for the next.  I am trying to organize my sewing room so that I am not wasting time trying to find things or make room for things. 

So, hopefully with the installment of Weekly Goals and lots and lots of organization I can design, create, and have more peace in my craft and hopefully that would transfer into a more peaceful family life also. I am working on my first installment of Weekly Goals as we speak. 

Cheers to goals!

Saturday, April 24, 2010

Adding to The Stash - Man's Best Friend

I couldn't help myself - I picked up 2 yards of fabric this week. Normally it's no big deal, but the 2 fabrics (1 yard each) is something that I have no idea what I'm going to use it for or is something that I usually pick.

Here's a photo of them:

 IMG_3392
One yard each. Same design - just different colors.

Yep, it's a dog motif - dog bone, dog house, dog food, and ball.  The fabric is by designer Yuko Hasegawa called "True Companions Toys" in Rust and Brown.  I guess I was thinking of my two real life dogs when I was picking these up.  Don't get me wrong, the design is very adorable and the fabric quality is great.  However, I'm not quite sure what to do with this.  I have no other fabrics to match or really go with this.

One thing I considered using the fabric for is pillow tops or a dog sheet/pillow for the dogs.  But it is a 100% cotton print fabric meant for quilting or similar purposes - I usually use a coarser and more heavy duty for making dog bedding.

For now this fabric will remain in my stash and hopefully I'll find a need for it soon.  It is very nice to look at since it always remind me of my first 2 babies.

IMG_2757
A picture of Crackers and Locke.  Since our second son came along these days have taken a permanent home in our courtyard outside.  Kid allergies, dog messiness and a smaller house all factor into the dogs no longer being inside.  It's been a big change, but they seem like they are really enjoying being outside :). Makes it easier to keep my sewing projects pet free and the kids from rashing up.

Thursday, April 22, 2010

Extended Checkered Has Started

One of my Spring goals is to complete this Extended Checkered quilt. It's a basic rectangle blocked quilt top using two different colors in the center and binding. I don't have anyone in mind for this quilt either.  But I really wanted to use the blue print fabric I had.  I didn't have much of it, a little over a yard, and the print was very nice.  I wanted to create simple that would showcase the fabric.

The quilt top design:
extendedCheckedFront
Keeping it simple to showcase the fabrics.  


The quilt backing.  I used a white Muslim 100% cotton fabric for the majority of the backing.  I used a little bit of the quilt front fabric for the backing.

extendedCheckedBack
Keeping the back of the quilt simple also.  I ran out of the blue fabric so I tried to use what was left of it for the back - not much left :).

I pieced together the quilt top and bottom a couple of days ago.  It is all ironed and ready for the basting.  I used Warm & Natural 100% cotton batting.  The quilt is about 53"x73" so I had to clear out my entire living room floor to make room.  Lay the batting on flat on the floor - enough for the quilt top and then some.  Then put the quilt top on top of the batting and SMOOTH SMOOTH SMOOTH.  Make sure you smooth from the middle out to all the edges.  This takes a bit of time, but it's a very important step. 

IMG_4003
Pictures is the smoothing process.  As you could see here, it's not enough to just put the quilt top on the batting.  If you don't take the time to smooth out this process, you're going to have a lot of tugging during the quilting process.  As you could see here there's still a lot of bumps to smooth out.

Once again I'm out of time for my projects.  This is a good stopping point because the smoothed out batting and quilting top needs to be rolled up anyways.  It'll be rolled up and ready to put the quilt backing on next time I have time to work on this - again I need to clear out my living room floor again :).

Tuesday, April 20, 2010

Scrappy Project Continues - Scrappy Pillow

For my scrappy project I decided to make a Scrappy Pillow.   It's also one of my Spring goals to make 2 items that are NOT a quilt this spring.

I made a strip about 14 yards of 2" wide straps. I cut the strip into 22" pieces.  This created about 32 pieces of 22" long and 2" wide fabrics.

I arranged the pieces together to make sure the same colors did not always end up on the same area on the pillow top.  

IMG_3958
Making sure that the colors were arranged in a flattering manner.  At first I thought I had enough for 3 pillow tops, but after playing around with it a little I decided that it's better to make just 2 pillows - each a perfect square.

There were enough pieces to create two pillow tops - each 16 piece.  My goal was to have two perfect square pillows.  Just to make sure that there were enough strips to make a square, I only worked on one of the pillows in case I needed to make adjustments to the other.  The impromptu project :).

After sewing and pressing I had my perfect square!
IMG_3970
I was so glad it worked out to be a square.  I didn't want to make the pillow any smaller since I wanted an over-sized pillow. To piece it together I used a generous 1/4" seam sew.  

This piece of the project was only the pillow top.  I wanted something more significant than the pieced part to be the pillow top.  I decided to sandwich the pillow top with some batting and add a packing to it - all JUST for the pillow top.


Measuring out the backing:
IMG_3971

Then adding the batting in between the backing and pillow top:
IMG_3979

What's next? Pinning the sandwich together for quilting, quilting and then decided which fabric to use for the back of the pillow and binding.  I also have to decide what to do with the pillow enclosure.  With kids I want to make the pillow top easy to remove in case I needed to wash it often.  Zipper?  Buttons? Velcro?  Not sure - I'll look around for ideas and hopefully I could finish up this project before spring ends :).

Monday, April 19, 2010

A Spring Challenge!

So one of the blogs I visit often is Tallgrass Prairie Studio.  Today Jacquie and  Spring Challenge.  Premise - list of projects that you want to finish in this spring - six weeks from today.  She's going to have a half way mark check in too.  What a great idea!  I took this as a challenge to think of my own projects and which one I want to set up a 6 week goal of finishing.

Here's what I came up with:
  • Finish Modded Brown Quilt (first quilt that's not ear-marked for anyone!).


    • This is I started already but I am DETERMINED to get it finished by the half way mark in the spring challenge.
  • Start on Extended Blue/White quilt.  This is been cut up and ready for piecing.  Photos and update to come.
  • START a quilt for my younger son. Haha he's over 1 and I still haven't gotten around to making him a quilt yet. The yard part for making quilts for the family is deciding on the fabric. I don't want to make him a baby quilt because I want something that he could use for his awaiting twin size bed. So I still have some time :).  I changed the goal slightly from the original because I really don't think it's possible to get it finished by 6 weeks.  But I am going to at least start on it!
  • Make some NON-Quilt items: pot holders, pillows, place mats, etc etc etc. Oh wait. Ok I'll stick to TWO NON-Quilt items.  Well on my way with the Scrappy Project.
Thanks Jacquie for the quite inspiration and setting goals!  Must resist the beautiful California weather and stick to these goals :).  At least I have these pretty things to look at while sewing:

IMG_3961
Two orchards from my living room.  

My OTHER goal (not sewing related) is to keep at least one orchid plant alive for more than 1 year :P.  I heard orchids were easy, but I have been having the worse luck with them.  Here's to setting goals!

Sunday, April 18, 2010

Modded Brown Continues - Quilt Sandwich

Time to break out the roll of batting and start sandwiching.  For most of my quilts I like to use Warm & Natural 100% cotton batting.  I brought a huge roll a while back and have been chipping away at it.

A few housekeeping task - clear out the rug area (the largest open space I have in my home right now), occupy the kids with other activities or put them down for a nap (you don't want kids to be running around while doing this task - for starters it takes up the whole living room!), and drag out the huge roll of batting.

I put the batting roll on one end of the room and start rolling it out to the other.  Make sure that there is enough batting for the size, 48"x67" in this case.  Make sure there is plenty enough extra batting on all size of the quilt.  I usually leave about 3 inches on each side.  The batting should be smoothed out completely before putting on the quilt top.

 IMG_3993
The roll of Warm and Natural spread out and ready for sandwiching.  In this picture I didn't smooth out the batting yet - so make sure you do so before putting on the quilt top!

After the batting is smoothed I lay the quilt top on the batting - make sure to leave around 3" of batting on all sides.  When the quilt top is placed in a good spot - SMOOTH SMOOTH SMOOTH down both the layers.  This is very important - making sure that there is enough batting on ALL sides of the quilt top and make sure that there is an even, flat contact between the quilt sandwich and batting.

When I know that the batting and quilt down is as flat as possible I cut around the quilt top, leaving about 3" of batting on all sides.  The quilt top and batting sandwich is now ready for the quilt backing.

The kids were waking up at this point so I needed to give up my open space.  What I do when I don't have time to finish the quilt sandwich is to roll up the quilt top and batting sandwich together into a log to be used later.
Here's a picture of the quilt top and batting sandwich being rolled up.

IMG_3994
I roll about a foot deep along the short side of the sandwich.  Keep rolling until the whole sandwich is nicely tucked into this roll.  

Once the sandwich is rolled up, it could be stored away safely until I am ready to assemble it with the quilt backing.  Hopefully this is sooner than later :P!


Friday, April 16, 2010

Going Through the Scrapbox

My scrap-box (aka the little brown box of leftovers) was getting a little crowded and I needed break from making big quilts.  So I emptied the box the examine the loot.  Here is what I found.

IMG_3864
A nice pile of fabrics - ranges to about 3" to 10" pieces.  


Find that there were two main color themes in the scrap pile - light colored (whites, beiges, pinks) and earth colors (browns, reds, greens).  So I went ahead and divided up the piles first to evaluate what I have.  Turns out I have a lot of earth tones, so I decided to work with those.  Still not really knowing what I'm going to do with these scraps, I forged ahead and cut two sizes - 2.5" strips and 2" strips.

IMG_3888
2.5" cuts on the left, 2" cuts on the right.

 The piles were done and I still have no idea what I'm going to make out of it, but I did know I wanted to keep it simple and small - I didn't have that much scraps.  So I decided to make a scrappy-strip pillow top.  I didn't really want to start measuring since this project as been so improv, I didn't want to start ruining that dynamic.

I decided to use the 2" cuts to make the pillow top - have no idea how many, or how big.  With no plan in mind, I decided to start assembling the 2" cuts to see how much fabric I actually have.

Assembling the 2" strips in chains.  Start with chaining together 2 pieces each.  Then cut the strings, then chain the chains together.  Keep doing this until you have one big giant piece.  Turned out I had about 14 yards of 2" pieces after it's pieced.

IMG_3892
The chain.

IMG_3894
Chaining the chains.

The results of hours of cutting and sewing and pressing.
IMG_3896
The pieced 2" strip.  Ended up to be about 14 yards of fabric :).

Next I'll have to decided how big of a pillow top I want to make :P.  Hopefully I get more than one pillow out of this exercise. 


Tuesday, April 13, 2010

Cutting Long Strips

Doing something new again ... cutting fabric into long-long strips.  Which ones?

Remember this?
IMG_3383
I'm going to tackle the one with blue flowers first - pictured about 1/3 of the way down.

Yep it's the Bryant Park fabric I got a little while back.  Still don't have a concrete design in mind yet for this fabric - though I have a few things in mind.  All of which involves cutting the fabrics into strips.  So, let's get snipping.

I'm going to do the one with blue flowers with long borders first - Bryant Park Floral Stripe Natural (I think - again I'm not good about keeping track of my fabrics especially the design names).  Since I'm cutting along the length of the fabric and the one with blue flowers is 2 yards long, I decided it'll be easier to tackle the cutting with scissors.

Where to cut?  There's a brown border running along side the flowers.  My first instinct was to cut that in the middle and try to keep some of the border in the quilt.  But since the brown border was less than 1" wide it will not be significant if I tried keep it in by cutting it in half.  So I decided to cut two types of strips - one with ALL the brown border on both sides and one with no brown borders at all.

The first cut - oops I should have cut on the OTHER side of the brown border!  Arg - oh well onward....
IMG_3869
First cut - not so cool.  I was suppose to cut on the other side of the brown border.  Oh well, not I have more selvage to use for misc projects :(.  Check out Jacquie's blog for a cool selvage project.


Cut cut cut...
IMG_3872
Showing off the two different strips I get from one fabric - the one with the brown border is about 7 inches, and the one without is about 5 inches wide.  All the strips are 72" long - perfect for a full quilt width or maybe a lap quilt length-wise?

Cutting with scissors after using a rotary cutter for all other quilting cutting was different.  I love the feel of the scissors against the fabric - I use a Clauss 8" scissor - quite heavy and feels solid.  Some may think that's a little odd - but I also use wooden #2 pencils for almost the same reason.  I just really like "old fashion" equipment.  I like the heavy feel of it, I like how it's very reliable, and it last FOREVER!  Haha okay, a #2 pencil does NOT last forever, but it's been around for almost forever :P.

Okay back to the fabric.  After cutting along all the borders,  this was the result:

IMG_3874
The Stack - 4 strips without brown border, and 3 with.  Can't wait to find out what I'll decide to do with this ;).  Wish I have more time to design...


I'll update once I decide on a design :).

Monday, April 12, 2010

Boxed In Completed!

It's done!  It's done!  I felt like a lifetime ago, alright not quite :P, but IT IS DONE!  After nights and nights of hand-binding this lap size quilt it is now ready to be packaged up and handed off to my sister.

Here's some evidence of the completion:
IMG_3877
A whole 41"x59" of completed quilt.  The colors don't show up all that well in this picture, but you could get a feel of the quilt.

IMG_3879
Another view of the whole quilt.

A closeup of the front:
IMG_3881
I have a little worried about the color scheme for the blocks, but I think it turned out pretty good.  I really like the way out sashing around the blocks went together so well with the blocks.

Here's a closer view of the top and back:
IMG_3883
For the back I used an all white broadcloth.  I was afraid any business from the back would be a little too much for this quilt.  I went with a free motion swirls for the quilting style - about 1-1.5 inches apart.

A closer view of the binding and quilting:
IMG_3880
The hand binding gave the quilt a very nice finish.  The binding matched the color of the inner most fabric of the blocks.  Even upon close inspection, the thread was hidden in the binding. 


My sister don't really know much about quilts.  After I completed my hand-quilted one she really wanted one of her own and I was happy to help out.  Her request?  Something with a reddish theme to use on the couch.   However after completing this quilt and working on the Modded (brown) quilt, I think she may like the Modded one more actually.  We'll see.  I'll give her a choice when both are done - she may have to wait a little longer if she decides she wants the Modded one instead.

 Quilt Info:
Boxed In (1)
Front: 100% Cotton Print Fabrics
Batting: Warm & Natural 100% cotton
Backing: White Broadcloth 100% cotton
Completed Dimension: 41"x59"
Quilting Method: Machine, Free Style - Swirls 1"-1.5" apart
Binding: Machine Sew to Front and Hand Sew to Back

Friday, April 9, 2010

Disneyland - A Late Post

So this was what we were doing last week:


Greetings from the Magic Kingdom!

The kids (Asher and Silas) had a blast.  We could hardly keep them still for this picture.  Asher (the older one) was wanting to talk to Mickey Mouse the whole time and Silas (the younger one) wanted to poke Mickey's face.  Definitely a great memory.

We had the 3 day pass and it was non-stop the whole time.  Along with Disneyland, there was California Adventures right across the way, and Downtown Disney.  There were rides and sights to see for kids of all ages.  Definitely will consider going back there sooner than later.  Asher was 1.5 inches shy of 40" - the height requirement for the bigger kid rides - oh well.  A lot of the bigger rides has height requirements - 44" and 48".  But even Asher and Silas had enough rides to keep them busy.  Actually we didn't even see everything.
 

Modded (Brown) Update: Assembling the Back

I'm taking a forced break from finishing the Modded quilt top - I was short 2 inches from the left and right side of the inner border.  I didn't notice until I got it all pinned - got to the end and notice that I was about 2 inches short.  I'll get those cut this weekend.  I don't like cutting during the weekdays - not enough time and it gets pretty messy with all the equipment and scraps.

So I'm going to move onto the top - until Sunday (plans with the extended family on Saturday - don't you wish you could just skip out to quilt all day instead sometimes???).  For the back of the quilt I decided to do a single patched strip using the colors I used for the inside of the blocks on the front of the quilt.

Here's a refresher of how the front looks like:
IMG_3825
Notice the olive fabric and the red fabric on the inside of the blocks - those are the 2 I'm going to use for the back also.

The rest of the quilt back will be the same Moda mocha color as the quilt top. The basic design will look like this:
moddedBack
The two strips labeled 'D' is the same fabric both the 'C' panels. 'A' and 'B' represents the olive and red fabrics alternating.

 On with the work.  Here's The Stash' after the fabric was cut.  I'm always amazed by the tiny stack of fabric - it always seen so...tiny.
IMG_3794
Getting it all ready to be pieced together.  This was cut when the quilt top was cut.  I try to do all my cutting at the same time :).

After the piecing, a quick pass on the iron.
IMG_3816
Single strip of blocks - pressing it was easy-peasy.


Now I just need to attach those 2 big panels on either side of the block strip and I'm done with the quilt back - well after more pressing of course.  Here's the beauties lined up ready to be sewn together.
IMG_3822
All ready for the final stage.

Wow got a lot accomplish in a short time.  What's left on the quilt?  A LOT.  Next, I need to finish the back, cut those mixing 2 pieces for the front, and start putting together the quilting sandwich.  Yes the quilting sandwich.  Ever since I got a huge roll of the Warm and Natural instead of the pre-cut pieces I've been avoiding the batting.


Here's a pretty outdated picture of the roll:
IMG_3370
Pretty outdated picture of the Warm and Natural Batting roll.  Don't mind the mess around here - it was during the pre-cleanup stage of the sewing room

Pretty intimidating taking that roll out each time.  But I like it.  It give me the freedom of making the quilts in whatever size the design is.  So far I'm like the off right color of the natural batting.  I try to stay away from bleached material.  I guess if I'm working with a very light colored fabric that I don't want the color to be compromised I will consider getting a pure white batting roll.  But for now, this will work just fine - without the extra bleaching.

Thursday, April 8, 2010

Being Lazy Does NOT Pay Off

I'm sure most of us, if not all, have taken some kind of short for a quilt.  Waiting till a quilt top is almost complete before touching the iron, stacking up a bunch of fabrics to cut at one time, machine binding instead of hand binding, etc etc.   But most of the time shortcuts are fabulous.  They could be a great time saver, and in the end, the results are not compromised.

However, I'm not talking about those kind of shortcuts.  Nope, I'm talking about the ones that have gone BAD.  The ones that you know you should not do, but decided to anyways.  The ones that have terrible terrible outcomes.  For me, these results usually come from laziness.  Sometimes when I'm rushing to finish a project or have a good rhythm going and don't want to mess it up.  Whatever the reason, I could just sum it up as lazy.

My Example: Changing The Thread.

Have this ever happened to you?  You're sewing with one color, the bobbin is still full, the tension is great, but you have to move on to another project, and the other project needs another thread color???  Instead of switching out the bobbin and top thread I decided to just go for it.  It's a quilt top the seams threads are pretty much invisible right? WRONG.

I was putting together a quilt top with a mostly light colored theme, so I was using a beige thread - for both the top and bottom.  I had to switch over to finish my Modded quilt - which was mostly darker colors, especially the deep mocha color.  What I did next was a BIG mistake.  I give you the results of my laziness.

IMG_3807
OOOOPS.  Yeah don't ever be lazy and not switch out the thread when the colors are so different :(.

How ugly is that??  Definitely NOT a good outcome.  Beige on mocha...not very discreet.  So I had to spend even more time fixing the problem.  Five minutes wasted, I had the seam completely ripped out.  You could see the damage at the left corner on the picture below.  Not cool.  Spent another five minutes carefully pulling out all the thread.  Waste of time and resources.

I couldn't find my black thread - thanks to my little toddler - so I opted for a dark olive thread.  It's dark enough for the mocha color and perfect for the green fabric on the quilt.

IMG_3810
The lovely olive green thread.  Not much of it left but enough to finish the quilt top :).  Need to stock up for the quilting...though I'm not sure if I even want the quilting with this color ....

Okay so after another 5 minutes to swap out the thread and re-pinning the fabric, I am back in track.  What a difference a color change makes.

IMG_3811
Even with the extreme closeup - the thread is barely visible.  Good, the quilt top is saved!


So lesson learn - some shortcuts are good, some are tragically bad.  And being lazy?  Better to avoid, because changes are, you'll have to spend more than correcting the mistake later. 

Wednesday, April 7, 2010

Back to the Machine - FINALLY!

It's been quite a while since I get to sit down at my sewing machine to get some work done.  In a previous blog I previewed the next quilt I'm working on "Modded".  I had the pieces cut for a couple of weeks now and it's been just sitting on my sewing table.  At last, I sat down today, pieced and pressed after I got off work from my 'day job'.

Here's the basic design of the quilt.
modded
Blocks of 5x7 with a border around and binding. This design is for a lap size quilt about 47"x60" completed.


Each of the box was pieced together in 5 block strips.  Make sure that each strip alternates block colors.
IMG_3799
Pictured is one of the strips of 5 blocks.  

Make sure you iron after each seam is made.  If you don't it'll be difficult to do so later on.  Diligent pressing creates flat surfaces for the quilt top.  Take special care of making sure all the joining seams are pressed carefully.  Here's a close-up of seams being pressed opened.
IMG_3819
I press seams open for most of my quilts.  It creates a very clean, flat surface to quilt on.  I also adjust my stitch spacing to be closer when I do this - I use sittings 2 on my Juki.  Notice the nice perpendicular joints - very flat and pressed down very well.  Remember to press each seam after sewing.


After the 7 strips of 5 blocks are complete, I lay out all the strips to make sure everything was lined up properly - hahaha and to make sure I didn't forget any pieces :P.
IMG_3825
Tried my best to take a picture of all the strips lined up - but didn't have the room in my hallway :(.  But you could get a good feel of the how the quilt time should look at by point. 5 blocks across, 7 blocks down, 35 blocks TOTAL.

Next?  Lining up the inner border all around the blocks.  I use the same green/olive fabric as I used for the blocks for the inner border.  I'm not quite sure how this will work out.  I first gut was to go with a different fabric for this step, but I really like the fabric and wanted to use it more than just in the blocks.  Well here's the guest and check :P.
IMG_3801
The inner border all cut, sewed, pressed, and ready to be added around the blocks.  This is pretty much all I had time to do this evening.  Not bad progress - I THINK.

Next up? Adding up the inner border, creating the quilt backing, quilt sandwich, quilt, binding.... Lots to do to get a quilt ready.

LinkWithin

Related Posts Plugin for WordPress, Blogger...