Showing posts with label Halloween. Show all posts

Friday, June 17, 2011

Fabric Love #16 & Fabric GIVEAWAY: Gearing up For Holidays Already?

Holidays are always on my mind and this year is no different.  In the near future I'll be stocking up on Christmas and winter items, but now it is the Halloween fun fabrics :).  Usually I don't think too much about Halloween fabrics but this year a couple of fabrics from Riley Blake caught my eye.


 Super cute little spiders, mummies, cat, bat, witch hat, etc etc.  Need to come up with a project for this pronto!  I LOVE the little vampire too - Is Halloween suppose to be this adorable? ;)


The black on this isn't a deep black - it's more of a ultra dark gray color...and you know how I feel about grays? :)  **hint: check out my blog banner ;)  I will definitely be saving some of these for my personal stash collection.

Boo To You also have a coordinating DOT collection.  This dot fabric is awesome - goes well with both the previous prints, but I think it's neutral enough to use with a lot of other projects that isn't so...Halloween:


So...on to this week's Fabric Giveaway.  Can you guess what it is? :)

Leave a comment for a chance to win all THREE of these fabrics (FAT quarters).  Comment must be posted by 9pm Pacific Time by Monday 6/20/2011.

Thanks!

-Q

Wednesday, October 6, 2010

Halloween Costumes Continues: Trick or Treat Bags

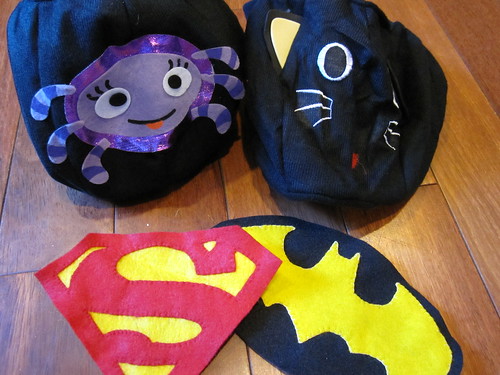
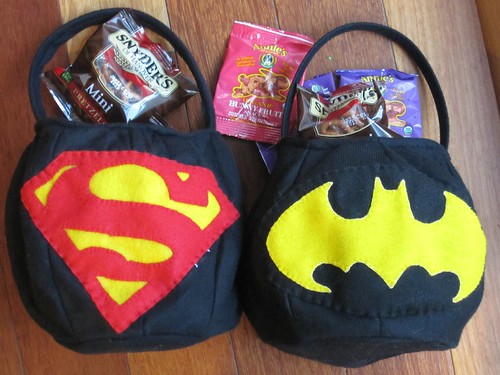
To accompany the boys' Halloween costumes as Superman and Batman I decided to put together these:

IMG_0128_1

Their very own Superman and Batman Trick-or-Treat bags of course :).

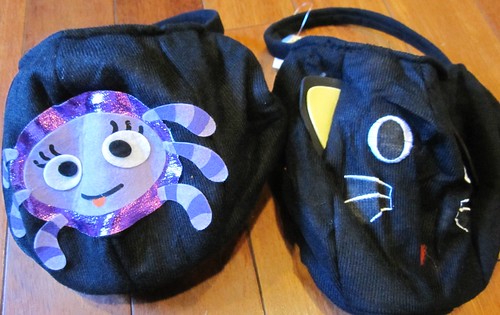
The idea started when I was at Target over the weekend and ran into these cute little trick or treat bags:
IMG_0070
Unfortunately I didn't get good shots pre-modification. One is a spider modif and the other a cat.

Cute but doesn't match the boys' costumes ... but for $1 a piece and knowing that I'll have to make them SOME sort of bag I decided to get them anyways.  That's what extra felt and some creativity is for right? :P


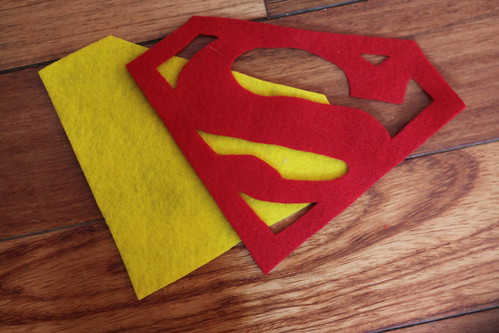
So remember these extra Superman and Batman felt patches from the cape?
IMG_0068

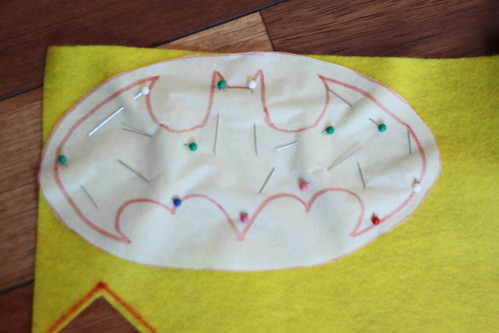
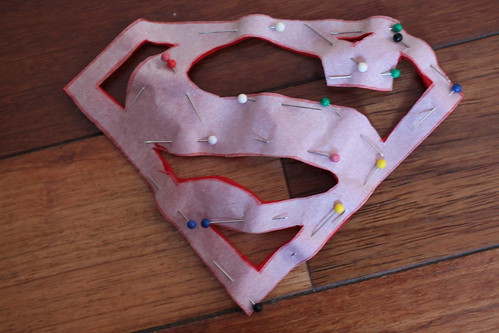
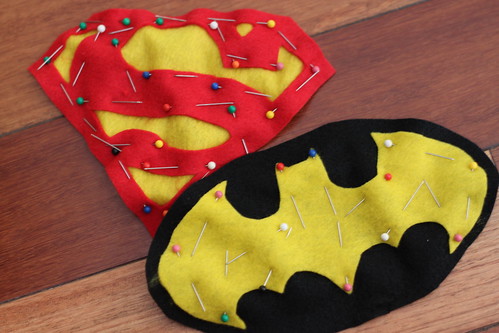
They will be put into good use after all. A quick little picture tutorial of what I did to make the patches (I mixed pictures from the Batman and Superman patches to show each patch in progress):
  1. Use parchment paper and trace logo from a t-shirt or other source.
  2. Pin along - but NOT directly - on the traced lines onto the felt
    IMG_6713
  3. Cut along lines
    IMG_6719
  4. Do this for both the colors for each patch accordingly
    IMG_6720
  5. Then pin the top colors (red for Superman, yellow for Batman), on top of the bottom colors (yellow for Superman, black for Batman)
    IMG_6716
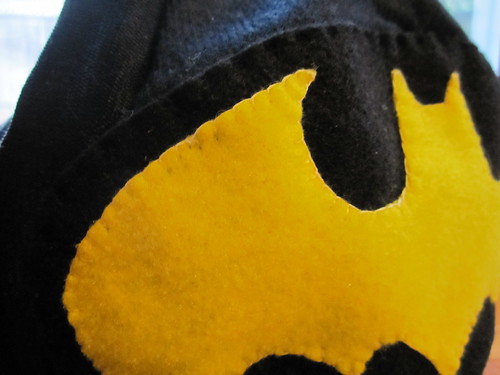
  6. Blanket stitch along all edges where the top edge covers the bottom piece
    IMG_0131

As for the bags, I just took scissors and some good ol' fashioned muscles then off comes the little spider and cat - leaving plain black bags. There was some remnants I couldn't remove but the patches covered it right up.

Once the bags were ready, I stitched the patches straight on each one and voila! Easy-peasy Trick or Treat bags for my Superman and Batman:
IMG_0142

Perfect size openings on top for both my little guys - haha Oh I do wish they get healthy treats like these when the day comes :P -
IMG_0139

Happy TRICK or TREATING!

I am sharing this project with these fun linking parties :).

Sunday, September 19, 2010

BOO!

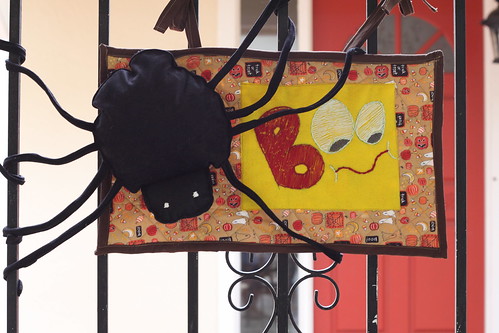
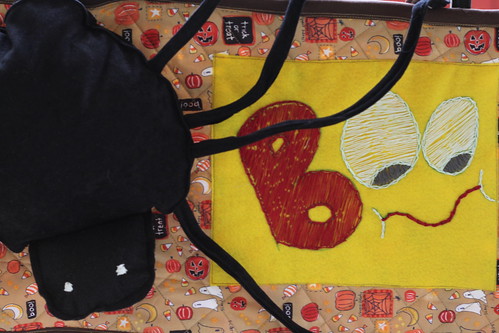
BOO!  It's that time of year to get in the HALLOWEEN spirit.  Not a huge fan of the holiday but doesn't mean I can't take this opportunity to do something that I am a big fan of: decorating of course :).

My front gate is now ready to great Treat-Or-Treaters:
IMG_7119

Here's a quick rundown of how I made this sign.

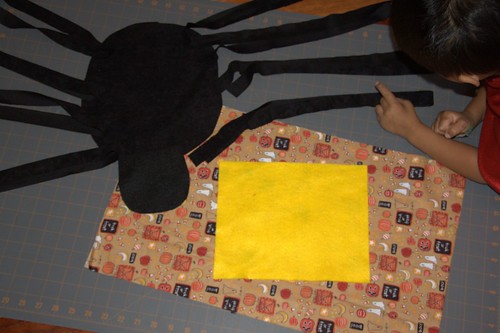
1.  Cut out the necessary fabrics:
    IMG_6895
    • For the spider - using black fabric of choice, cut down the body (2 pieces - oval approx. 8"x12"), 8 legs (1.25" x 25") and a head (2 pieces - gumball shape about 5" base)
    • Sign fabric - rectangle (2 pieces -22"x16")
    • Yellow felt - rectangle (2 pieces - 10"x8")
2. Assemble the spider
    • Start with the head - sew seams except for gumdrop base and fill with stuffing
IMG_6991
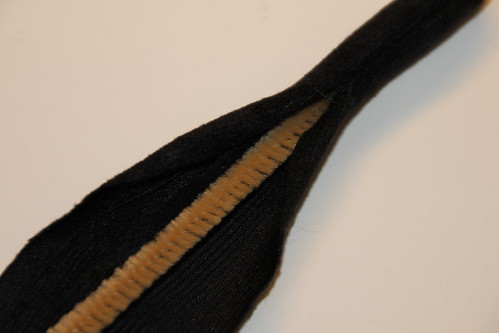
    • Sew legs over itself with a craft pipe or other flexible/bendable material in the center


      IMG_6998
    • Sew the body of the body together, starting with the head.  When sewing the seams of each of the limbs (head, each leg) place that limb inside the seam and then sew the seam shut
    • Embroider some eyes onto the spider
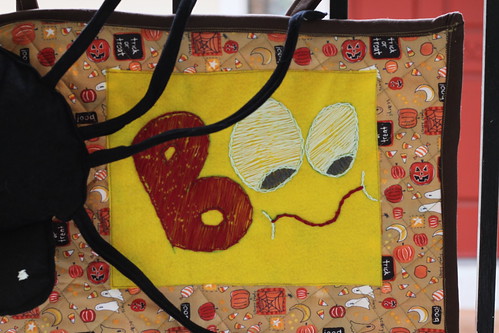
3. Embroider the yellow felt:
    •  Embroidery - or write with permanent paper - a cool little Halloween image/saying.  I went with the basic BOO! :)
4. Quilt the signage and bind it:
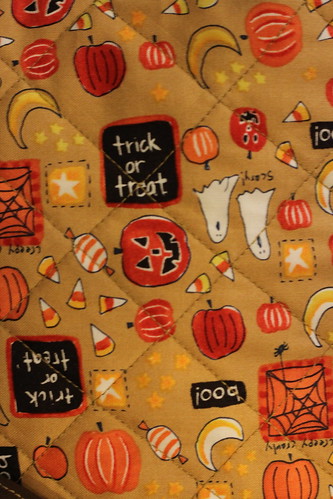
    • Treat the signage fabric like a single sheet quilt top and quilt back.  Layer it with batting and quilt.  I went with a basic straight diagonal crossing lines.
    • IMG_7103
    • Bind with a dark brown fabric.  I machine bind to the BACK then machine bind to the front of the quilt top.
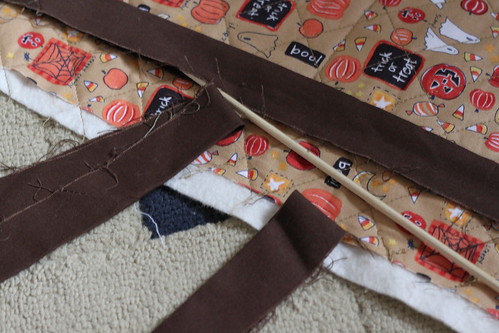
5. Attach the hanging 'rod':
    IMG_7092
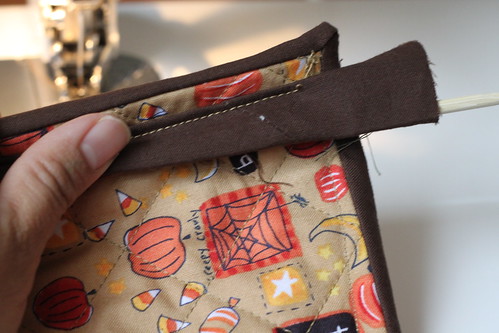
    • I used 2 bamboo skewers - you could use whatever would be long enough for the whole width of the signage.  It just need to be rigid enough to keep the edges of the sign from folding down.
    • Use some of the leftover binding strip to create a pocket to put the rod in.  Sew the ends shut.

      IMG_7097

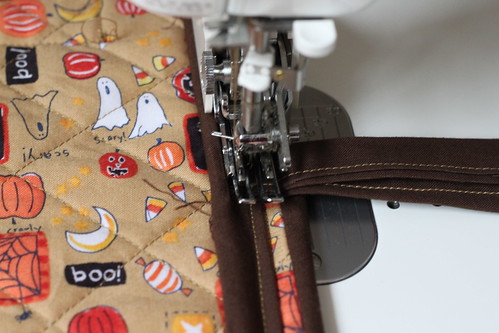
    • With more of the leftover binding strip, sew 2 'ropes' or strings and attached to the newly formed rod pocket
    • IMG_7102
6. Attach the yellow felt to the signage:
    • Find a placement on the right side of the sign that you like - leave enough space on the left side for the spider, then stitch along the edge of the sign onto the sign

      IMG_7117
7. Attach the spider
    • Use a black thread and sewing the spider securely onto the signage.

      IMG_7114
8. Trim all the loose string, find a place for the sign, and attach :) VOILA!  A BOO! Halloween sign.
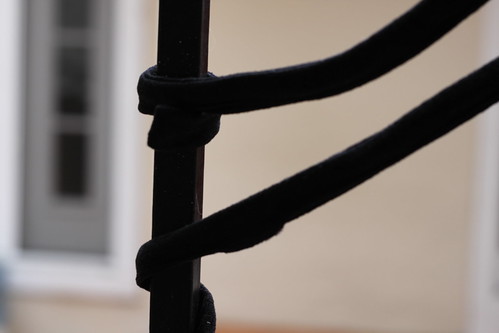
    • Make sure that you wrap the spider legs outward.  I wrapped all the legs around a pole on the gate.

      IMG_7110

 
There's even a nice view from the back :):
IMG_7108

Now I could get into the Halloween spirit a little bit more.  Love looking at this sign every time I come in and out of the gate :).  
IMG_7119

      Sharing at these MARVELOUS places.

      Sunday, September 12, 2010

      Superman Beginnings

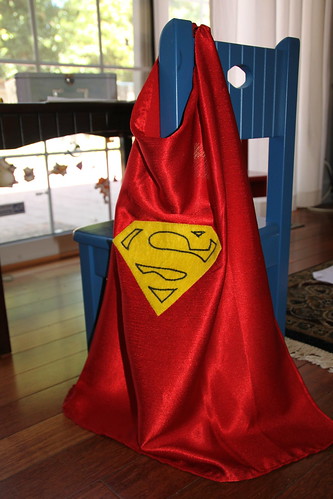
      My older son, Asher, has been a Superman fanatic since watching the original movie.  So guess what he wants to be this Halloween?  Superman OF COURSE :).  It's still a bit early to be making the whole costume, but I can't resist making him a cape in the meanwhile.

      IMG_6910

      Here's a quick rundown of how I made the cape - sized for a 3.5 year old.

      Materials:
      • red fabric 19"x30".  I used a light weight fabric with a little shimmer that flows well.
      • yellow felt - 7"x5"
      • black embroidery floss
      • red sewing thread - match the red fabric
      • yellow sewing thread - match the yellow felt
      • iron on fusing web 
      • printed out Superman symbol - about 6" across.  I used my son's old Superman t-shirt with the logo on it.  They sell them at places like Target and Old Navy.
      • parchment paper - or another thin paper that you could see the logo through
      • Craft pen or thin sharpie
      • Scissor
      • Snap Button

      1. Double fold and sew each edge of the red fabric with the red thread.  
      2. Measure the diameter of your child's neck, add 2-3" for comfort.
      3. Fold down - 'dog-ear' the 2 top corners of the cape.  This will keep the cape from always draping over the front - optional step.
      4. Attach snap button to where you measured for the neck.  Double check to see if this is a comfortable width for your child.
        IMG_6904
      5. Trace the Superman logo onto the parchment paper.
      6. Cut out the logo around the logo and cut out the 'S'. This will be used as the stencil.
      7. Put the stencil on top of the yellow felt, make sure the whole symbol fits on top.  
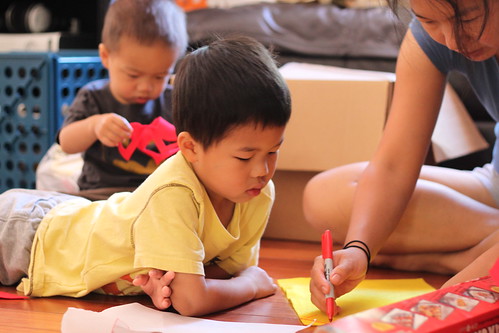
      8. Use a craft pen or thin sharpie to trace around the outside of the logo and the 'S' shape right onto the yellow felt. Don't worry about the lines showing - I cut slightly inside the line around the logo and the 'S' line will be invisible once it's embroidered.IMG_6706

        Always enlist the help of the little ones :).

      9. Cut out the logo ONLY around the edges - Make sure to cut just inside the line so that the marker will be cut off.  DO NOT cut the 'S' shape.
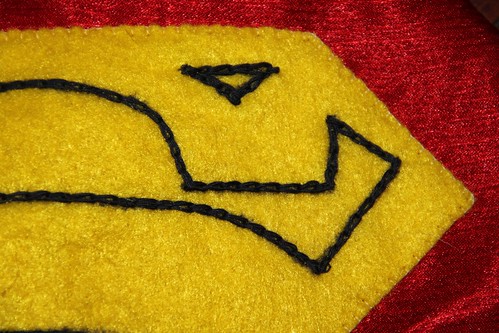
      10. Using the stenciled on 'S' outline, embroider with the black embroidery floss using a chain stitch along the 'S'. Here's a closeup of the 'S' embroidered on.  See no more marker showing :).
        IMG_6907
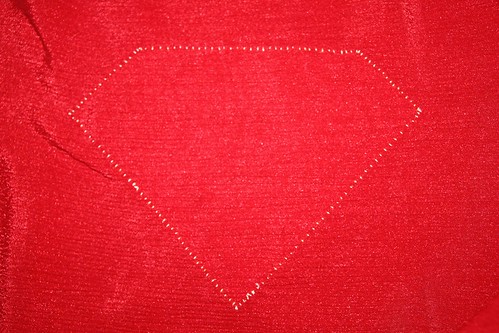
      11. Using the fuse web, fuse the logo onto the red fabric about 8" down the center of the cape.  It should hit just below the middle of the back once the cape is on.
      12. Blanket stitch along the logo with the yellow thread once it's fused onto the cape.  This will ensure that the edges don't come loose and give it that extra nice look.  I use the fuse web just to make sure that the middle is on tightly. 
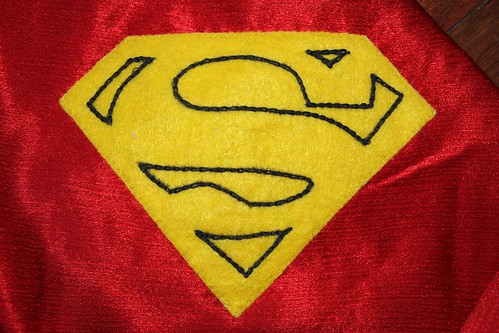
        A view of the front:

        IMG_6908

        A view of the back:

        IMG_6906

      13. Now your little one is ready to enjoy this cape :).
      14.  

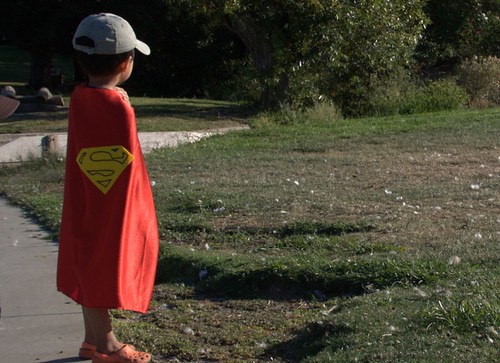
        What's the next step?  The rest of the Superman outfit.  In the meanwhile Asher enjoys wearing his cape EVERYWHERE.  Here's my Superman spotted at the park :).

        superman1

        Sorry I didn't have many pictures of the process.  I actually made logos earlier in the day with a similar process but realized later that I couldn't use it for the cape...could you see why???

        IMG_6720

        Yep Superman's cape has an all yellow logo with black lines for the 'S'.  I guess I'll use that red/yellow logo for shirts or decal for other things - photo album cover?

        I'm sharing this project HERE.

        LinkWithin

        Related Posts Plugin for WordPress, Blogger...