

I take a 2 stage approach to attaching the binding to a quilt - or any project with binding.
Stage 1: Machine Sew the Binding to the Quilt Top
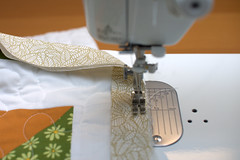
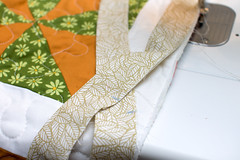
A. Face the quilt with the quilt top facing up and measure about 2/3 of the way down from one edge of the quilt. Line up the raw edge of the quilt from that point with the raw edge of the binding - make sure you leave about 10" of the binding unused. Start sewing using about 1/4" from the raw edge - make sure you leave about 10" of the binding unused.
(Steps B-E outline to creating miter corners.)
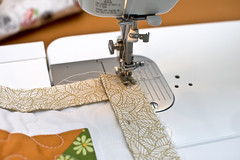
B. At each corner you want to stop about 1/4" from the end. Stitch back and forth a few stitches.
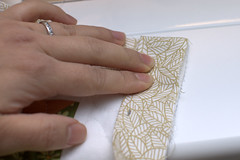
C. Take the quilt and binding off the sewing machine and fold the binding up at a 45 degree angle.

D. Fold the binding down on itself so that it lies along the unsewn edge.
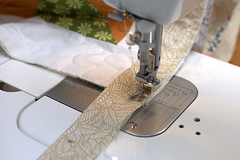
E. Start about 1/4" from the top of the unsewn edge, stitch back and forth a couple of times and then continue stitching the rest of the edge - again with 1/4" allowance.
F. Once you get to the beginning of the binding, stop about 10" from where you started. Mark where the 2 bindings should join up once the binding is complete.
G. Open up the binding and face at a 90 degree angle with right sides together. Pin to stay in place and mark where the stitch line should be.
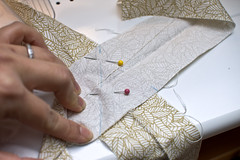
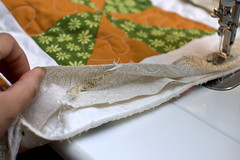
H. Sew on the stitch line and trim 1/4" from the sew line. Press open the seam, refold the binding and continue attaching the rest of the binding.
Now that the binding is attached to the quilt top it is now time to decide now you want to attach it the quilt bottom. There are 2 basic approaches to this - either machine bind or hand bind. For (almost :P) all my quilts I have been using hand binding. I find that it makes for a more traditional looking quilt finish and gives the quilt that nice handmade feel...and if done correctly you do not see any threads.
Though you must be warned, hand binding takes WAY longer than machine binding. Today I'm just going to go over the hand binding technique. I'll try to create machine binding soon - probably the next quilt I decide to machine bind :).
So onto...
Stage 2: Hand Sew Binding to the Quilt Bottom
The key to creating a nice even binding to a quilt is not to pull or tug on binding and to keep each stitch even...also keep it as 'Invisible' as possible :).
A. For hand stitching, use a hand quilting thread to prevent from breaking and knotting. Choose a color that matches the binding and quilt bottom. If you are using the technique that only sew on the binding you could choose a thread that matches the binding exactly. If you choose the method that jumps from the binding to the quilt bottom, try to find a thread that matches both the binding and quilt bottom or an invisible thread.
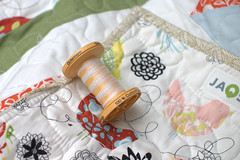
I usually use Gutermann 100% cotton for hand quilting:
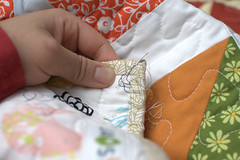
B. To start, tie a knot and stitch a few stitches to tie down the thread along the inside of the sew line from the binding top. Start this a few inches from a corner of the quilt.
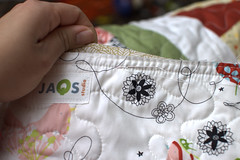
C. Fold the binding to cover the sew line, bring the needle out and into the edge of the binding - make sure you catch a few threads on the binding so the sewing thread will be nicely secured. Continue bringing needle through the binding and into the quilt bottom, catch a bit of the batting as well, but make sure you do not get any of the quilt top. Right now you needle should be about 1/8" from where you originally started the stitch, once you get to this distance, push the needle through through the quilt bottom, right along the sew line. Pull the needle and thread back the position to start the next stitch. Alternatively if you don't want the thread to be seen between the quilt bottom and binding at all you could push the needle through on the binding instead quilt bottom - in this case use a thread that is the same color as the binding.
Step D - F goes over the miter corners for the quilt backing:
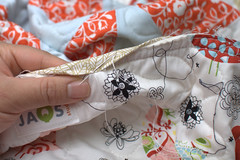
D. Continue doing step C until you come to a corner. Stitch all the way to the edge of the binding.
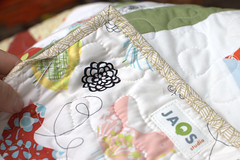
E. With the binding on the same edge as the sewn binding press down with one hand, and fold down the binding from the next edge over the sewn edge. Stitch into this folded miter corner to secure in place. Stitch a couple of times before continuing sewing on this new binding side.
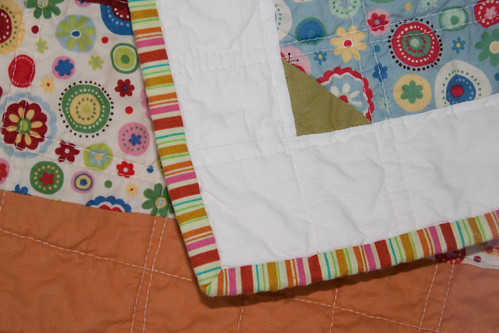
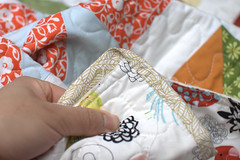
F. Continue sewing each edge and corner in this manner until you finish :). Your corners should look something like this:
Hope this tutorial will help some of you who are not familiar with binding. I'll keep this tutorial updated as I get feedback and have time to add more details. Happy quilting :).
Go Back to JAQS Studio Tutorial & Tips
-Q
9 comments:
Thanks for the tutorial,you quilt is beautiful.
Connie
http://thecrafterbug.blogspot.com/
I needed this!
I'd love it if you would link up over at the Glitter Party!!!
http://runwithglitter.blogspot.com/2011/03/weekly-tues-thurs-link-party.html
xoxo
Kelly
Your quilt is gorgeous! Thanks for the great tips. I've been wanting to try making one for years and maybe now I'll get up the guts to do it!
shannonsews.blogspot.com
excellent tutorial - I am a long time quilter and sometimes have people ask me about binding a quilt -- it is almost impossible to explain it over the phone, so I am going to make note of your tutorial and send them over to see how its done...
These are great instructions! Thanks for sharing them!
Thank you for this, I am new to quilting and this information is so helpful. Your work is beautiful!
Christina
frozenfamily.com
What a great tutorial! I love when people do all this work, it is how I learned most of the quilting I do! Thanks for linking up to Quilt Story!
Q-
Thanks for linking to Creative Juice Thursday. Hope to see you back this week!
This I will be trying!
Crystal
www.domesticbutnotmartha.com
Crystal@domesticbutnotmartha.com
Post a Comment