
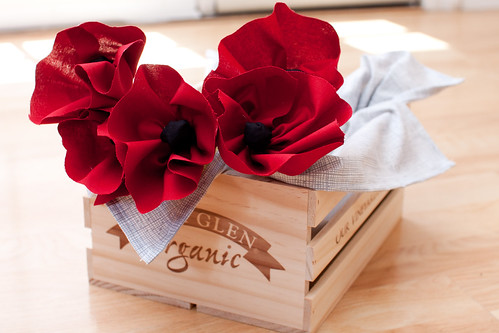
Fabric Red Poppies :). I had a bit of red fabric and some time on Friday to create something new for the home so I figure I'll make something I really enjoy but don't get to see that often.
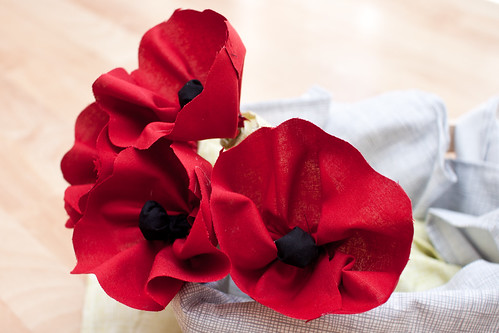
These are sitting pretty in the little wooden crate. Originally designed to be part of a napkin topper for decoration:
Here's a quick tutorial of how to make these poppies (makes 6):
Materials:
- 6 strips of red fabric cut 4.5" x 14"
- 6 black fabrics scraps (~4" x 4" each)
- 6 black fabric strips (1/3" x 6")
- 6 strips of green fabric cut 1.5" x 14"
- 6 bamboo sticks/skewers about 6" each
- hot glue gun
- scissor
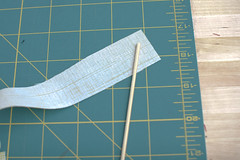
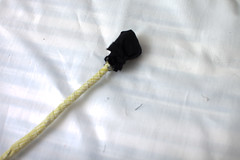
- Prep the poppy stem: Wrap each stick with one of the green fabrics - leave about 1/2" exposed where the flower would be attached later on
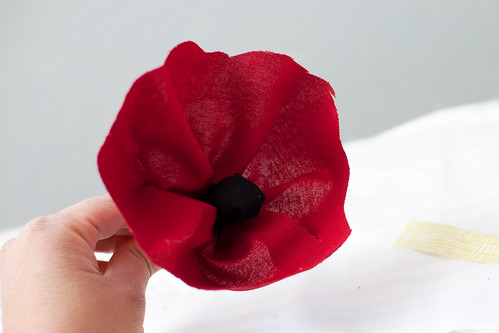
- Make the poppy center.
- Place one of the black fabric scraps on a flat surface and place some stuffing in the middle (I used some cut up fabric scraps).
- Scrunch up the fabric around the stuffing to make a ball and tie the 'ball' with a strip of the black fabric. Cut off the excess fabric.
- Attach the poppy center to the exposed end of the poppy stem with some hot glue
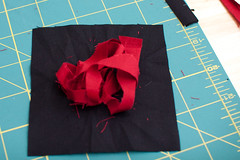
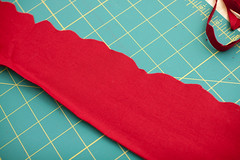
- Prep the poppy petals. Cut wavy lines on one of the long sides of each of the red fabric strips. The cutting doesn't have to be precise to give it a more unique look for each poppy.
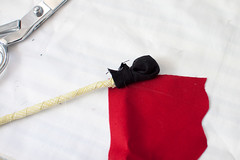
- Attach the poppy petal to the stem.
- Start with one of the the red fabric strip. Hot glue a corner against the exposed poppy pen. Make sure that the wavy end is facing upwards.
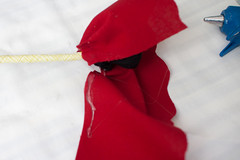
- Hot glue a small line against the long uncut end of the fabric strip - pinch and hot glue (if needed) against the poppy stem. Continue this until the whole red fabric strip is against the step. Make sure that the exposed stem area is completely covered by the poppy petal and the petal goes all around the stem. Use a little bit of hot glue to blue the start of the petal to the end so it forms a neatly enclosed poppy

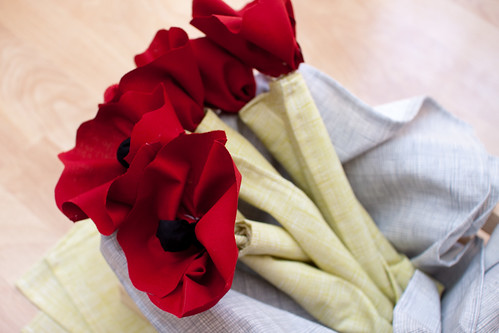
Bunch them up for a nice bouquet:
Thanks for visiting and I'll be sharing this tutorial at these lovely LINKY PARTIES.

-Q
24 comments:
Fantastic - love it. Found you at The Girl Creative and looking forward to linking up.
Jen
http://shimistore.blogspot.com/
I love how you did the stems. Most people would take the easy way out and paint them. All the details from the stem to the center are perfect, but I love how they are displayed in the vintage inspired garden basket.
Love them! I make the rolled rosettes to adorn things all the time, now I have a new flower how to up my sleeve!
Would love for you to share at Calling All Crafters!
http://allthingsfee.blogspot.com/2011/05/calling-all-crafters-7th-edition.html
Poppies have always been my favorite. I don't have any right now though. Hey, this is the time of year to buy them. Thanks for reminding me about how much I love poppies. Best wishes.
I love red poppies too! And these are great. Thanks for sharing. I found you at Mad in Crafts.
I love new flower tutorials. Your poppy one is wonderful. Thanks for sharing it!
So neat! Thanks for sharing this tutorial!
http://www.lovelycraftyhome.com
Clever,clever you!! Great flowers:)
These are so pretty! I hope you'll link up at Inspire Me Mondays @ Singing Three Little Birds.
http://singingthreelittlebirds.blogspot.com/2011/05/inspire-me-monday-thanks-for-stopping.html
These are soo pretty! I love the fancy edge to the poppies and the tutorial is great! Thanks so much for sharing with the Pink Hippo Party! Can't wait to see what you share next week!
these flowers are just lovely, and so is your tutorial! i will have to try them out now.
I'm a new follower!
kathryn
www.thedragonsfairytail.blogspot.com
aww these are so cute! :) im going to have to make some of these in my new house! thanks for posting this, love your blog! just found you today through my backyard eden link party!
thestyleprojects.blogspot.com
Those are so gorgeous and fun!
(stopping by from Organize & Decorate Everything blog hop)
how clever! i love how you did the center! way to go, i have just made some fabric flowers as well, stop on by and take a peek!
-Rox
everythingelseilove.blogspot.com
I love poppies too. These are gorgeous. Thanks for linking to Home Decor & Organizing Link Party.
very nice tutorial!
I am having a giveaway on my blog. $30 store credit to get a cape from pip and bean. check it out!
http://houseonashwelllane.blogspot.com/2011/05/30-store-credit-free-shipping-to-get.html
These are so cute! Thanks for sharing in detail how you made them. I'm excited to try your easy sound tutorial.
I linked up after you (for my first time!) at Tatertos and Jello!
purplestpecalin.blogspot.com
I love it! Simple....and very, very beautiful!
hugs
Cidinha
I love poppies. This is a great tutorial!! TFS. Stopping by from It's a Hodgepodge Life and I am your newest follower.
Come on by my blog when you have a moment. This is what I shared on the blog hop: http://craftybrooklynarmywife.blogspot.com/2011/05/red-simplicity-cynthia-rowley-dress.html
What a terrific tutorial! I love poppies! <3
Hi! these really turned out perfect and pretty! We will be featuring this today and you also made it to TSWL's Finest round 4. Votation will start tomorrow and will run for a week! Good luck! Do grab a featured button if you fancy to ^^)
They're gorgeous and just what I was looking for a few months ago. I've bookmarked your tutorial. Thanks so much.
The Viral Site best decoration ideas
Post a Comment