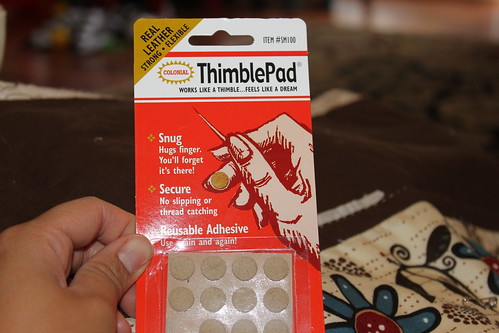
Like most quilts, there's usually a lesson or two learned, a story, or a memory that goes with the quilt. With Borders and Stripes I have learned many 'new to me' gadgets to help make the process much more enjoyable. Last post I wrote about the stick on thimbles- a very good alternative to regular thimbles for folks like me who either loose them or it doesn't fit properly.
Love these little pads. From start to finish this quilt took only 3 of these pads - not bad considering that I kept having to take them off and on all the time because I only had time to quilt for like 1/2 hr straight because the kids needed attention.
Another great tool to help along the way was 1/4" quilter's masking tape. It was great to use along the parameter was the quilt to guide where the hand-quilting to start and where it should end. Though I did learn along the way that it's too tedious use and not very appropriate for quilting straight lines on the actual quilt top area. But it was great around the parameter of the quilt though since it stayed the whole time and very easy to take off.

The 1/4" quilter's tape essentially a very thin masking tape. It worked very well along the edge of the quilt to mark where I needed to end my hand quilting. I tried it on the quilt top to guide straight lines pictured above - this was very time consuming and wasted a lot of tape. I ended up not using the tape for this purpose and stuck with using it only for the edges.
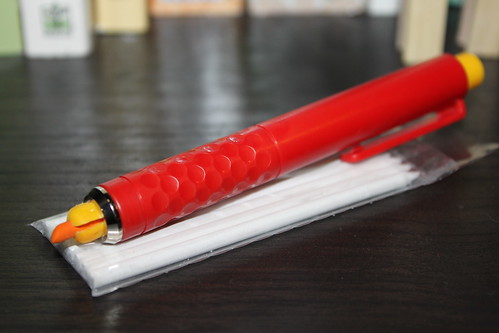
And last but not least - the marking chalk. I don't remember which brand it was, but I did pick it up at Joannes so it shouldn't be that hard to find. It comes with a chalk holder case and a bunch of colored chalk sticks. They are a much more efficient and cost effective way to mark a quilt top. This will be a great for machine quilting too.

Here's a view of the 'pen' casing that comes with the kit. You just slide the chalk in and use. Pictured underneath the pen is some of the replacement chalk that came with the kit. There's many different colors.

The chalk in action. Pictured is the green chalk marking on the off-white fabric. It creates a temporarily line to help guide the quilting.
I know these are probably like regular tools for experienced quilters, but this is new to me so bear with me through the excitement as I 'discover' these tools :P. They make all these different tools for a reason right? So we could find the tool that fits our own unique needs. So go out there and experiment, find something new or at least new-to-you. Happy quilting everyone.
And yes I'll post soon with the finished results of this quilt. Can't wait to use it! This one is a keeper and will be staying with me in my collection :).


No comments:
Post a Comment