
Well I finally got a chance to make a little more progress on the Boxed In quilt for Sis. I finished free motion quilting the top. The free quilting gave the quilt a very nice feel because the color screen and design was making the quilt feel a little too ... boxy after the quilt top was done. But the free-motion quilting softened the look of the quilt and gave it a very nice complete feel.
Here's a picture of the quilting in progress:
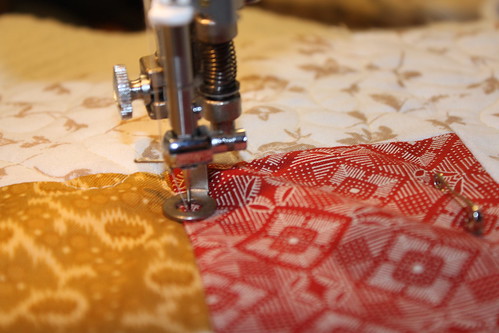
I use my Juki TL-98E for free motion quilting. Notice the safety pin in the right side of the picture. I use a lot of safety pins to keep the quilt sandwich in place while I quilt by machine. I pin about 3-5 inches apart all over the quilt through all the layers of the quilt - top, batting, and quilt bottom.
After all the quilting was complete I machine sew on the binding (my FAVE) to the top of the top and proceeded to hand sew the binding.
Here's a few pictures of how I hand sew on the binding after it's been machine sewn on from the top. (A lot of quilting blogs go over this in detail so I'm not going to go over in great detail - visit sites like "Oh, Franson!" for more details.)
1) After the loose side of the binding is machine sewn onto to the top of the quilt, flip the bottom over to the back and push your threaded needle just at the edge of the binding - push it through until you get a little big of the batting. Make sure you don't push through to the quilt top.
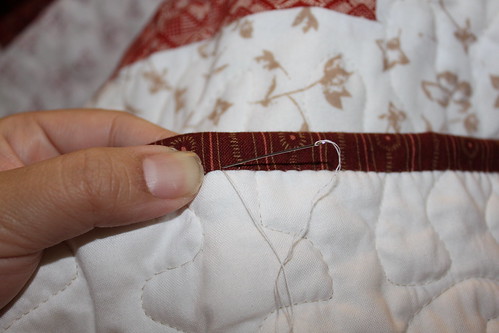
Needle through the binding, catch a little bit of the batting and start turning the needle back up.
2) After catching a little of the batting, start pushing the needle back up through the binding - about 1/8" from where the needle went down. This will create stitches about 1/8" apart. You may decide to space it out further or closer base on your quilt.
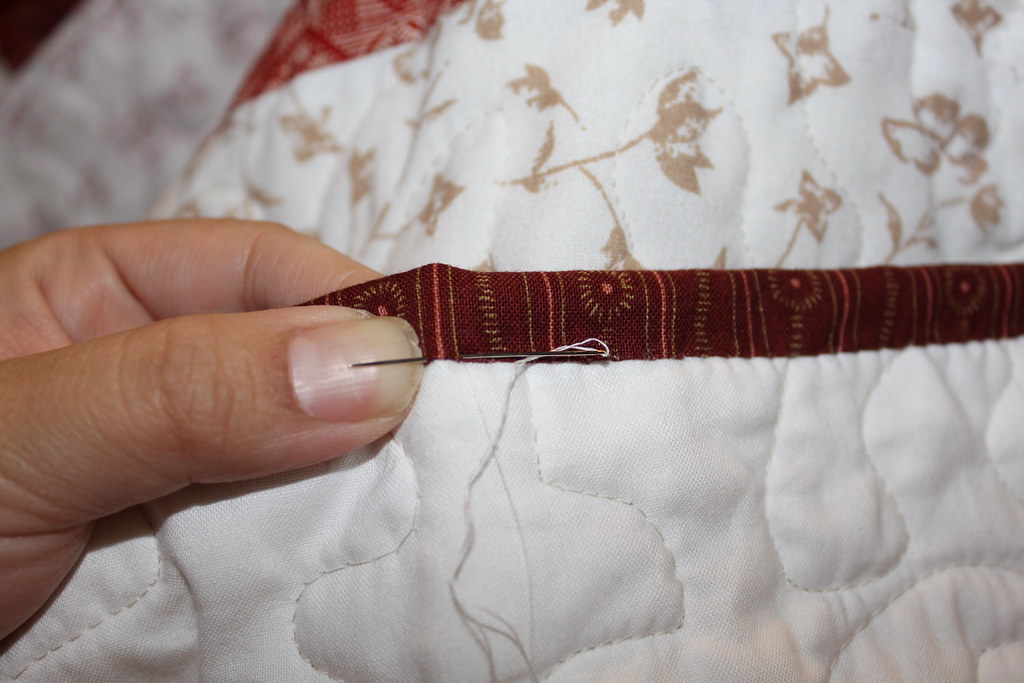
Needle push back up through the binding - creating a stitch about 1/8" apart.
3) Continue stop (1) right next to where the needle was pushed up from. You may choose to space this apart a little to exaggerate the stitch on the binding or you may choose to barely put any spacing to minimize or even hide the stitch. I like to hide or minimize as much as possible.
And the results?
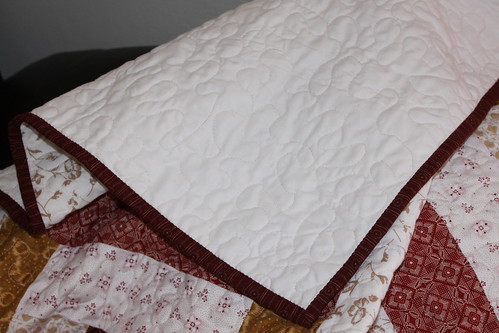
Awesome, professional, clean looking binding. A great finish to any quilt. I'm still working on finishing up the binding - about half away through. After the binding, then a quick wash/dry and the quilt will be ready to go - I guess I can't claim a finished quilt that stop is done huh? Will update in another posting - the finished Boxed In for Sister.
2 comments:
I love the colors! I can't wait to see it completely finished!
:) Thanks! Hopefully I have time later this week. I'll post a picture of the finish quilt.
Post a Comment